TR7500_Series_Software_v29_En - 第91页
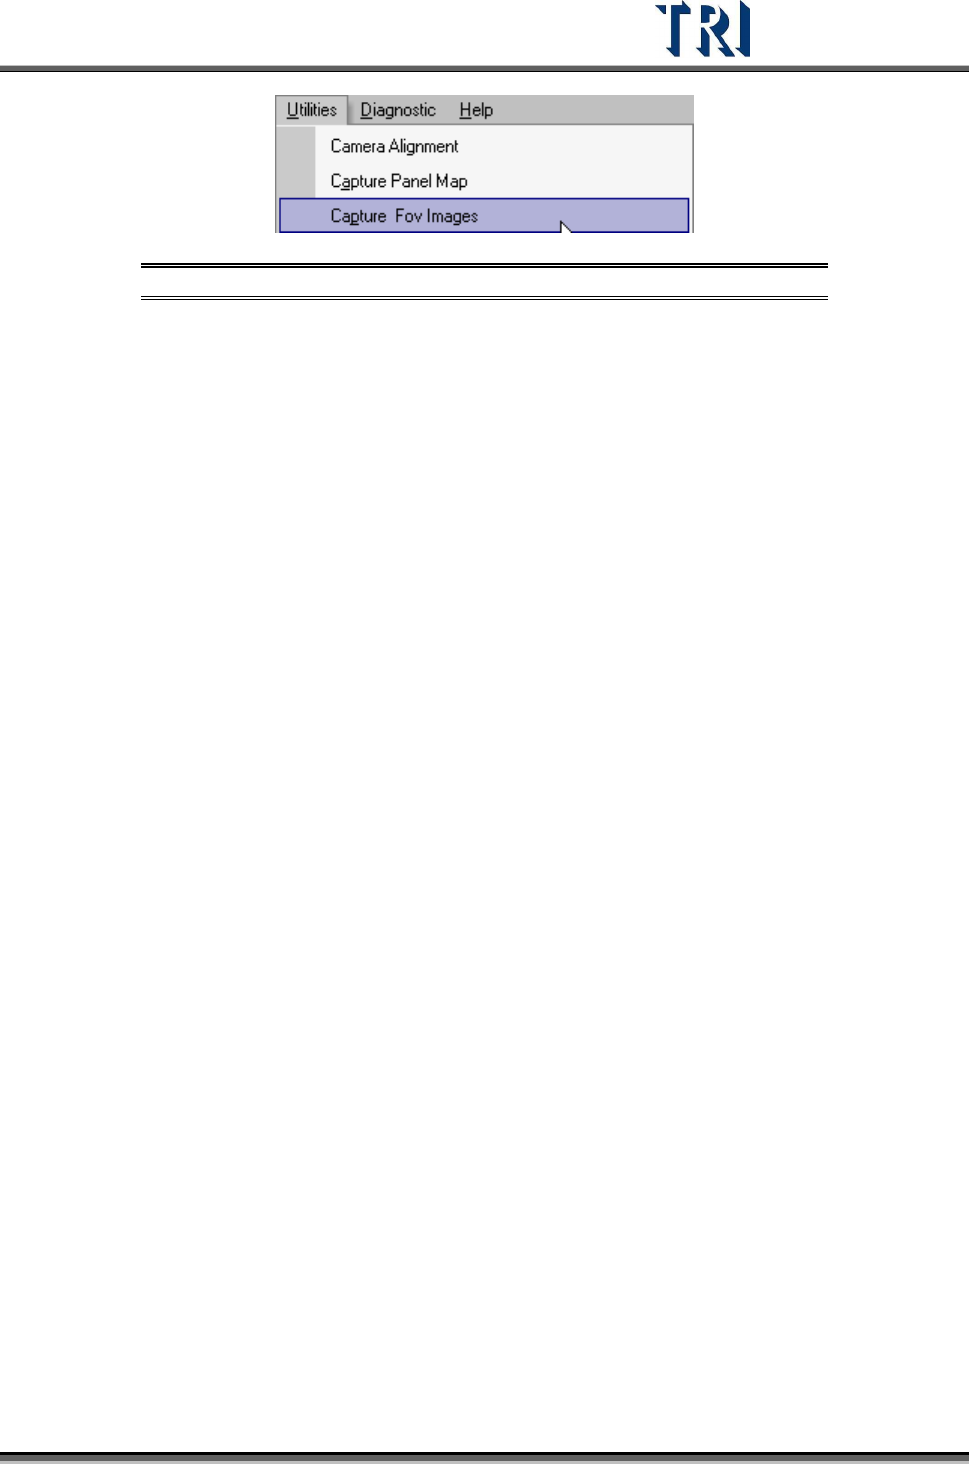
Test Research Inc. TR7500 Series User Guide – Software v.2.9.0 69 Figure 122 : Select Capture FOV Images 6. Reopen [Train] dialog to edit the new FOV. 3.4.6 Remove FOV This is only enabl ed in the [Train] dialo g . Whe…
Test Research Inc.
68 TR7500 Series User Guide –Software v.2.9.0
will modify the parameter as [Min.] value; if the calculated parameter is bigger than
[Max.] value the system will modify the parameter as [Max.] value.
[Auto Update] – It means when the total inspection number of times is over 30, the
parameter will be calculated after every inspection.
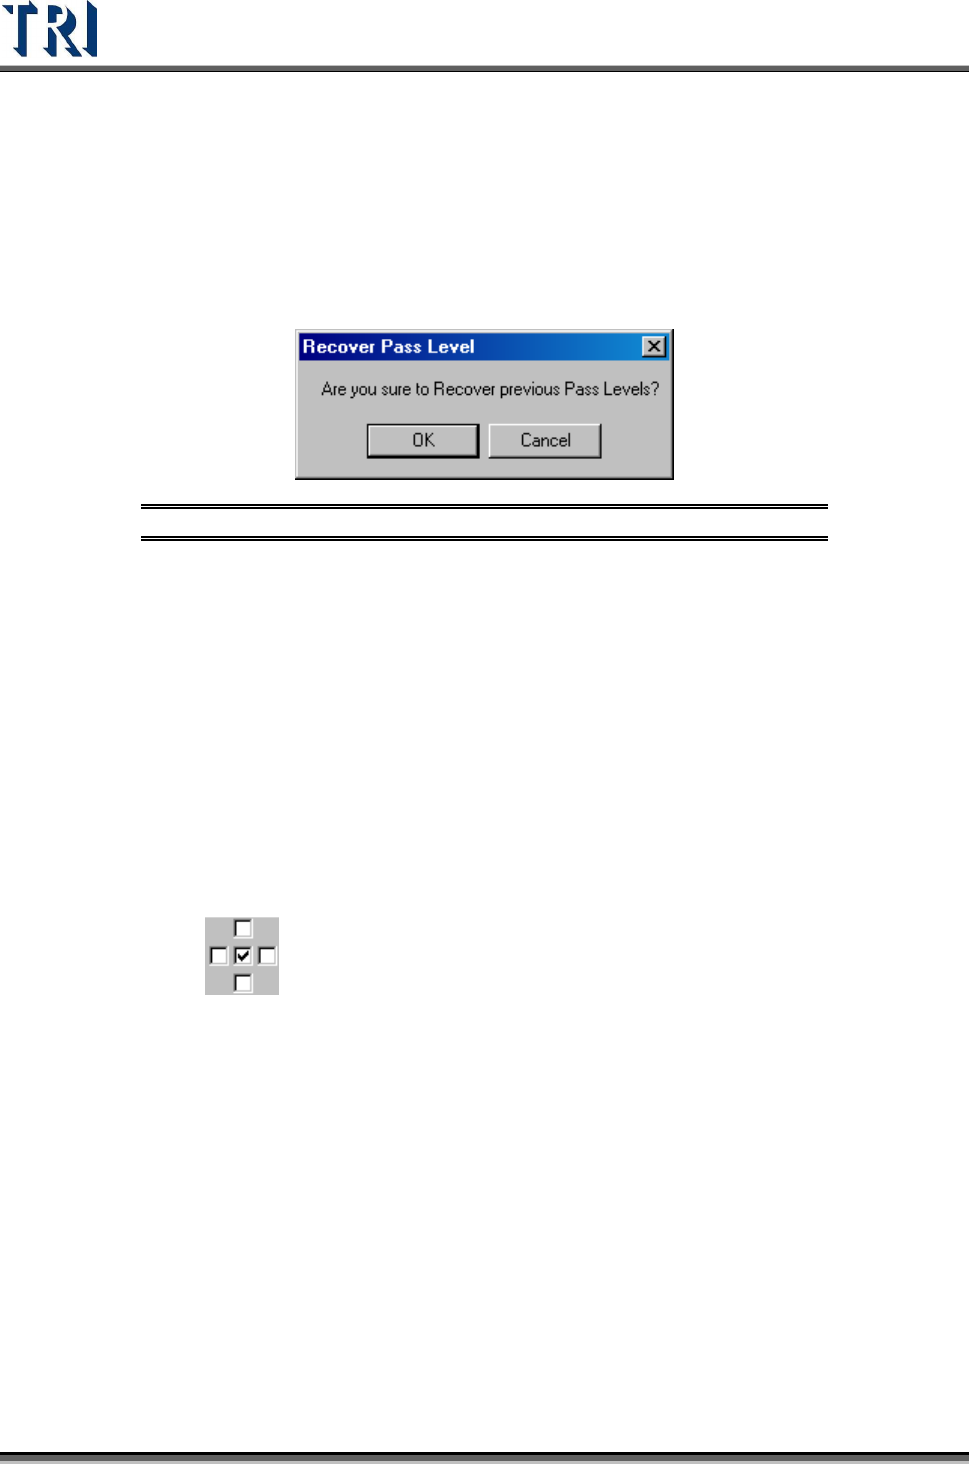
3.4.4.3 Recover Pass Level
Press to recover the one former pass level setting.
Figure 121: Confirm Recover Pass Level Window
3.4.5 Add FOV
This is only enabled in the TRAIN dialog.
Selecting [Add FOV] will show a panel map and real time FOV image. There are
two ways to add FOV.
Click on the position where you want to add an FOV on the panel map and the
camera will move to the position to grab the image. Confirm the image then
press [Add]. If it’s multi-board module the system will create FOV to the relative
position. The existing FOV can’t be selected.
Click near a position on the panel map. Press [Prev.] or [Next] to find the FOV
you want to add. If it is a multi-board module, the system will create an FOV in
the relevant position. The existing FOV cannot be shown.
Use the
control to select the appropriate camera to add or delete and FOV.
Press [Save] to save the current image in the folder in which the project is saved.
Add FOV Steps:
1. Press [Program/Add FOV]
2. Select objective FOV then press [Add]
3. Add other FOVs
4. After you finish adding FOVs press [Program/Add FOV] again.
5. Close [Train] dialog then press [Utilities/Capture FOV Images].
Test Research Inc.
TR7500 Series User Guide –Software v.2.9.0 69
Figure 122: Select Capture FOV Images
6. Reopen [Train] dialog to edit the new FOV.
3.4.6 Remove FOV
This is only enabled in the [Train] dialog.
When [Delete FOV] is selected, it will show the panel map and real time FOV image.
There are two ways to delete an FOV.
Click on the position where you want to delete the FOV on the panel map and
the camera will move to the position to grab image. Confirm the image then
press [Delete]. If it’s a multi-board module the system will delete FOV to the
relative position.
Click near the position on panel map. Press [Prev.] or [Next] to find the FOV to
delete. If it is a multi-board module the system will delete FOVs to the related
positions.
Delete FOV Steps:
1. Press [Program/Delete FOV]
2. Select objective FOV then press [Del]
3. Delete other FOVs
4. After finishing deleting FOVs press [Program/Delete FOV] again.
5. Close [Train] dialog then press [Utilities/Capture FOV Images].
3.4.7 Rotate 180°
This function allows any existing project/board to be rotated 180 degrees without having to
create a completely new program from scratch.
After selecting this option, the new board needs to have the [Fiducial0] mark reset and the
panel map to be recaptured.
Test Research Inc.
70 TR7500 Series User Guide –Software v.2.9.0
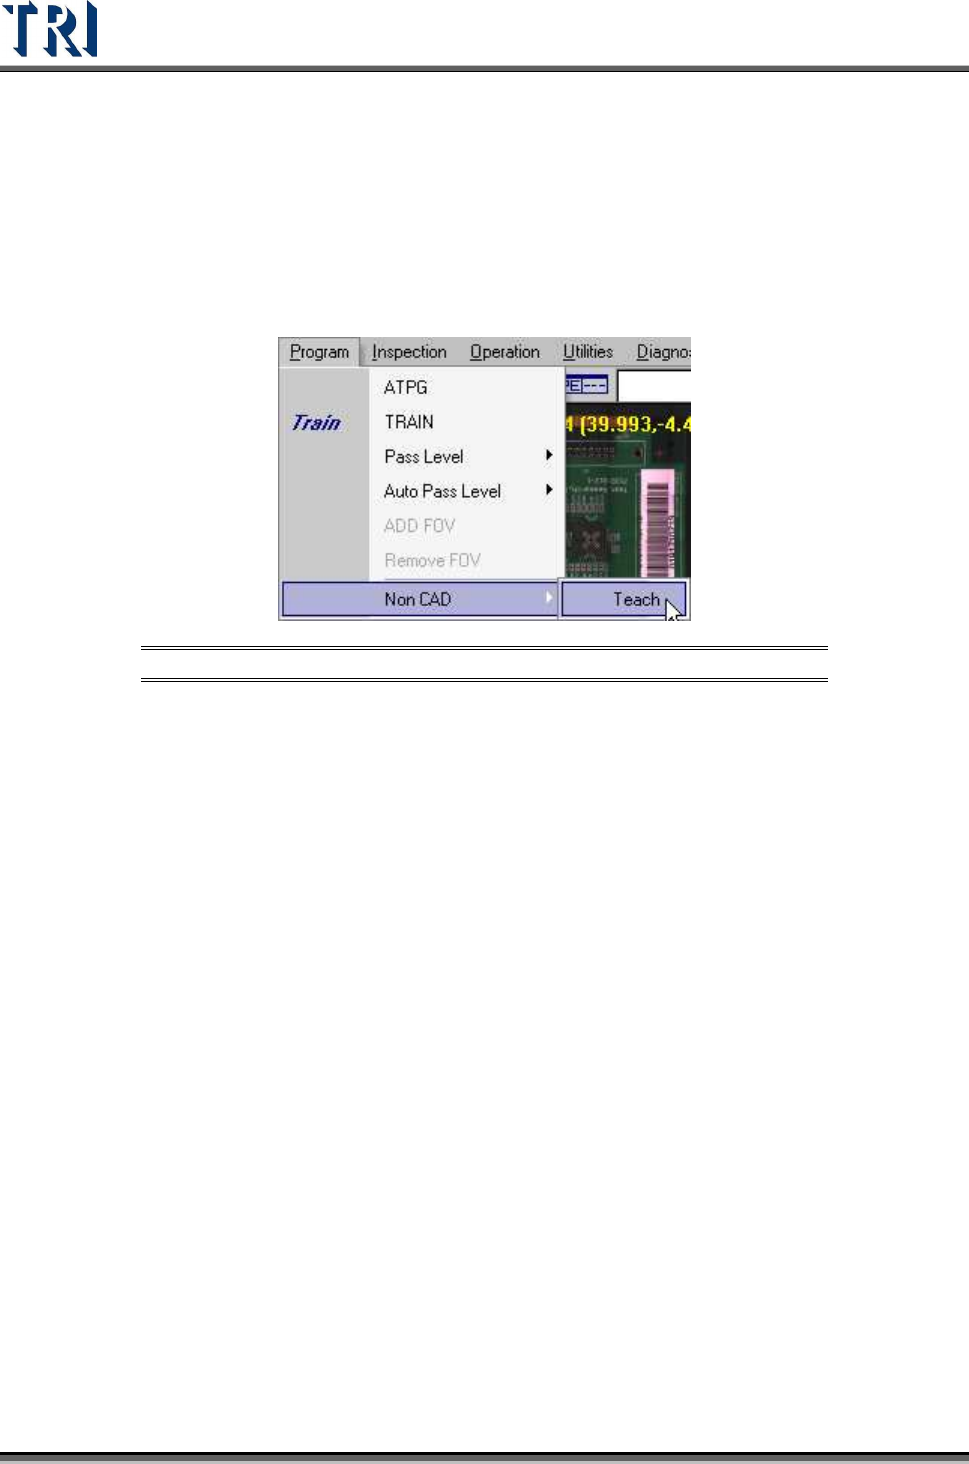
3.4.8 Non CAD
3.4.8.1 Objective
When the user doesn’t have the CAD data to inspect, this function can get the position of
components’ CAD coordinates manually.
To start, select [P
ROGRAM
>
N
ON
CAD/T
EACH
]
Figure 123: Select Program > Non-CAD > Teach Function