00198328-01_AI_Basic Pack Vakuum Tooling_TX_DE_EN.pdf - 第62页
3 Installation 3.3 Final Work 62 Montageanleitung / Assembly Instructions SIPLACE TX-Serie Basic Pack Vacuum Tooling 07/2017 3.3.1.3 Setting Switching Point 1 Fig.6: Setting switching point 1 Proceed as follows to set s…
3 Installation
3.3 Final Work
Montageanleitung / Assembly Instructions SIPLACE TX-Serie Basic Pack Vacuum Tooling 07/2017 61
3.3.1.2 Setting Switching Point 2 as Normally Open
Fig.5: Setting switching point 2 as normally open
Proceed as follows to set switching point 2 as normally open:
► Press the SET button.
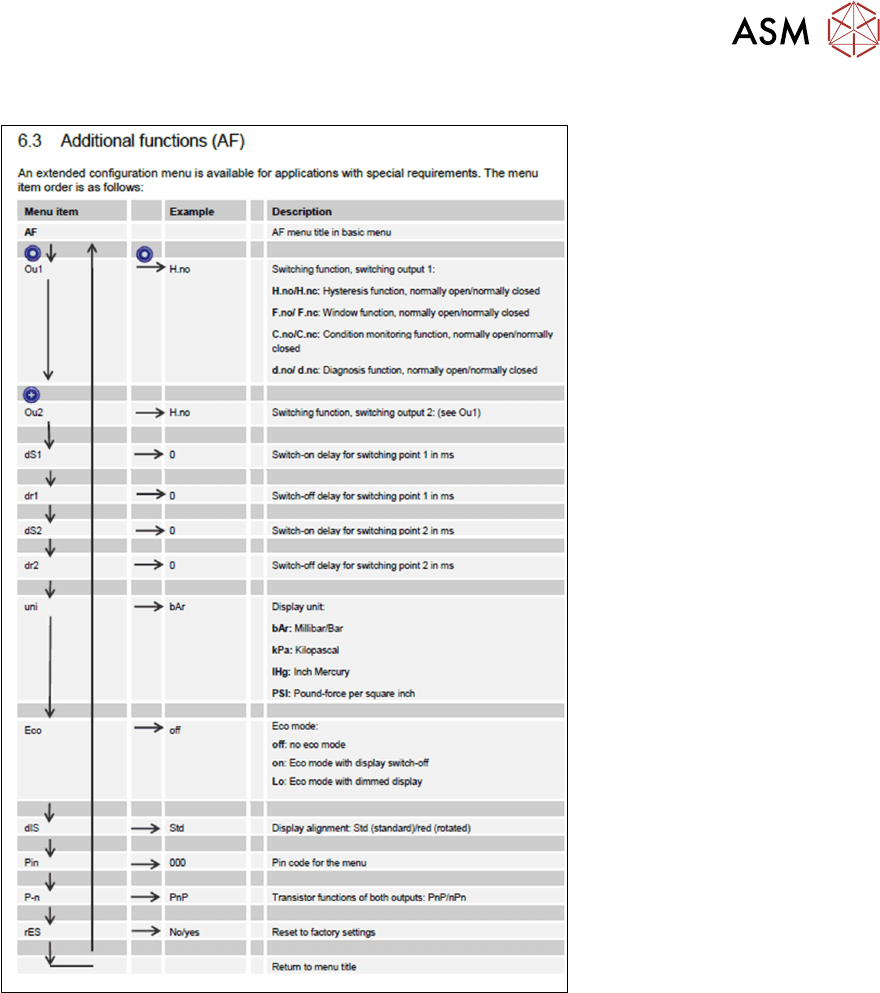
► Press the SET button until you see the AF (Additional Functions) menu item.
► Press the MODE button. Ou1 appears on the display.
► Press the SET button until Ou2 appears.
► Press the MODE button. H.no appears on the display.
► Press the SET button until H.nc is on the display.
► Quit the menu.
3 Installation
3.3 Final Work
62 Montageanleitung / Assembly Instructions SIPLACE TX-Serie Basic Pack Vacuum Tooling 07/2017
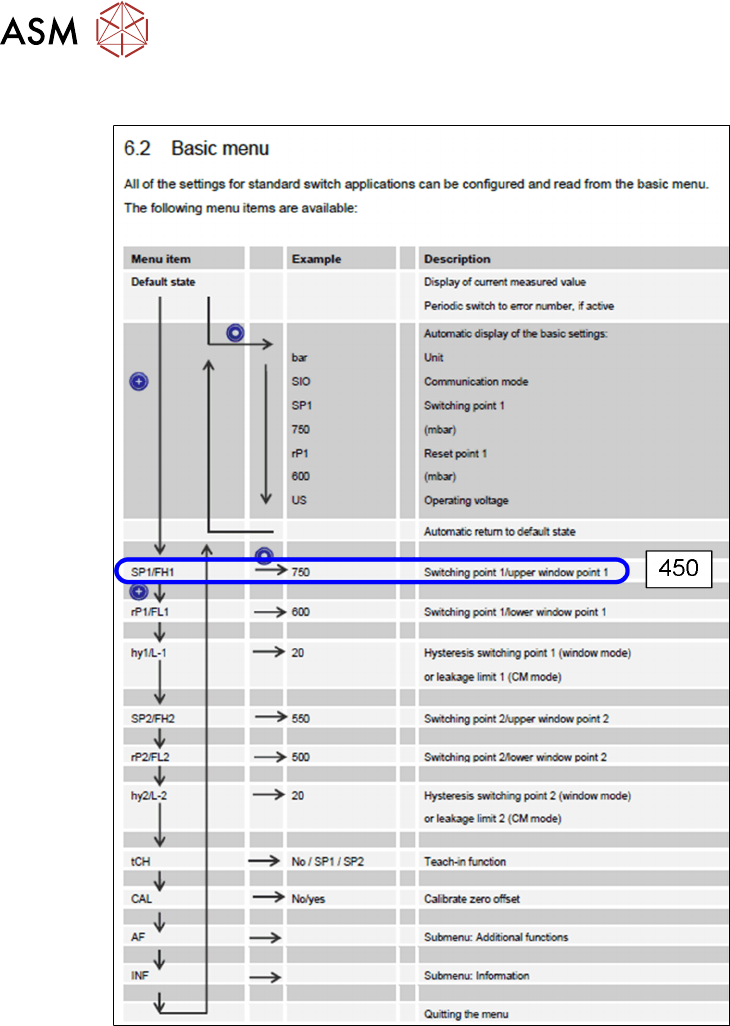
3.3.1.3 Setting Switching Point 1
Fig.6: Setting switching point 1
Proceed as follows to set switching point 1:
► Press the SET button.
► Press the SET button until you see the SP1 (Switching Point 1) menu item.
► Press the MODE button. A value appears on the display. The one point flashes.
► Press the SET button and set a value 0-9.
► Press the MODE button. The tens point flashes.
► Press the SET button and set a value 0-9.
► Press the MODE button. The hundreds point flashes.
► Press the SET button and set a value 0-9.
► The display shall now show 450.
► Wait 2 seconds. SP1 appears on the display again.
► Continue with SET button – please refer to 3.3.1.4 "Setting Hysteresis Switching Point
1" [}63].
3 Installation
3.3 Final Work
Montageanleitung / Assembly Instructions SIPLACE TX-Serie Basic Pack Vacuum Tooling 07/2017 63
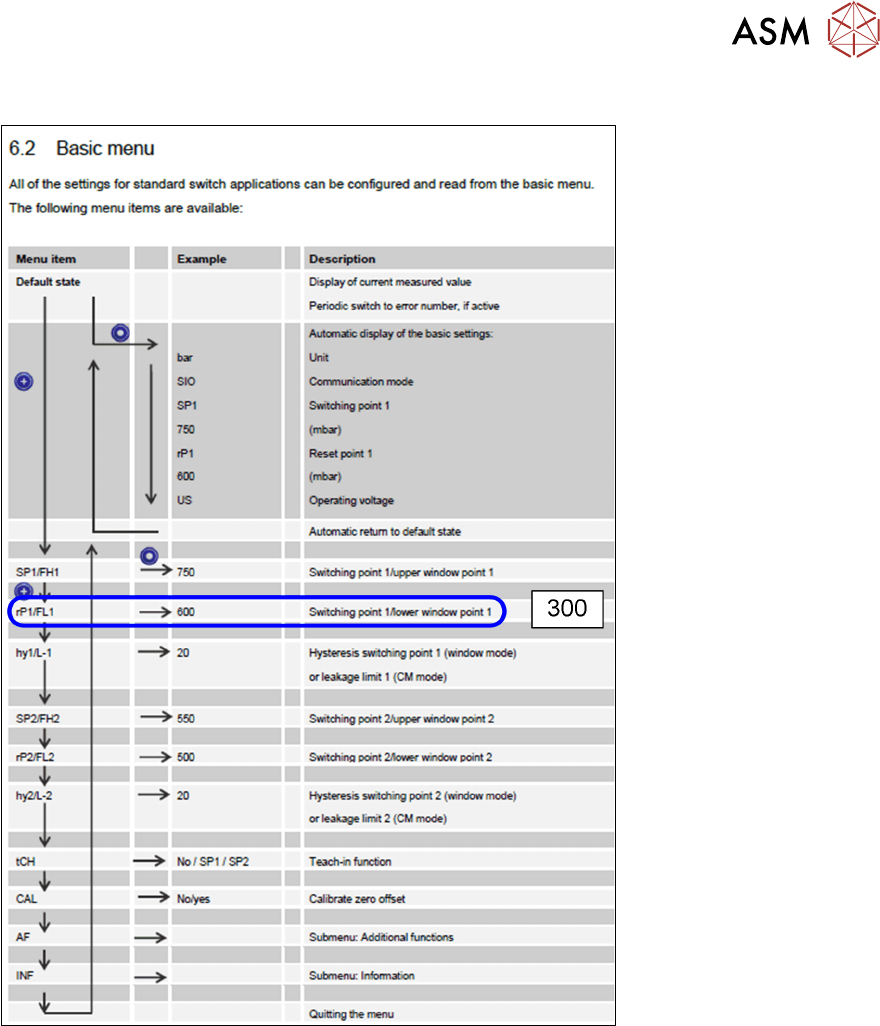
3.3.1.4 Setting Hysteresis Switching Point 1
Fig.7: Setting hysteresis switching point 1
Proceed as follows to set hysteresis switching point 1:
► Press the SET button.
► Press the SET button until you see the rP1 (Hysteresis 1) menu item.
► Press the MODE button. A value appears on the display. The one point flashes.
► Press the SET button and set a value 0-9.
► Press the MODE button. The tens point flashes.
► Press the SET button and set a value 0-9.
► Press the MODE button. The hundreds point flashes.
► Press the SET button and set a value 0-9.
► The display shall now show 300.
► Wait 2 seconds. rP1 appears on the display again.
► Continue with SET button – please refer to 3.3.1.5 "Setting Switching Point 2" [}64].