CP6的IO代码.pdf - 第276页
6. Tie a knot in the end of the top-film, insert into the slit on the take-up reel cover and pull until snug. On the take-up reel there are two arrows. When locking the take-up reel, align the arrows and turn in the dire…
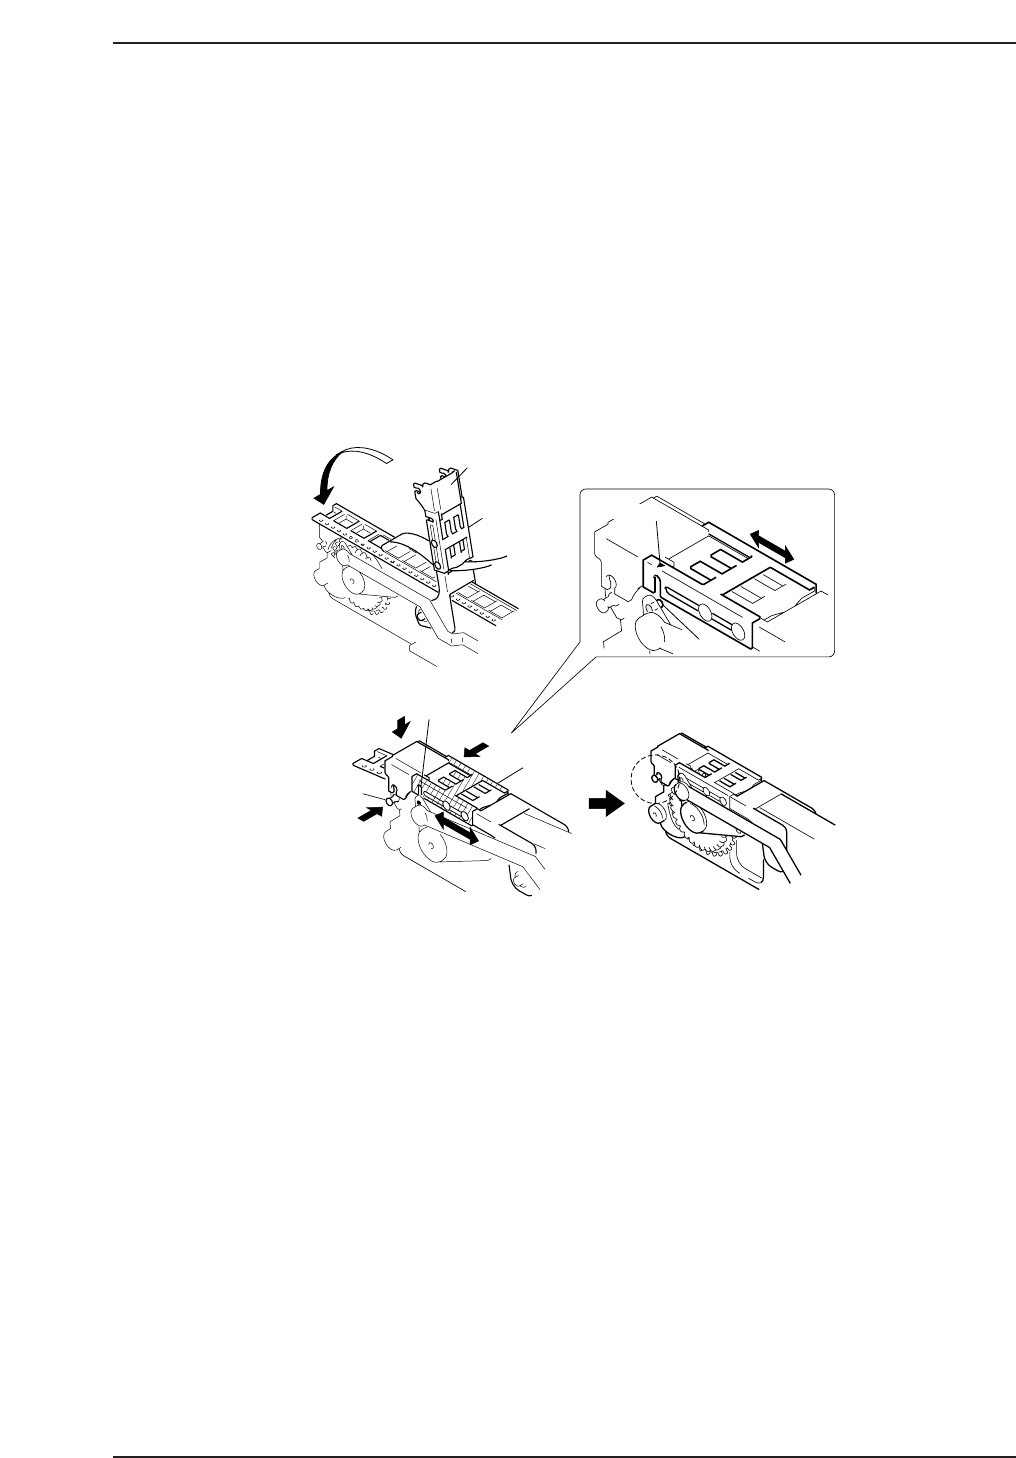
5. Make sure that the feed holes line up with the sprocket, pull the top-film out of the
way, lower the tape leaf, and press the catch pins simultaneously to lock the tape
leaf into place.
Before the tape leaf is completely closed, adjust the shutter position so that the cut-
out on the shutter engages with the pin on the arm.
If an arrow, " ▼ ", is marked on the tape leaf, slide the shutter until the arrow
meets the pin.
Note: If excessive force is applied to the tape leaf without aligning the cut-out with the pin, the
tape leaf will not be properly locked, or it will be deformed, resulting in a reduced pick-up
rate.
Closing the tape leaf
Tape leaf
Shutter
Shutter
Catch pin
Cut-out
Pin
Align the arrow mark "▼"(or the cut-out)
and the pin on the shutter before locking.
Arrow mark
CP6M8020
Part 8 Chapter 1 WC Feeders
Edition 1.0 8-1-13 CP-6 Series Mechanical Reference
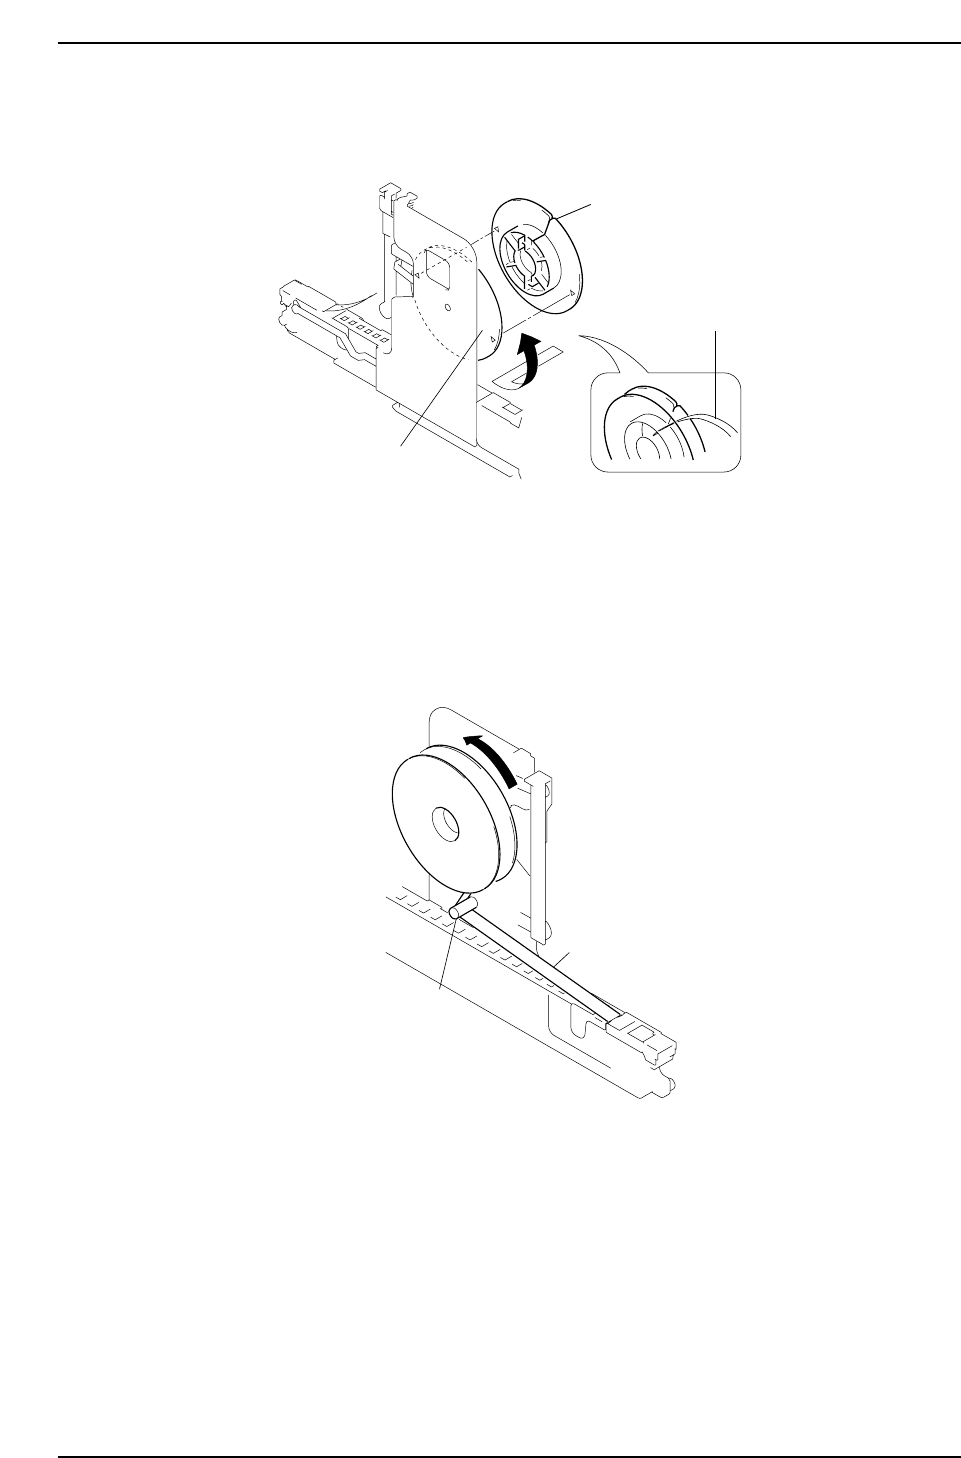
6. Tie a knot in the end of the top-film, insert into the slit on the take-up reel cover
and pull until snug. On the take-up reel there are two arrows. When locking the
take-up reel, align the arrows and turn in the direction as shown below.
Setting the Top-film
7. After feeding the top-film through the rollers, rotate the take-up reel in the
direction of the arrow as shown. When the top-film is wound too tight, it is
necessary to turn the take-up reel in the opposite direction. Because there is
resistance in the take-up reel axis, it is necessary to use a little force when rotating.
Setting the Top-film
Roller
Top-film
CP6M8022
Slit
Take-up reel
Top-film
CP6M8021
Part 8 Chapter 1 WC Feeders
Edition 1.0 8-1-14 CP-6 Series Mechanical Reference
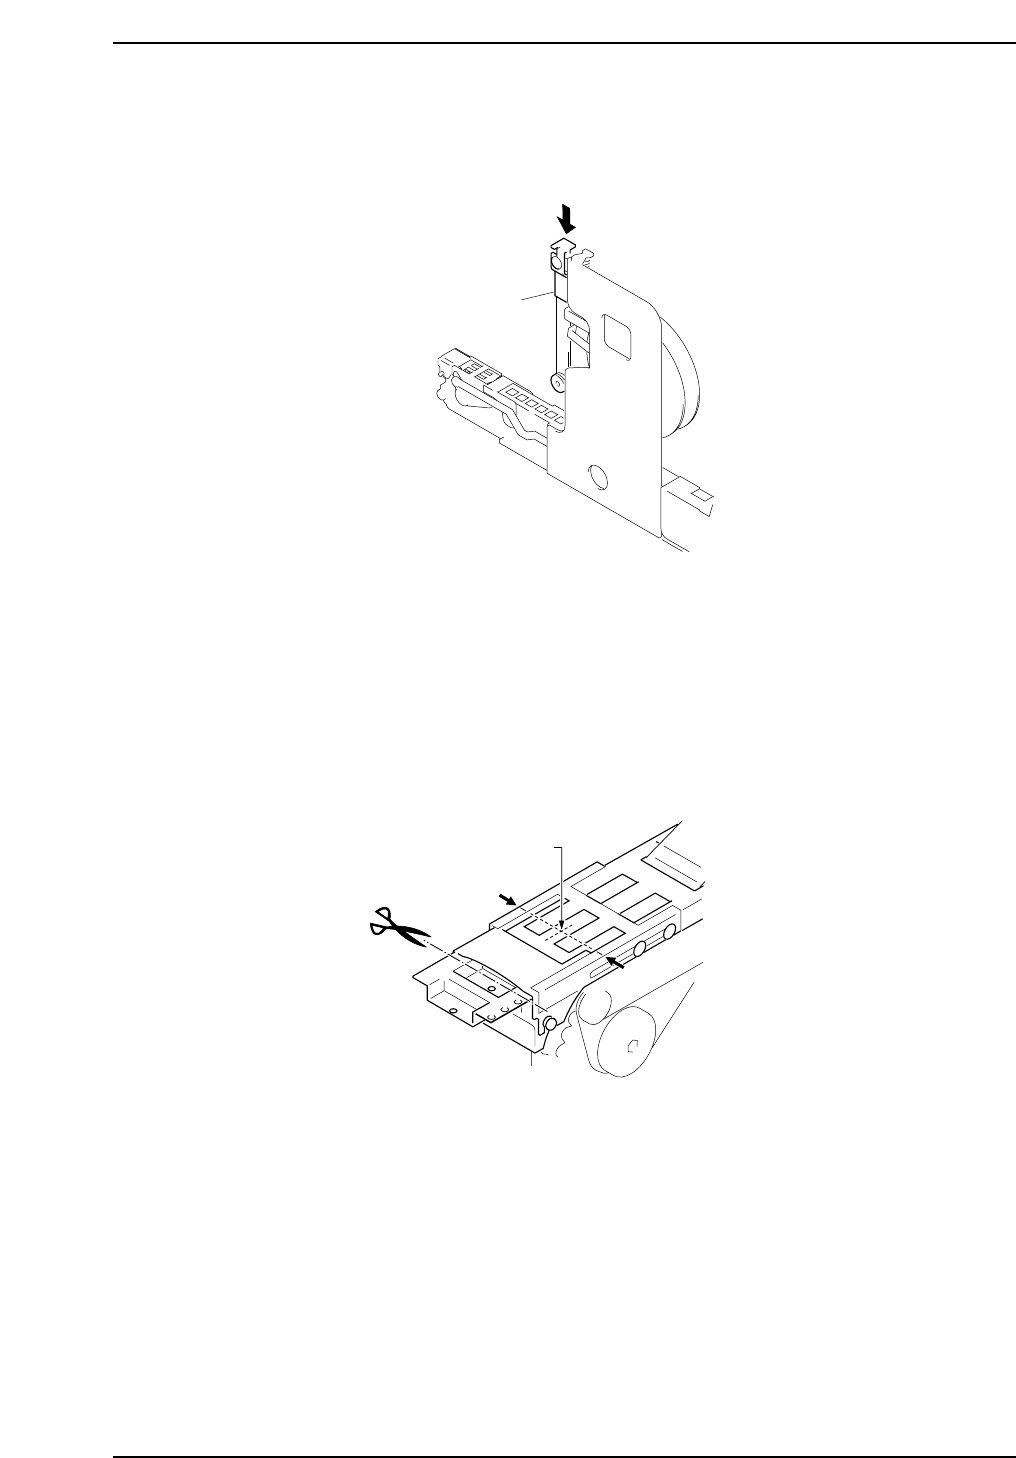
8. Manually feed the part and check the pick-up position. To feed the part one pitch,
push the lever in the direction as shown. When the component pitch is P24 or P32,
it is necessary to feed 2 times. When the component pitch is P36, it is necessary to
feed 3 times.
Confirming Pick-up Position
9. Confirm that the part lines up with the pickup point shown below, after feeding
the part one pitch at a time. Use a pair of scissors to cut the tape that extends over
the end of the feeder.
Note: Tearing the tape by hand may cause feeding problems.
Confirming Pick-up Position
❈
❈
Pick-up point
CP6M8024
Tape feed lever
CP6M8023
Part 8 Chapter 1 WC Feeders
Edition 1.0 8-1-15 CP-6 Series Mechanical Reference