CP6的IO代码.pdf - 第283页
9. Confirm that the part lines up with the pick-up point shown below after feeding the part one pitch at a time. Use a pair of scissors to cut the tape that extends over the end of the feeder. Note: Tearing the tape by h…
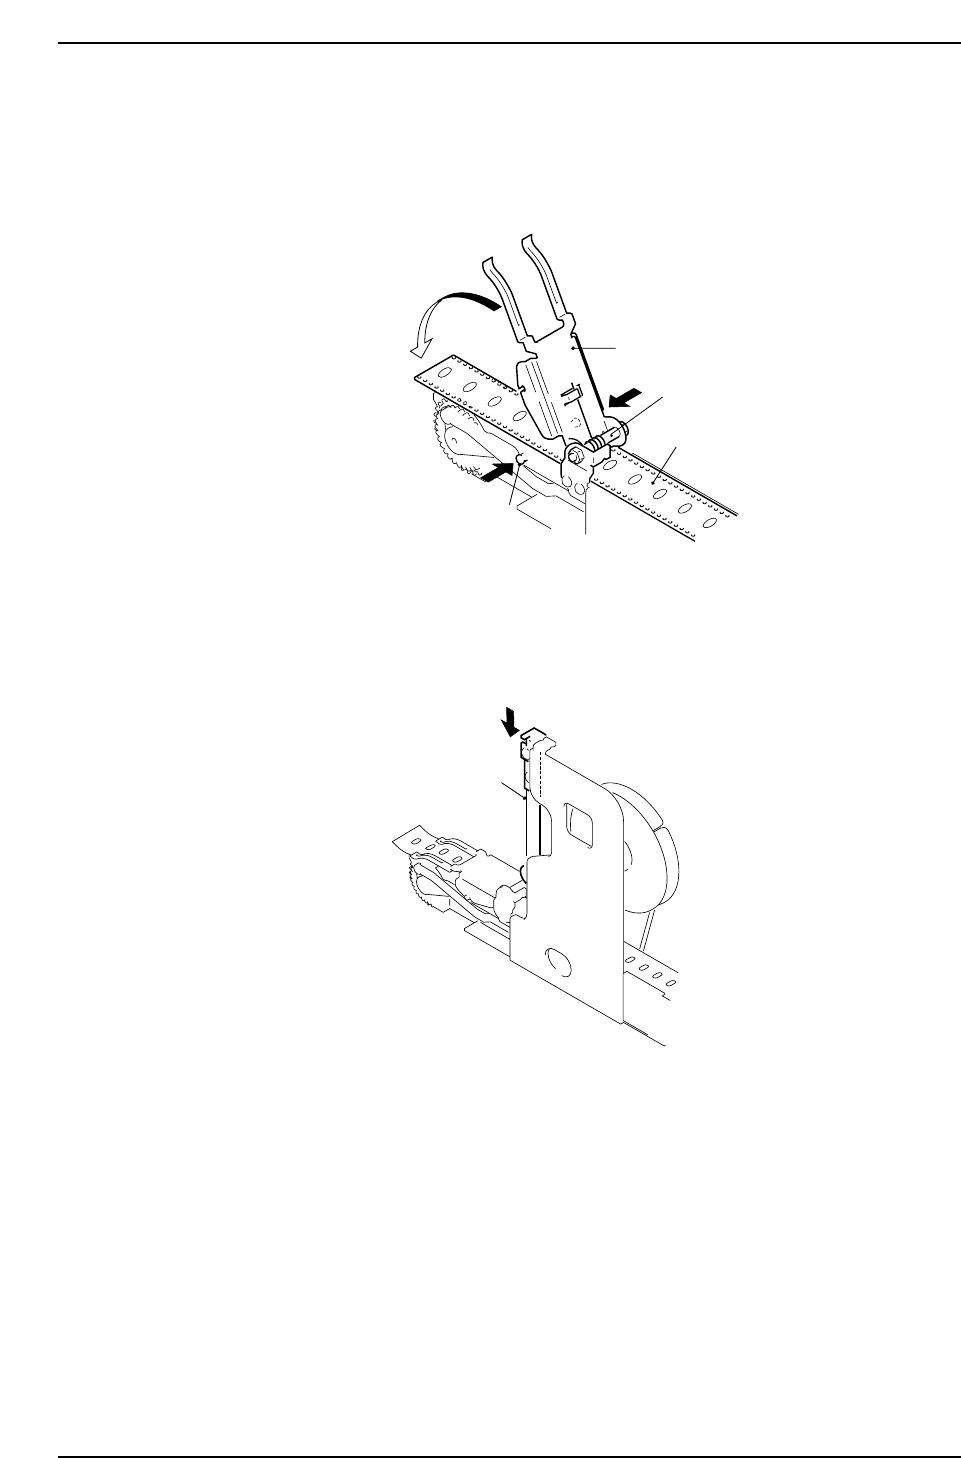
7. Return the tape leaf. Take-up the slack tape and confirm that the tape feed holes
are aligned with the sprocket teeth. Push in the clamp pins (one on the right side
and one on the left side) and slowly lower and lock the tape leaf. Be careful to not
cut the adhesive tape or the paper tape. When the tape leaf is not set properly, the
spring will raise the tape leaf.
Setting the Tape Leaf
8. Manually feed the part and check the pick-up position. To feed the part one pitch,
push the lever in the direction as shown.
Confirming Pick-up Position
Tape feed lever
CP6M8032
Tape leaf
Spring
Parts tape
Clamp pin
CP6M8031
Part 8 Chapter 1 WC Feeders
Edition 1.0 8-1-20 CP-6 Series Mechanical Reference
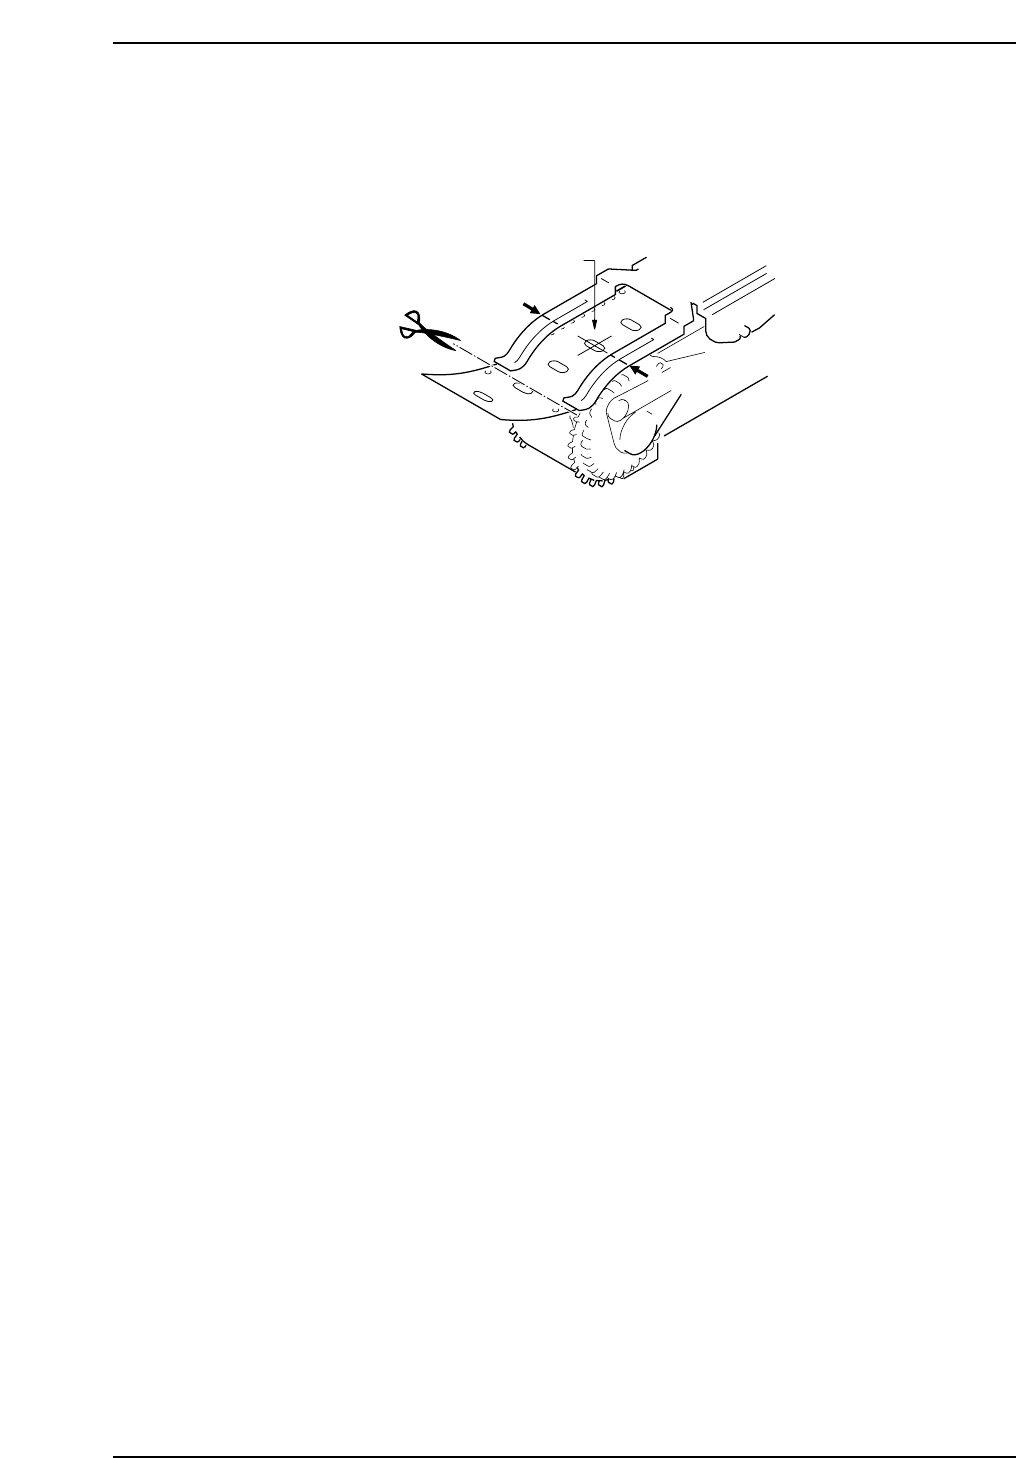
9. Confirm that the part lines up with the pick-up point shown below after feeding
the part one pitch at a time. Use a pair of scissors to cut the tape that extends over
the end of the feeder.
Note: Tearing the tape by hand may cause feeding problems.
Confirming Pick-up Position
❈
❈
Pickup point
CP6M8033
Part 8 Chapter 1 WC Feeders
Edition 1.0 8-1-21 CP-6 Series Mechanical Reference
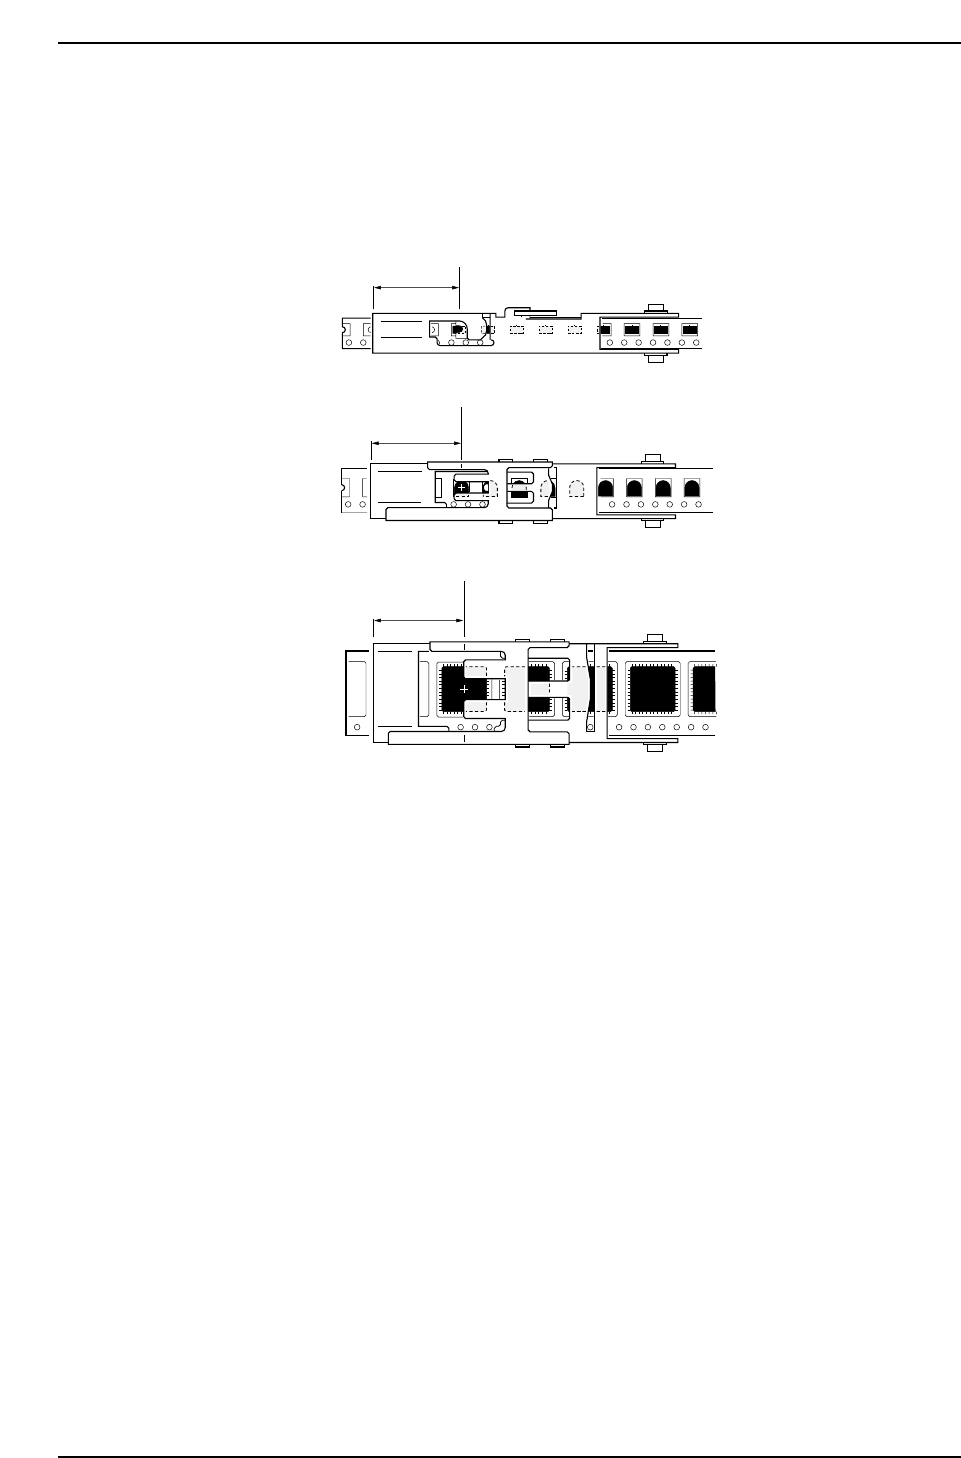
1.7 Pick-up Point and Parts Set Position
Part locations vary with the pick-up points of each feeder. Refer to the following
illustrations for the distances from the tips of the feeders and the setting conditions.
• Embossed Tape
4, 8, 12, 16 mm pitch
Pickup Position and Parts Set Position 1
Pick-up point
24
Pick-up point
24
Pick-up point
24
CP6M8034
Part 8 Chapter 1 WC Feeders
Edition 1.0 8-1-22 CP-6 Series Mechanical Reference