CP6的IO代码.pdf - 第288页
• W12xP12, W16, W24, W32, W44 (embossed) Replacing T ape Leaf (W12xP12, W16, W24, W32 W44 embossed) 1. While pushing in the catch pins (one on the right and one on the left), unlock and raise up the tape leaf. 2. Remove …
1.8 Replacing Tape Leaf
All types of tape leaves are explained in section 1.9 “Selecting a Tape Leaf” of this
chapter.
• W8, W12
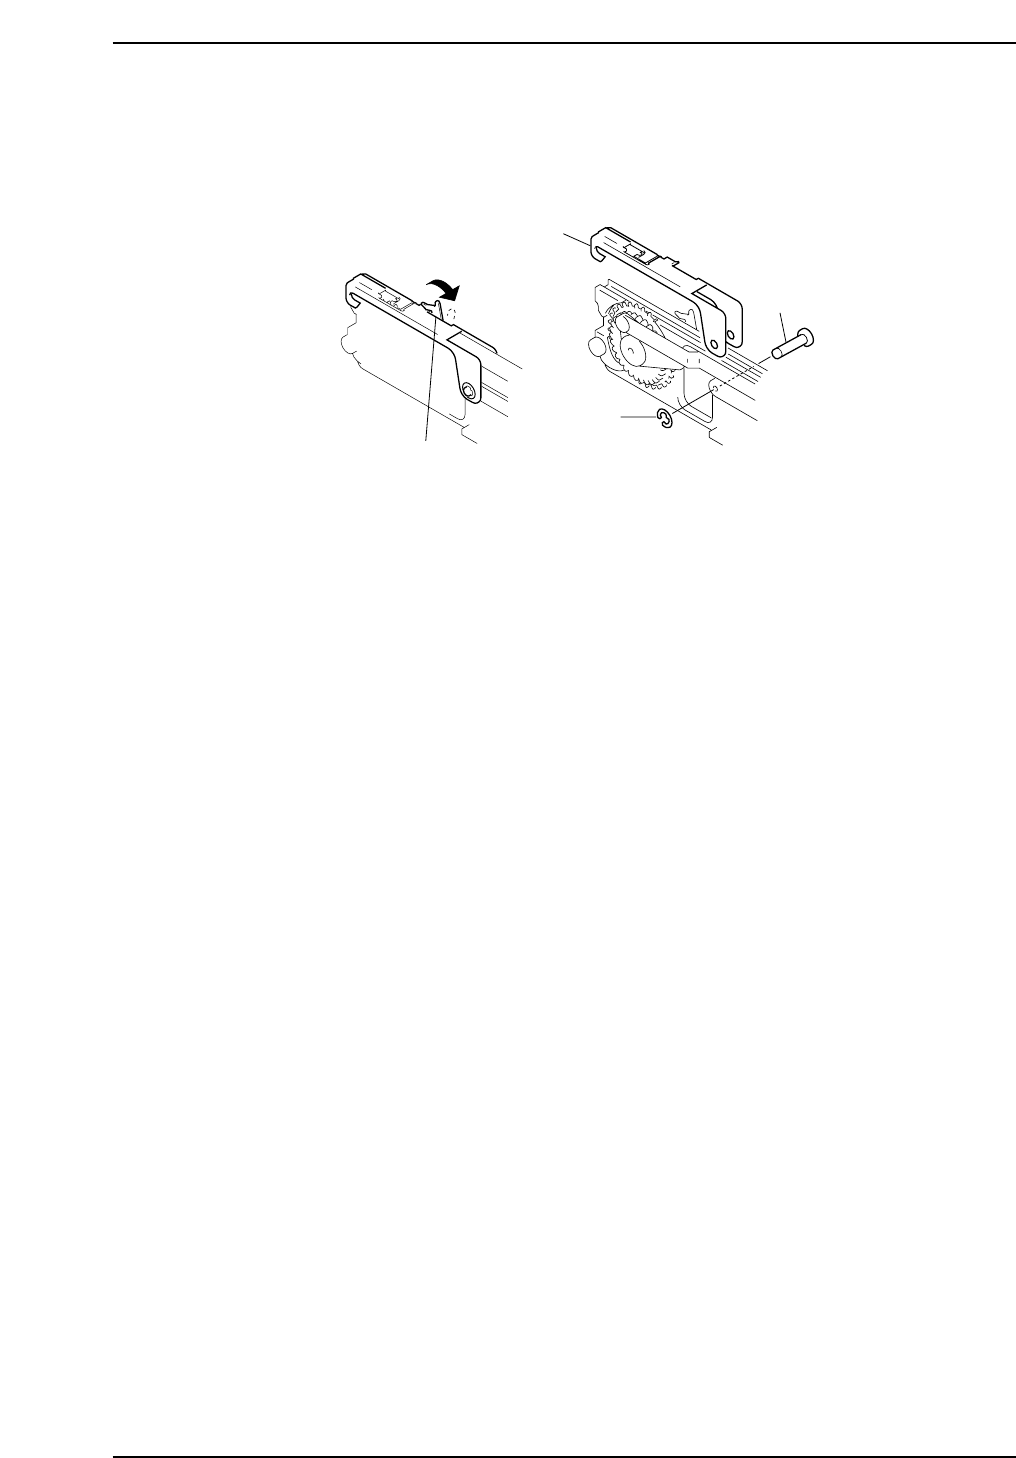
Replacing Tape Leaf (W8, W12)
1. Push the tape leaf lock in the direction of the arrow as shown.
2. Remove the tape leaf E ring.
3. Remove the pin from the feeder body.
4. Remove the tape leaf by raising up.
5. After replacing, follow the steps in reverse to attach.
Note: After replacing, make sure to lock the new tape leaf.
Tape leaf
Pin
" E " ring
Tape leaf lock
CP6M8038
Part 8 Chapter 1 WC Feeders
Edition 1.0 8-1-25 CP-6 Series Mechanical Reference
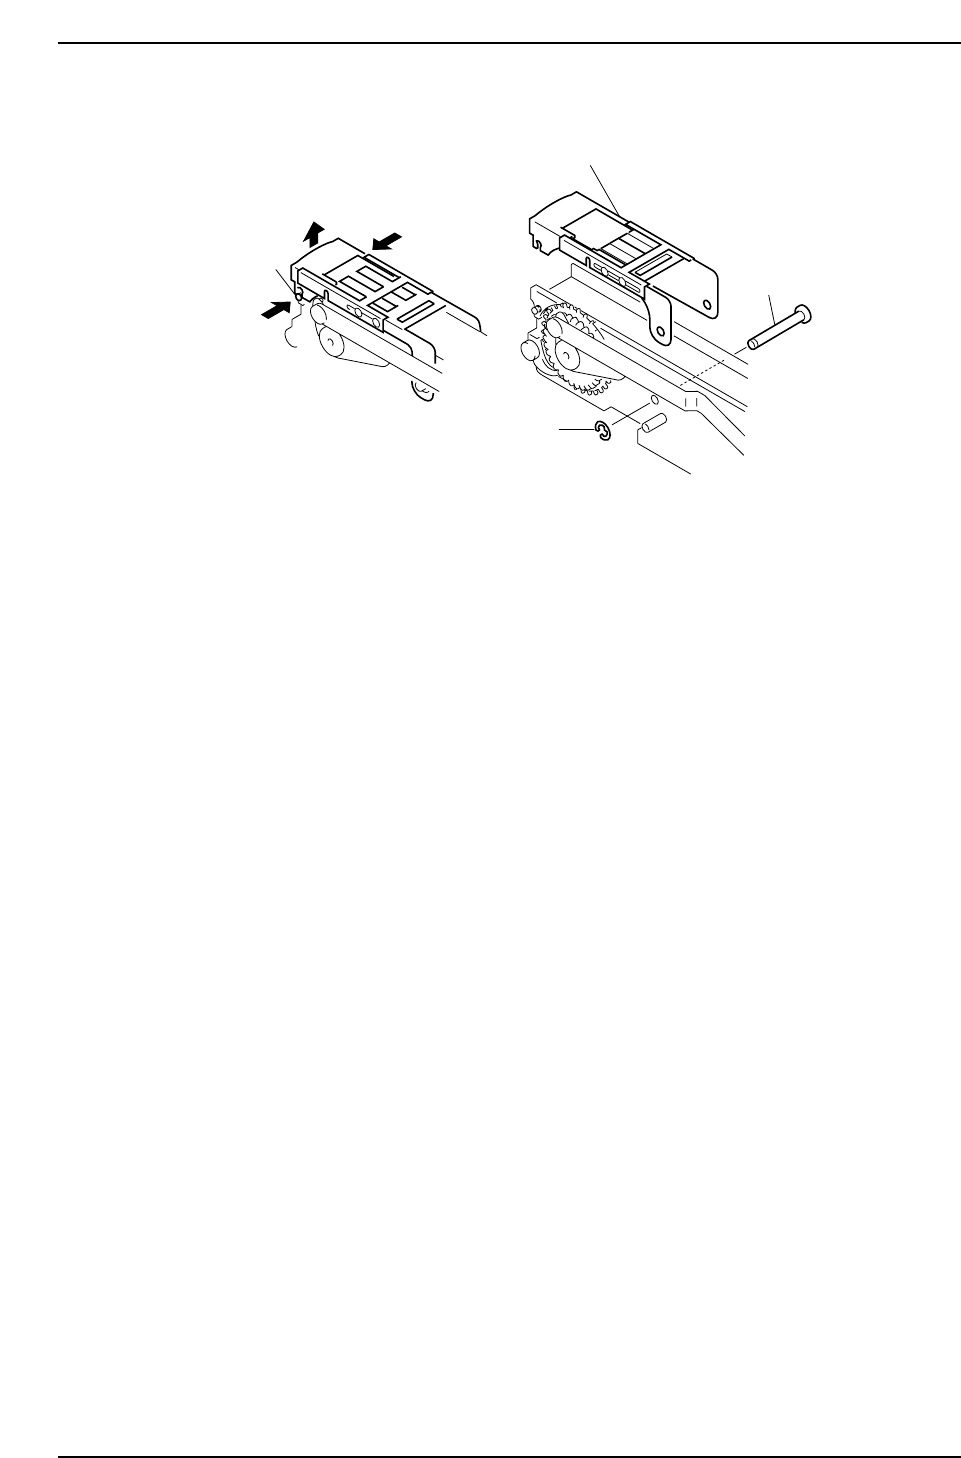
• W12xP12, W16, W24, W32, W44 (embossed)
Replacing Tape Leaf (W12xP12, W16, W24, W32 W44 embossed)
1. While pushing in the catch pins (one on the right and one on the left), unlock and
raise up the tape leaf.
2. Remove the tape leaf E ring.
3. Remove the pin from the feeder body.
4. Remove the tape leaf by raising up.
5. After replacing, follow the steps in reverse to attach.
Note: After replacing, make sure to lock the new tape leaf.
Catch pin
Tape leaf
Pin
" E " ring
CP6M8039
Part 8 Chapter 1 WC Feeders
Edition 1.0 8-1-26 CP-6 Series Mechanical Reference
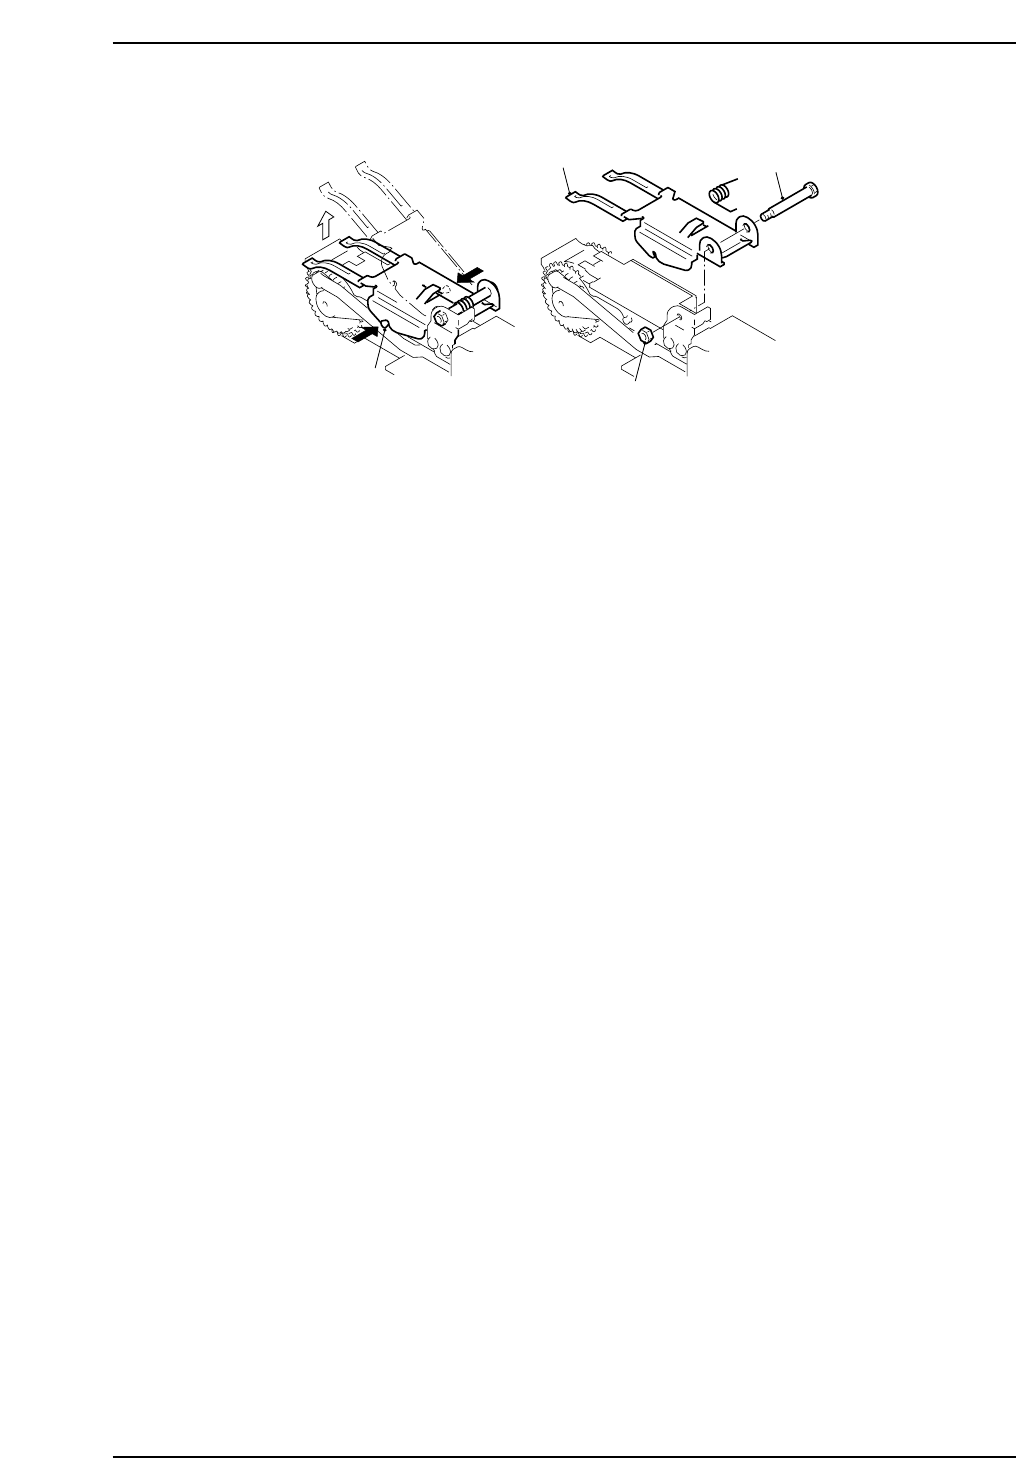
• W32 (paper)
Replacing Tape Leaf (W32 paper)
1. While pushing in the catch pins (one on the right and one on the left), unlock and
raise up the tape leaf.
2. Loosen the nut for the tape leaf pin.
3. When the pin is removed, the tape leaf can be removed.
4. After replacing, follow the steps in reverse to attach.
Note: After replacing, make sure to lock the new tape leaf.
Tape leaf
Tape-leaf pin
Nut
Clamp pin
CP6M8040
Part 8 Chapter 1 WC Feeders
Edition 1.0 8-1-27 CP-6 Series Mechanical Reference