DECAN_S1_Maintenance_EN.pdf - 第33页
DE CAN S 1 Mai nte nan ce H an dbo ok 3-4 chapt er 3 Daily Inspe ction Nex t Generation, Multi- Funct ional Placer Checking and cleaning the nozzle Daily Inspection Caution Use only the required amount of lubricating oil…
DECAN S1 Maintenance Handbook
3-3
chapter 3
Daily Inspection
Next Generation, Multi-Functional Placer
Checking and cleaning the nozzle
Caution
Wipe the cleaning liquid on the nozzle using a clean cloth, ensuring
none remains on the nozzle.
When foreign materials remain on the nozzle continuously, contact
our C/S company (STS) or local agent to solve the problem.
Use the ultrasonic cleaning machine, the clean case the Nozzle, you
will be able to improve the cleaning of the nozzle.
Step 9.
The method to clean the nozzle is as follows:
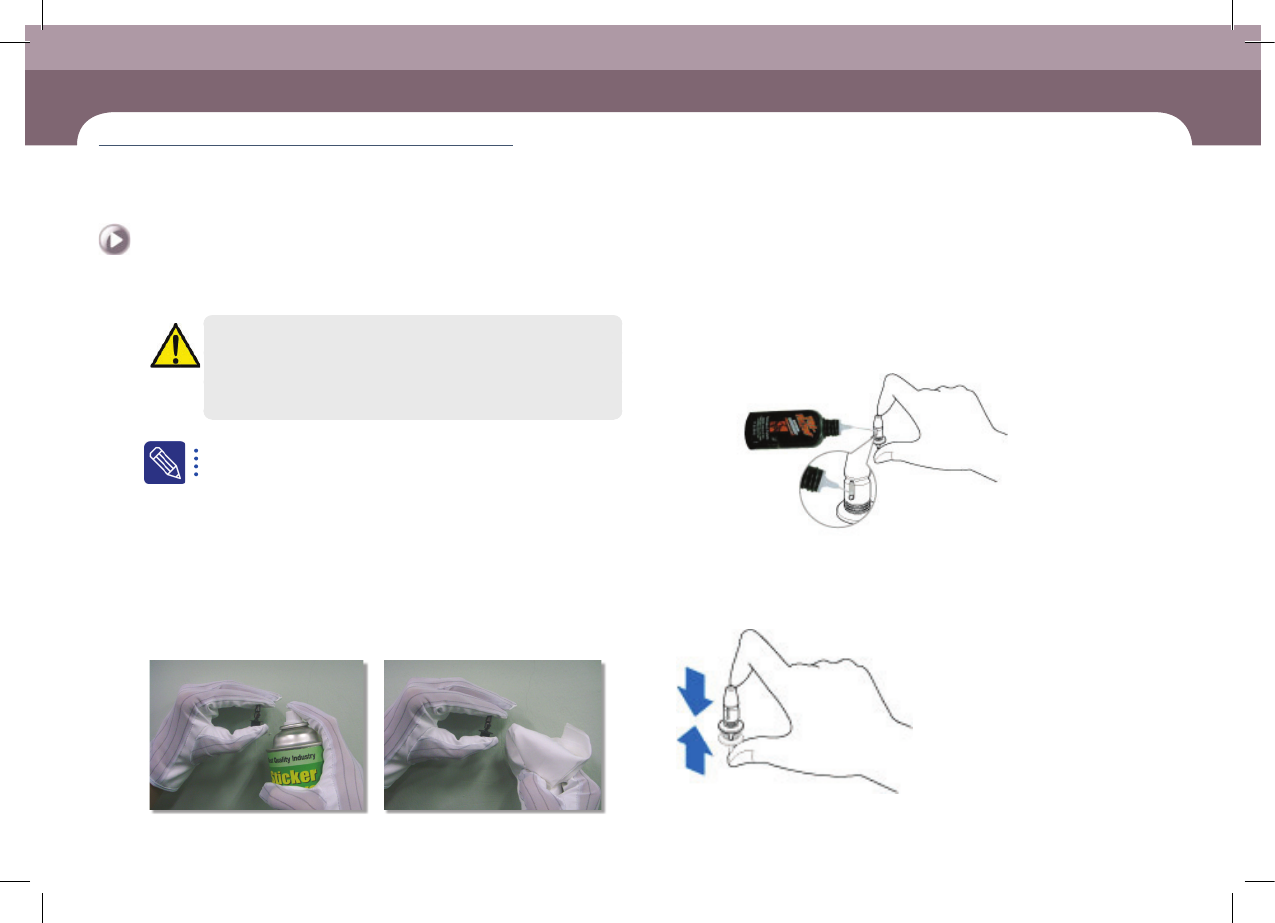
ㆍ Spray the cleaning liquid recommended by us on the nozzle exterior using a spray
straw.
ㆍ Clean the nozzle exterior with a clean cloth within 1 minute after spraying the
cleaning liquid.
ㆍ If the foreign materials (solder paste, etc.) have not been removed, repeat
cleaning once more.
Step 10.
If lubrication of the nozzle spring is insufficient due to
its having become thick, inject a suitable amount of the
nozzle lubricating oil provided with the machine.
lubricant for nozzle
Lubricating Point
Step 11.
Press the nozzle 4~5 times after lubricating so that the
ubricating oil is uniformly spread out.
Nozzle spring

DECAN S1 Maintenance Handbook
3-4
chapter 3
Daily Inspection
Next Generation, Multi-Functional Placer
Checking and cleaning the nozzle
Daily Inspection
Caution
Use only the required amount of lubricating oil. If insufficient
lubricating oil is applied, the nozzle will not operate smoothly.
If too much lubricating oil is applied, it may lump together with
foreign materials causing defective pickup.
Step 12.
Release the emergency stop as described in "Releasing
'Emergency Stop' mode" on page 1-6 and perform the
operation again.
DECAN S1 Maintenance Handbook
3-5
chapter 3
Daily Inspection
Next Generation, Multi-Functional Placer
Cleaning feeder and feeder base
Cleaning the feeder and feeder base can prevent feeder installation error and
defective contact of the connector.
Tool for Maintenance
Brush
Measures
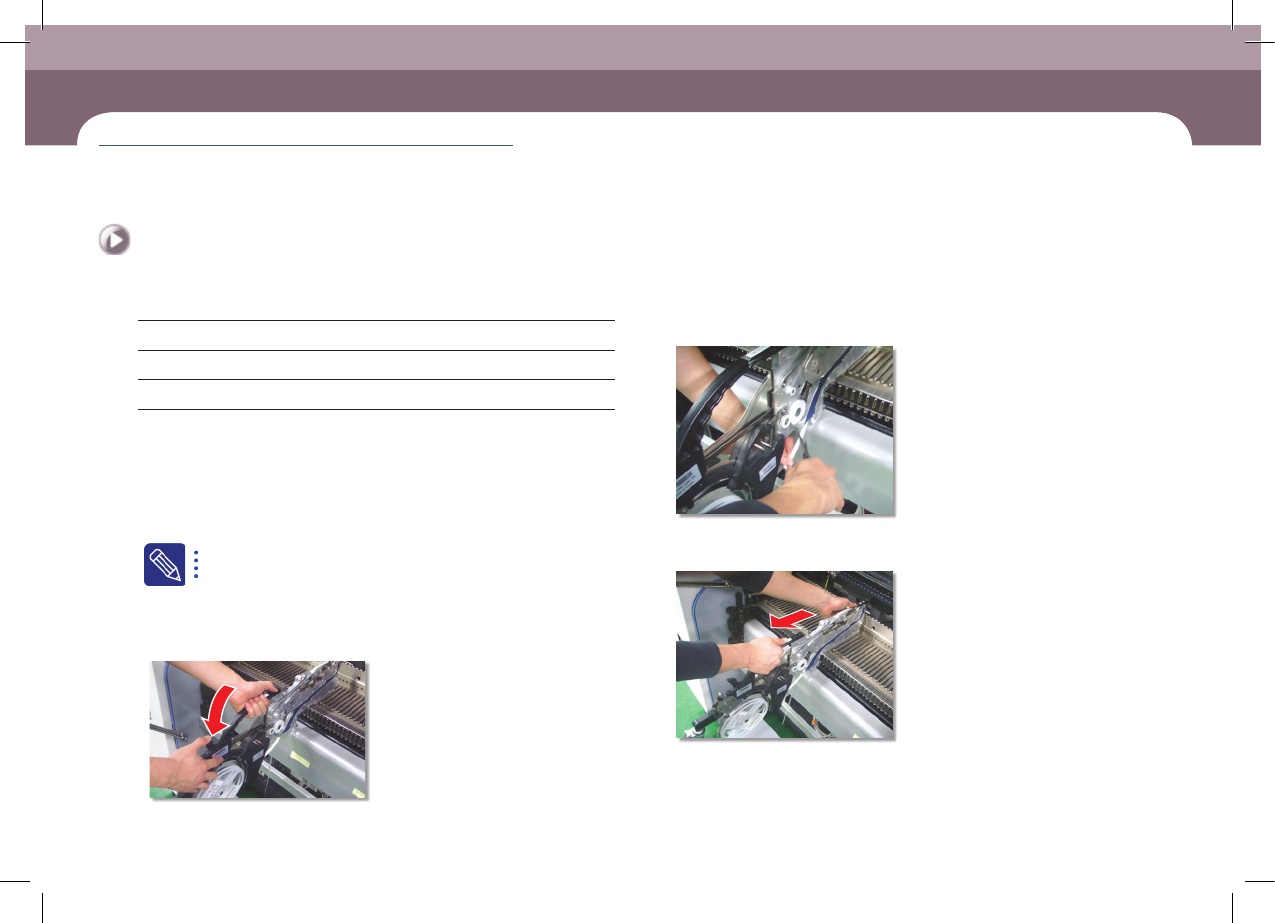
Step 1.
Press the 'Feeder Change' and move the X frame to the
center of the machine.
Step 2.
Press the 'STOP' and 'RESET' buttons in order after
pressing the 'EMG' button on the OP panel to stop
operation.
For more details, refer to "How to perform emergency stop" on page
1-2.
Step 3.
Remove the feeder from the feeder base.
①Pull the grip back
②Remove the cover tape
③Remove the feeder
Cleaning feeder and feeder base
(Time required: 10min / No. D-2)