DECAN_S1_Maintenance_EN.pdf - 第42页
DE CAN S 1 Mai nte nan ce H an dbo ok 3-13 chapt er 3 Daily Inspe ction Nex t Generation, Multi- Funct ional Placer Checking and replacing Mist Separator Filter Step 5. Se para te th e con tain er by tu rning i t cou nte…
DECAN S1 Maintenance Handbook
3-12
chapter 3
Daily Inspection
Next Generation, Multi-Functional Placer
Checking and replacing Mist Separator Filter
Daily Inspection
Clean the dust from the air to prevent machine failure due to foreign materials when
using pneumatic air.
Measures
Step 1.
Press the 'STOP' and 'RESET' buttons in order after
pressing the 'EMG' button on the OP panel to stop
operation.
For more details, refer to "How to perform emergency stop" on page
1-2.
Step 2.
Shut the main pneumatic pressure supplied to the
machine.
Step 3.
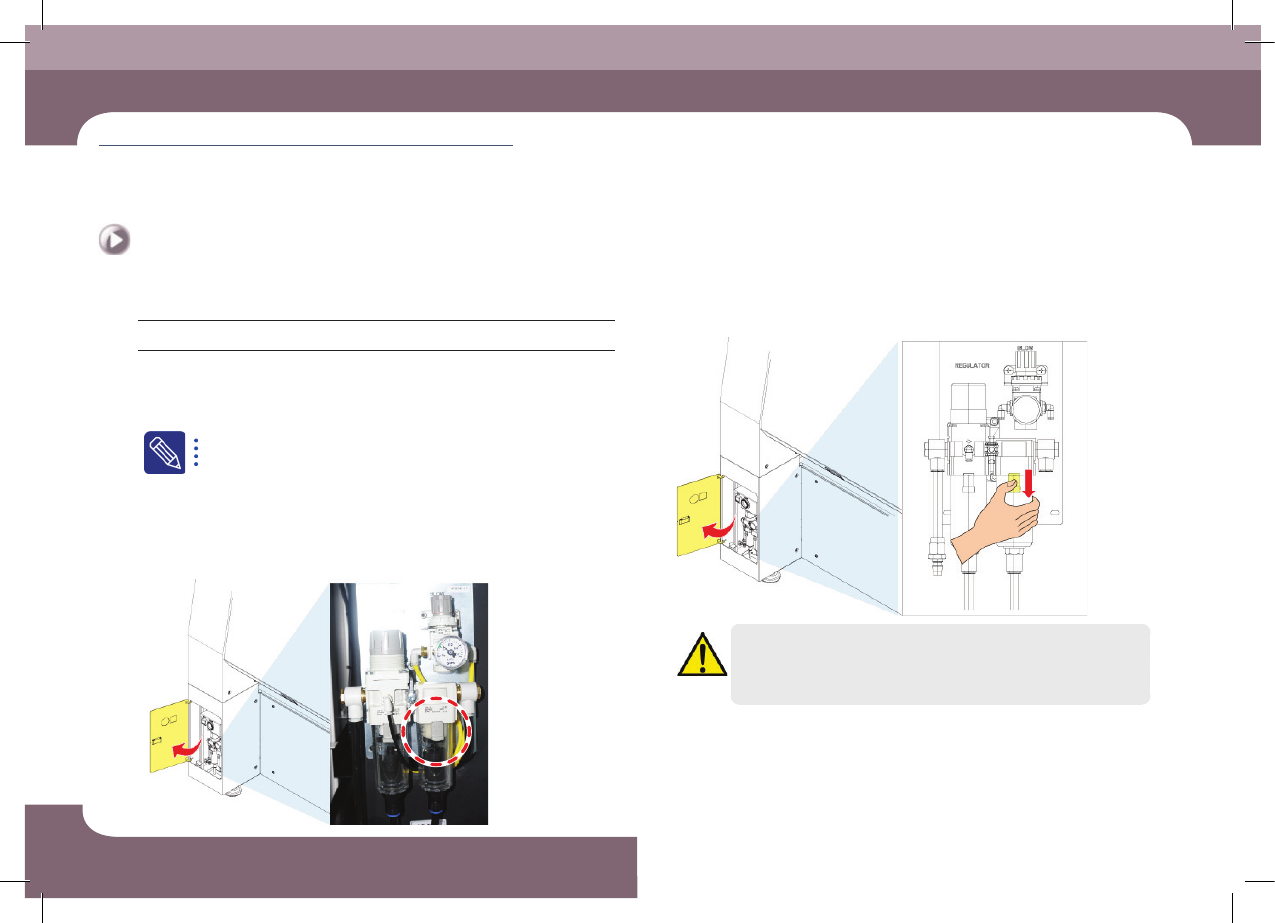
Open the front bottom left door of the machine and
check the Mist filter visually.
Step 4.
Press down on the mist filter container lock button.
Caution
Failure to shut off pneumatic pressure when replacing the air filter
or mist separator filter may result in personal injury. Shut off the
pneumatic line before replacing any of these parts.
Checking and replacing Mist Separator Filter
(Time required: 30min / No. D-5)
DECAN S1 Maintenance Handbook
3-13
chapter 3
Daily Inspection
Next Generation, Multi-Functional Placer
Checking and replacing Mist Separator Filter
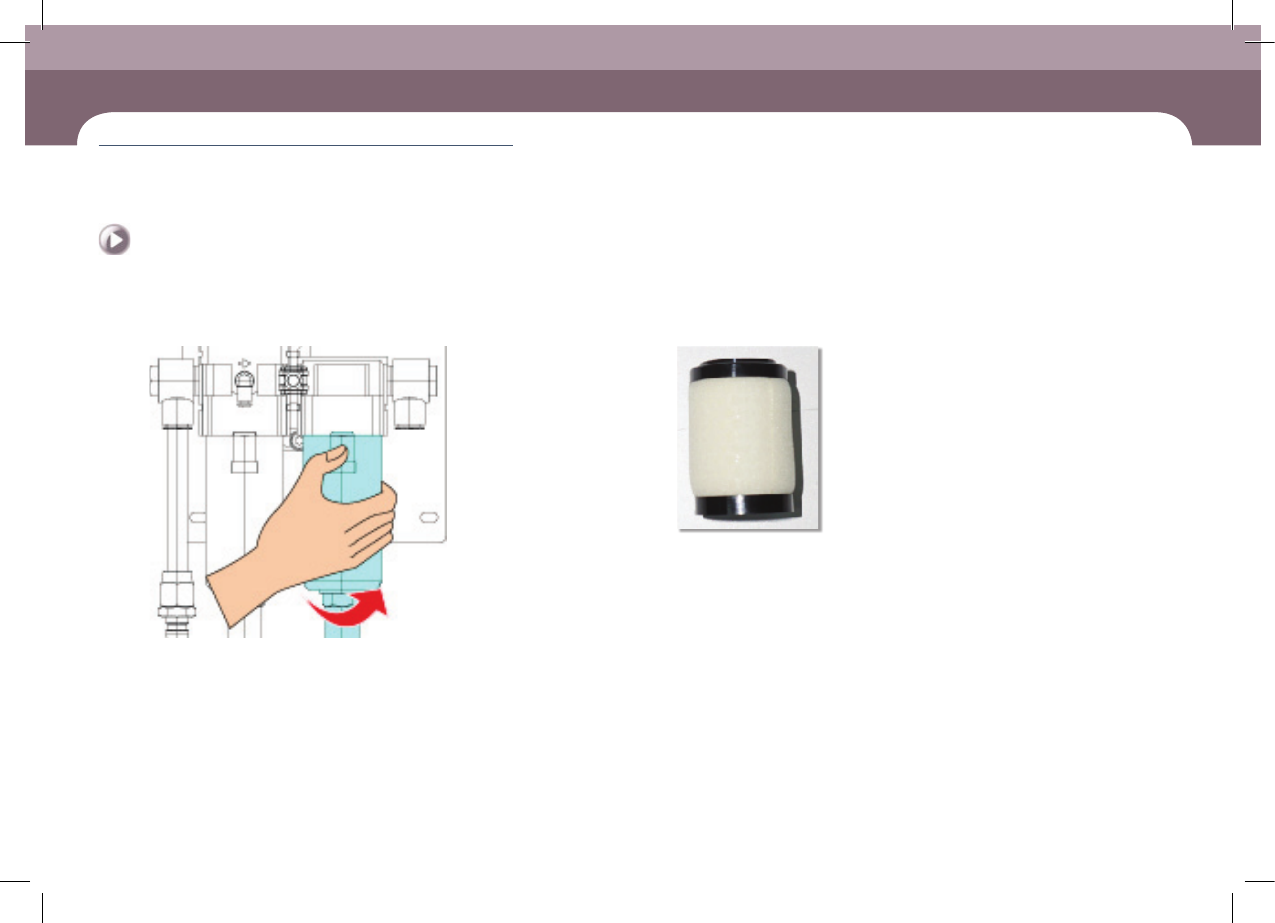
Step 5.
Separate the container by turning it counterclockwise
Step 6.
Turn the filter clockwise to separate it.
Step 7.
Release the emergency stop as described in "Releasing
'Emergency Stop' mode" on page 1-6 and perform the
operation again.
DECAN S1 Maintenance Handbook
3-14
chapter 3
Daily Inspection
Next Generation, Multi-Functional Placer
Checking and Cleaning Fix Camera Cover Glass
Daily Inspection
Checking and Cleaning Fix Camera Cover Glass
Remove foreign material on the glass to prevent part recognition error.
Tool for Maintenance
Ultra fine fiber cloth, alcohol, Wrench
Measures
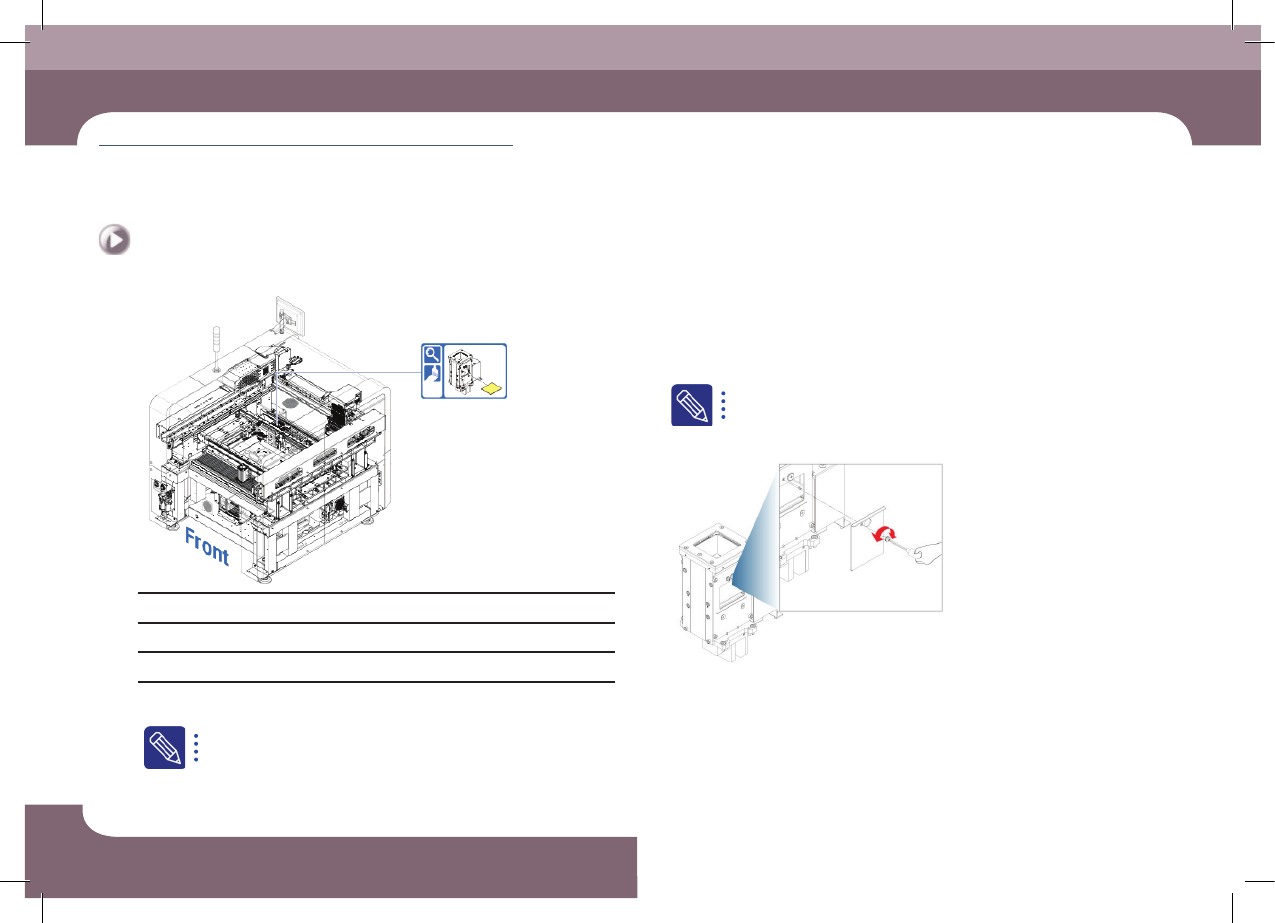
Step 1.
Move the X-frame to the rear.
For more details, refer to "Backward movement of the X-frame" on
page 1-4
Step 2.
Press the 'STOP' and 'RESET' buttons in order after
pressing the 'EMG' button on the OP panel to stop
operation.
For more details, refer to "How to perform emergency stop" on page
1-2.
Step 3.
Separate Screw by using Srew Driver.
(Time required: 10min / No. D-6)