DECAN_S1_Maintenance_EN.pdf - 第67页
Mon thly Inspe ction chapt er 5 Nex t Generation, Multi- Funct ional Placer DE CAN S 1 Mai nte nan ce H an dbo ok 5-1 4 Cleaning and Lubricating X Frame LM Guide, Ball Screw Monthly Inspe ction Step 7 . Re move th e cove…
Monthly Inspection
chapter 5
Next Generation, Multi-Functional Placer
DECAN S1 Maintenance Handbook
5-13
Cleaning and Lubricating X Frame LM Guide, Ball Screw
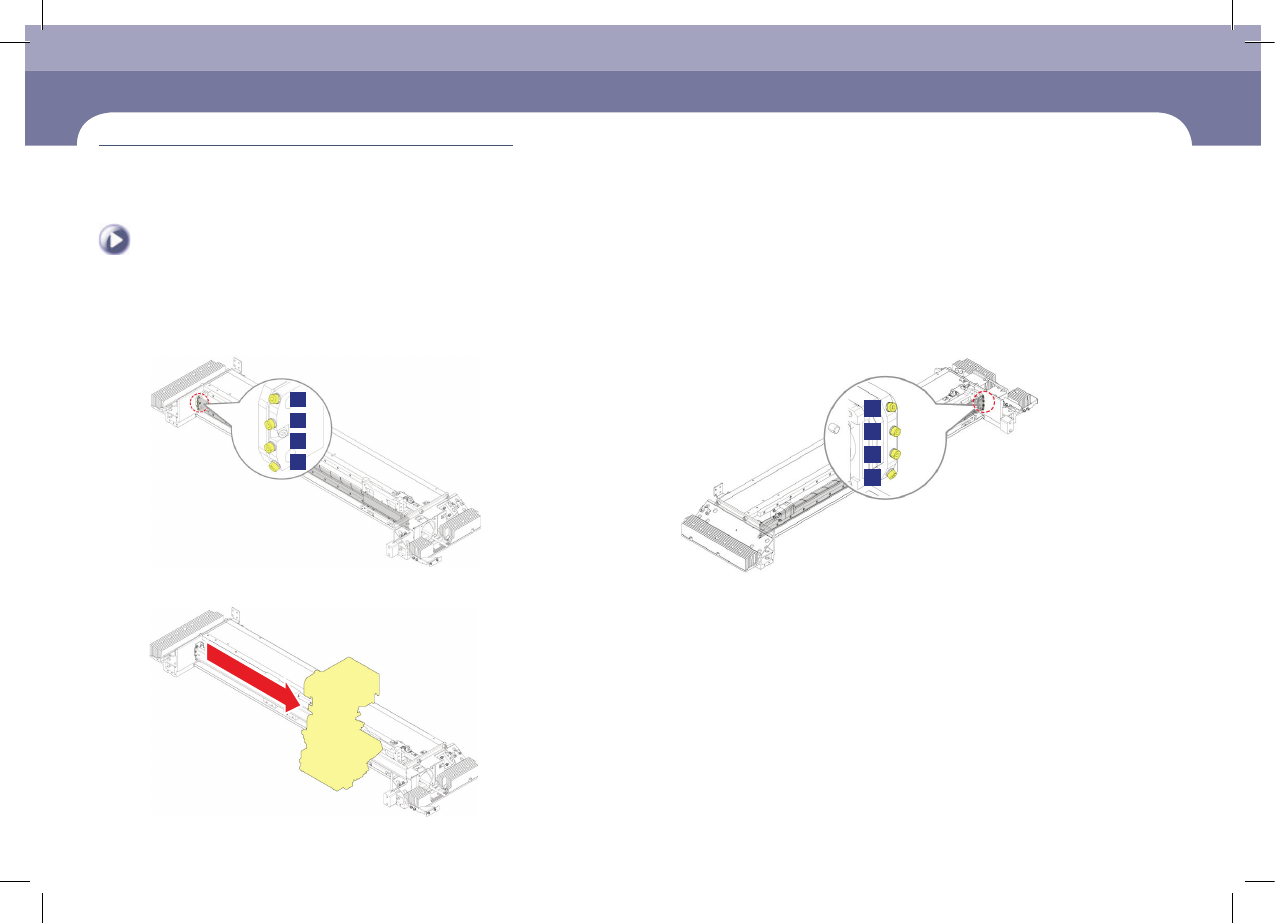
Step 4.
Remove the bolts fixing the cover in the order shown in
the following figure using a hex wrench (M3).
1
3
4
2
Step 5.
Move the head assembly to the right as far as it goes.
Step 6.
Remove the bolts fixing the cover in the order shown in
the following figure using a hex wrench (M3).
1
3
4
2
Monthly Inspection
chapter 5
Next Generation, Multi-Functional Placer
DECAN S1 Maintenance Handbook
5-14
Cleaning and Lubricating X Frame LM Guide, Ball Screw
Monthly Inspection
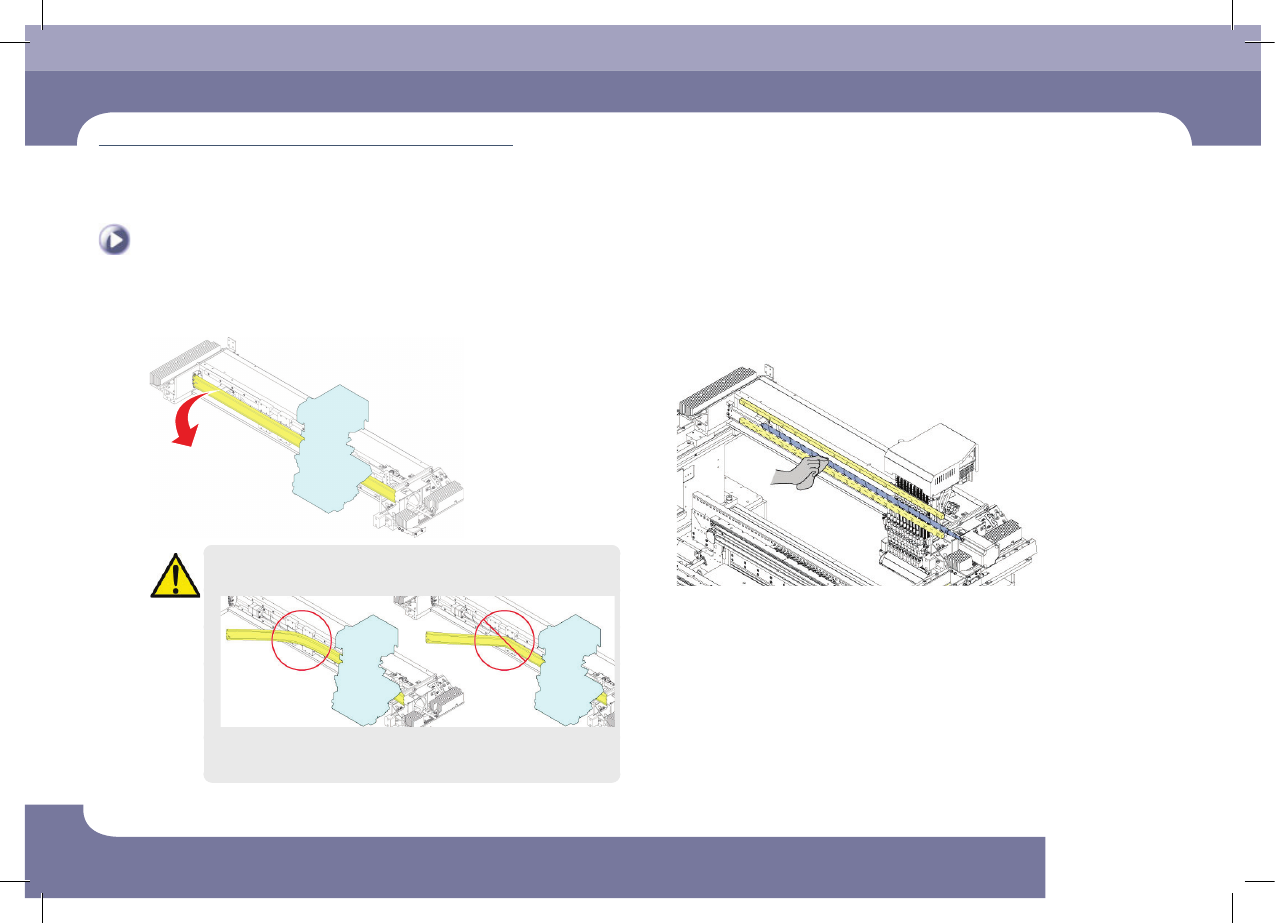
Step 7.
Remove the cover from the X-frame.
Caution
When removing the grease scatter prevention cover, exercise great
care so that it will not be bent.
If the cover is bent, it cannot be used. Therefore, a new one must
be purchased.
Step 8.
Clean the LM guide rail and ball screw using an industrial
use paper wipe.

Monthly Inspection
chapter 5
Next Generation, Multi-Functional Placer
DECAN S1 Maintenance Handbook
5-15
Cleaning and Lubricating X Frame LM Guide, Ball Screw
Step 9.
Fasten the bolts fixing the cover in the order shown in
the following figure using a hex wrench (M3).
4
2
1
3
Caution
When assembling the grease scatter prevention cover, exercise great
care so that it will not be bent.
If the cover is bent, it cannot be used. Therefore, a new one must
be purchased.
Step 10.
After inserting a steel plate with a thickness of 2.0mm
between the grease scatter prevention cover and head,
position the head at the center of the X-frame to check
whether the space between the cover and head is more
than 2.0mm.