DECAN_S1_Maintenance_EN.pdf - 第68页
Mon thly Inspe ction chapt er 5 Nex t Generation, Multi- Funct ional Placer DE CAN S 1 Mai nte nan ce H an dbo ok 5-1 5 Cleaning and Lubricating X Frame LM Guide, Ball Screw Step 9. Fas ten th e bolt s fixin g the c over…
Monthly Inspection
chapter 5
Next Generation, Multi-Functional Placer
DECAN S1 Maintenance Handbook
5-14
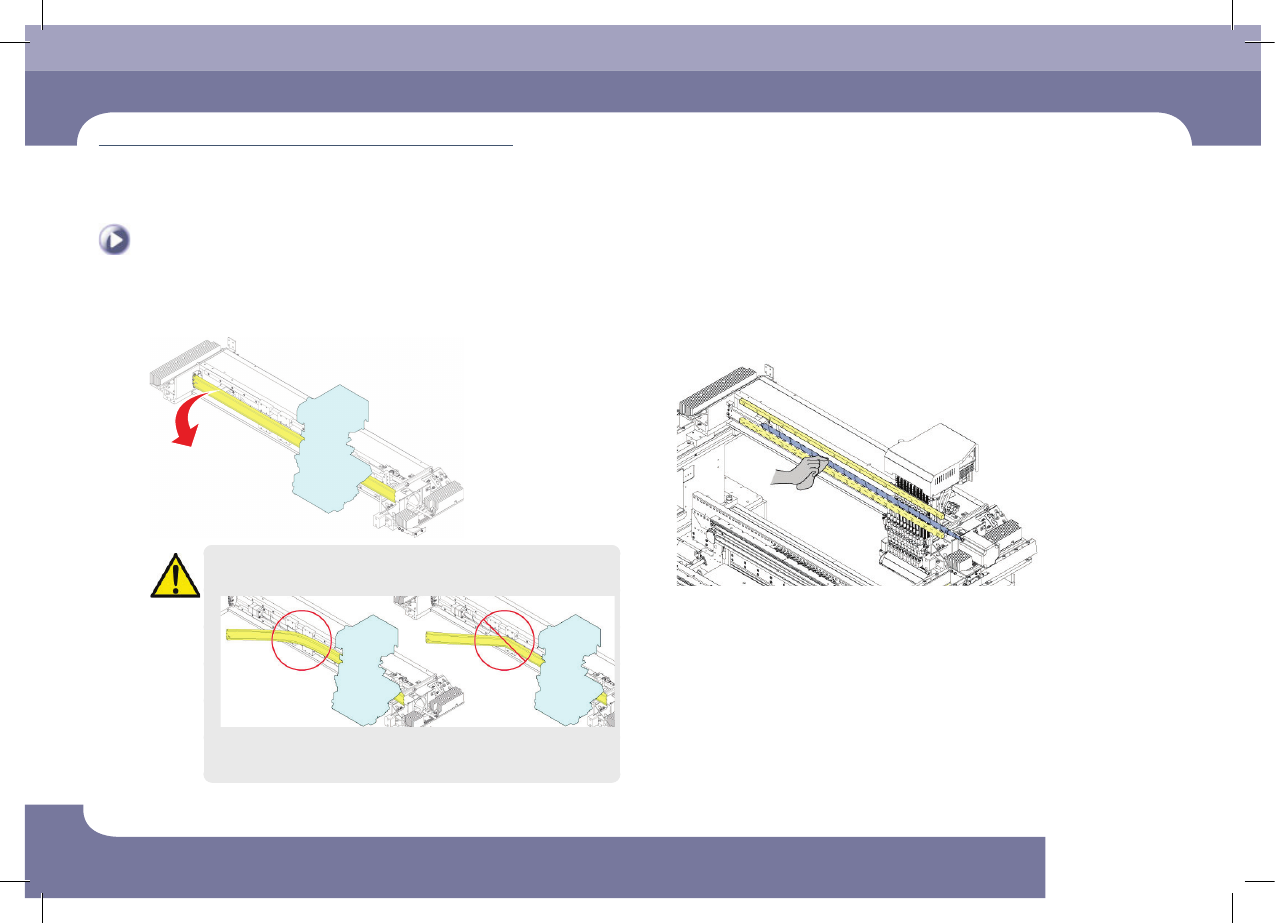
Cleaning and Lubricating X Frame LM Guide, Ball Screw
Monthly Inspection
Step 7.
Remove the cover from the X-frame.
Caution
When removing the grease scatter prevention cover, exercise great
care so that it will not be bent.
If the cover is bent, it cannot be used. Therefore, a new one must
be purchased.
Step 8.
Clean the LM guide rail and ball screw using an industrial
use paper wipe.

Monthly Inspection
chapter 5
Next Generation, Multi-Functional Placer
DECAN S1 Maintenance Handbook
5-15
Cleaning and Lubricating X Frame LM Guide, Ball Screw
Step 9.
Fasten the bolts fixing the cover in the order shown in
the following figure using a hex wrench (M3).
4
2
1
3
Caution
When assembling the grease scatter prevention cover, exercise great
care so that it will not be bent.
If the cover is bent, it cannot be used. Therefore, a new one must
be purchased.
Step 10.
After inserting a steel plate with a thickness of 2.0mm
between the grease scatter prevention cover and head,
position the head at the center of the X-frame to check
whether the space between the cover and head is more
than 2.0mm.

Monthly Inspection
chapter 5
Next Generation, Multi-Functional Placer
DECAN S1 Maintenance Handbook
5-16
Cleaning and Lubricating X Frame LM Guide, Ball Screw
Monthly Inspection
Step 11.
Fasten the bolts fixing the cover in the order shown in
the following figure using a hex wrench (M3).
4
2
1
3
Step 12.
Fasten the cover tension adjustment bolts using a hex
wrench (M4).
Fasten the tension adjustment bolts so that the block of the grease
scatter prevention cover and the spacer come into close contact.