00197195-02-UG SetupCenter 5.1_en.pdf - 第99页
Operating the Barcode Reader Barcode Reader Display Barcode Reader - General Exercises User Guide SIPLACE Setup Center 5.1 99 6.3 Barcode Reader - General Exercises 6.3.1 Barcode Reader Display The barcode reade r displa…
Operating the Barcode Reader
Motorola MC70/MC75 Scanner Roaming-Barcode for MC70/MC75 Barcode Scanner
98 User Guide SIPLACE Setup Center 5.1
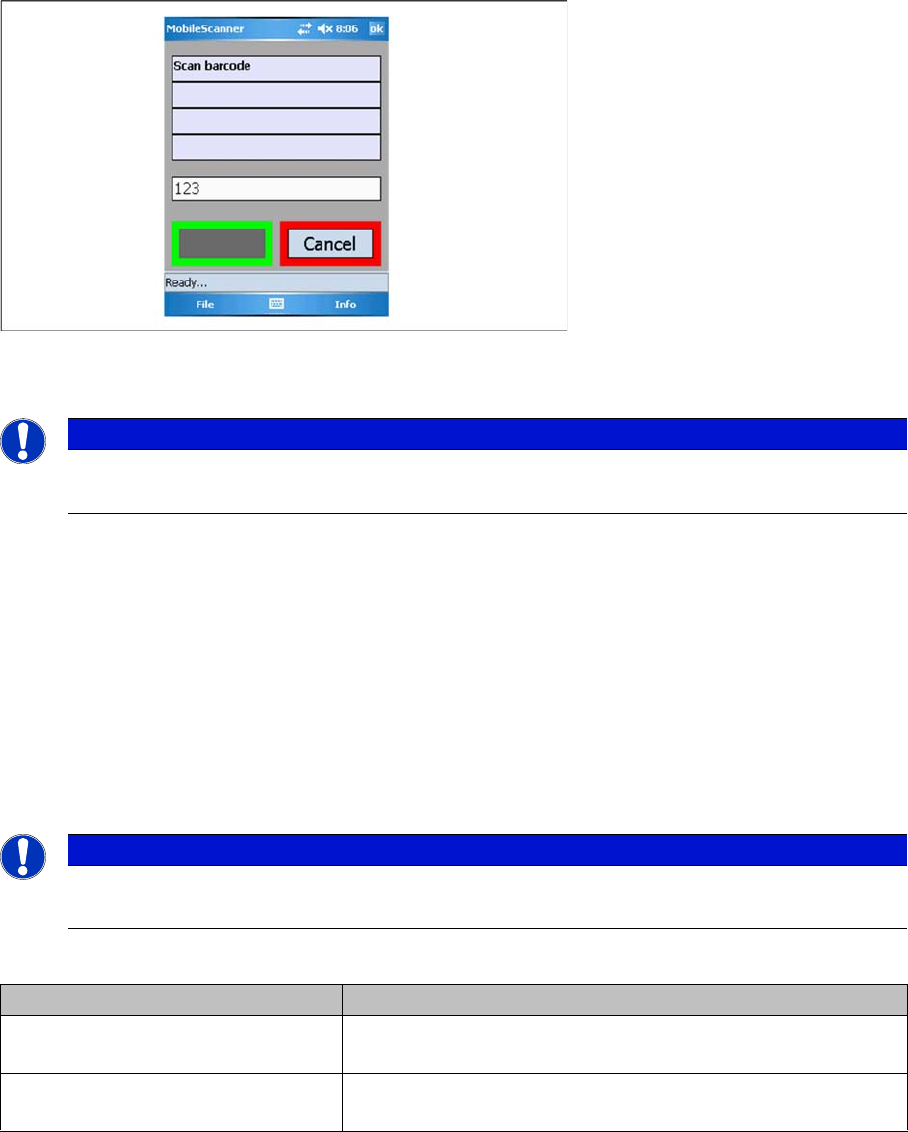
"Cancel" allows you to terminate the entry at any time. Press the Enter button "ENT" to accept and apply
the entry.
To cancel an action (e.g. manual barcode entry, data exchange), press the backspace button "BKSP".
6.2.3 Roaming-Barcode for MC70/MC75 Barcode Scanner
Roaming barcodes enable you to operate an MC70/MC75 scanner in connection with multiple Setup
Center computers. By scanning in this barcode, the scanner is linked to the Setup Center computer con-
tained in the barcode.
Barcode format
Compile the barcode with the following format:
$IP<Hostname/IP-Address>-<Port>
Explanation
Example:
$IP192.168.10.10-7575
$IPSDD2140C-7575
Setup Center is installed for one line, on the "SDD2140C" computer, with the IP address 192.168.10.10.
Setup Center awaits inputs at port 7575.
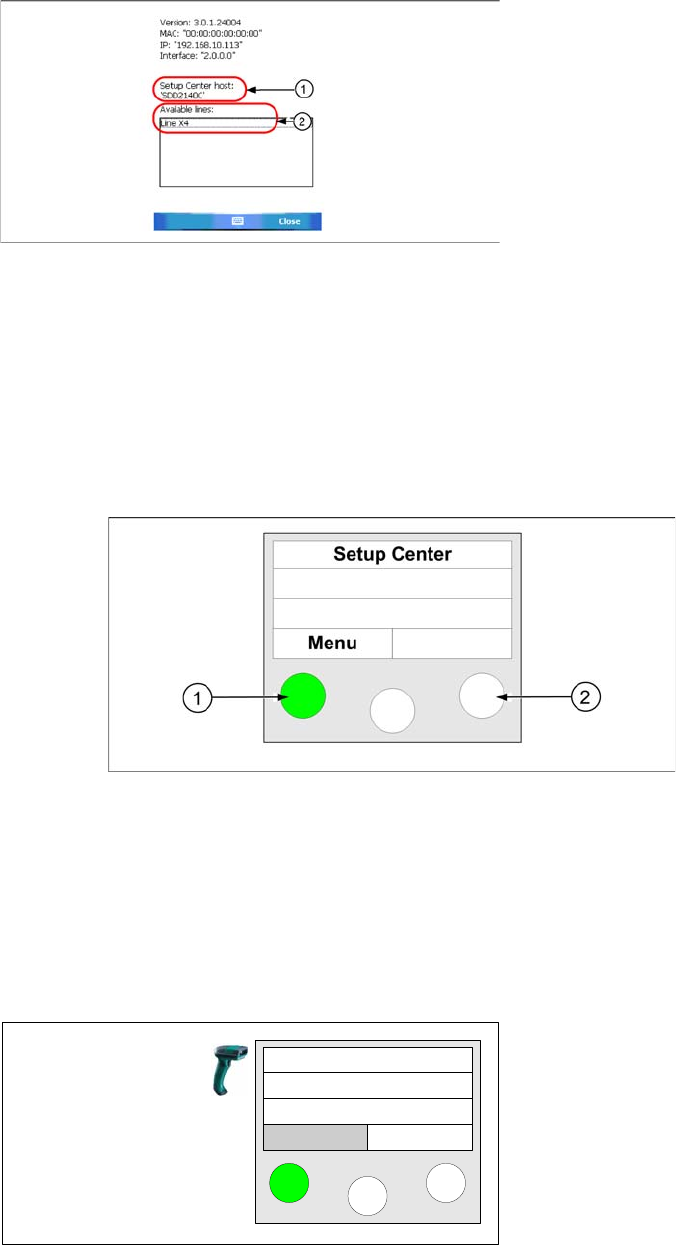
► After scanning in the barcode, the information dialog is shown with the connection data:
NOTICE
Information about character entry
Information about the characters to be entered can be found in the Motorola manual provided.
NOTICE
Use code type 39
It is recommended to use code type 39 here.
Attribute Meaning
<Hostname/IP-Address> The computer name or the IP4 address of the computer on
which Setup Center is installed.
<Port> The number of the port at which Setup Center awaits mobile
scanner inputs (standard: 7575).
Operating the Barcode Reader
Barcode Reader Display Barcode Reader - General Exercises
User Guide SIPLACE Setup Center 5.1 99
6.3 Barcode Reader - General Exercises
6.3.1 Barcode Reader Display
The barcode reader display is divided into two areas. The top three lines provide the user with informa-
tion about the current step. The bottom line shows the current functions for the left and right buttons.
These are adjusted according to the current step.
The following diagram shows the barcode reader display and will be used throughout the exercises:
Legend
1. Button pressed
2. Button
6.3.2 Scanning a Packaging Unit
The following steps explain how to scan a packaging unit and store the data in the Setup Center data-
base. To scan a packaging unit, you have to use unique barcodes.
Legend:
1. Host name / IP address of the Setup Center computer
2. Available lines in Setup Center
► Take the barcode reader and press the Enter key un-
til the main menu appears on the reader display.
► Press the button under the word "Menu" (soft key
"Menu")
Setup Center
Menu
Operating the Barcode Reader
Barcode Reader - General Exercises Additional Information During Setup Verification
100 User Guide SIPLACE Setup Center 5.1
If a label consists of several barcodes, these need to be scanned in, one after the other, until the a signal
indicates that you have reached the end of the label.
In this step, SIPLACE Setup Center records the packaging unit.
6.3.3 Additional Information During Setup Verification
During setup verification online and offline, you have the possibility to collect additional information for
each track via the reader, for instance the display of the component name, the current setup and line as
well as the location of the station.
Prerequisite:
You are in online/offline setup verification or in refill mode.
Using the Reader:
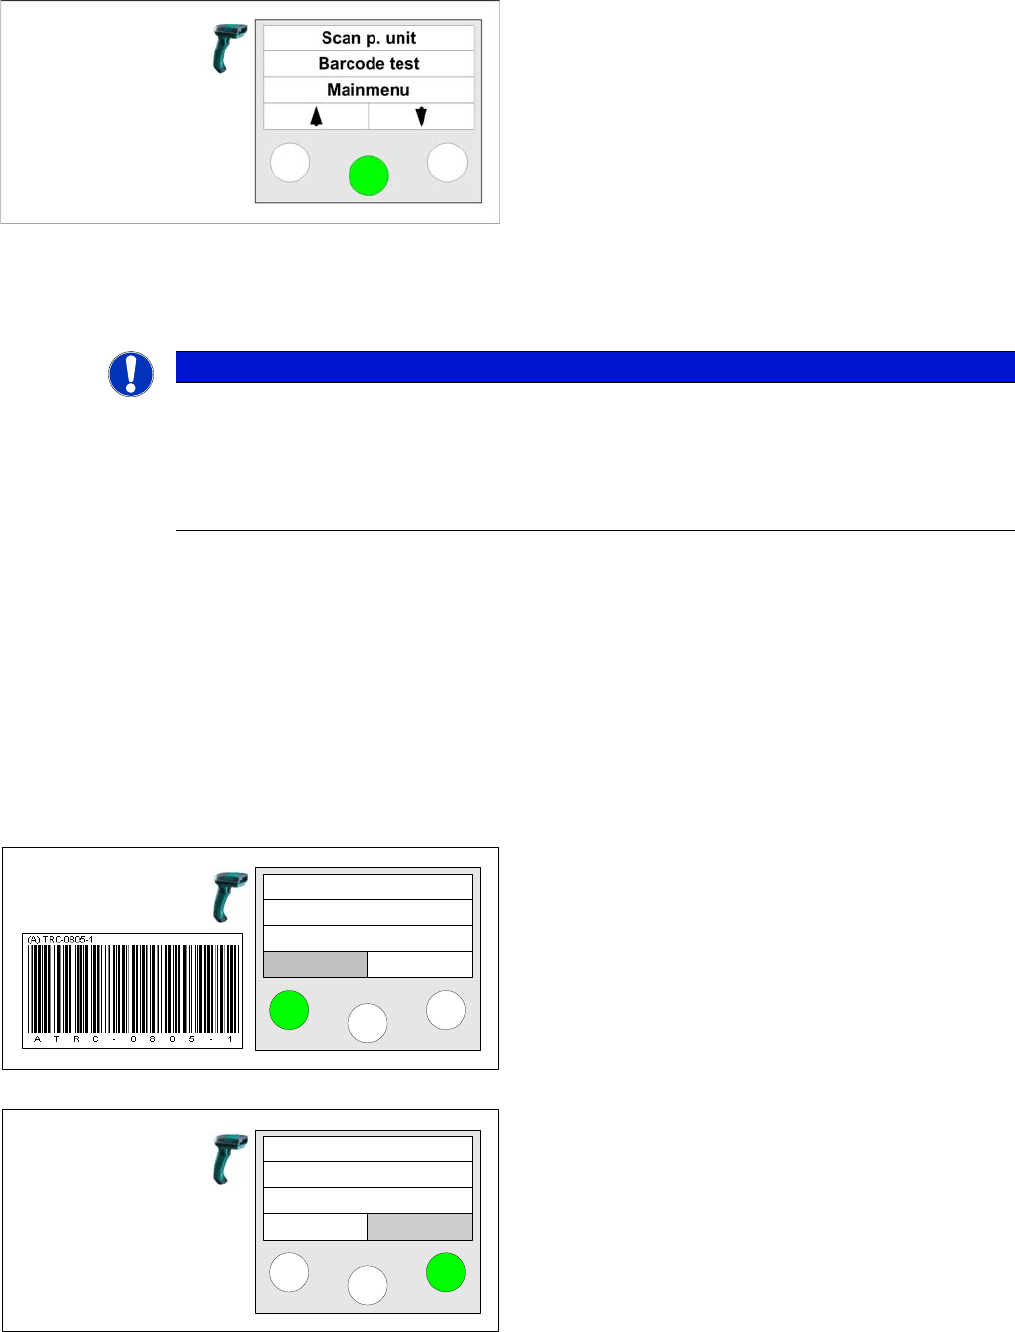
► Use the soft keys to browse "up" and "down" in the
"Scan p. unit" menu. Then press the Enter key.
► Start to scan in the barcode label on the packaging
unit.
NOTICE
Scanning the unique barcode
If a packaging unit has already been scanned in previously, you only need to scan in the unique
barcode. SIPLACE Setup Center will automatically recognize the packaging unit that has al-
ready been recorded.
This simplifies the working steps with recorded packaging units and saves you time.
Step 1
During online/offline setup verification and refill the Info
option allows you to display additional information for
each track at the reader. To do this, press the left key of
the reader.
Step 2
The component name is displayed .
With the Next key on the right, you can display additional
information.
With the Back key, on the left, you can exit the info menu.
You must complete this step to continue with setup veri-
fication.
Track: 55
Scan component
Info >>
Component:
TRC-0805-1
Back Next