00195427-02_AI_HeadReconfigKitsD1D2_DE+EN.pdf - 第57页
Assembly instructions Head Re configuration SIPLACE D 1 / D2 Edition 03/2007 55 2.6 Prep aratory measures : Back-up the machine dat a for the existing MA configuration (Hosts.txt, MaData.zip, MaDataInfo.zip, Services.txt…
Assembly instructions Head Reconfiguration SIPLACE D1 / D2
Edition 03/2007
54
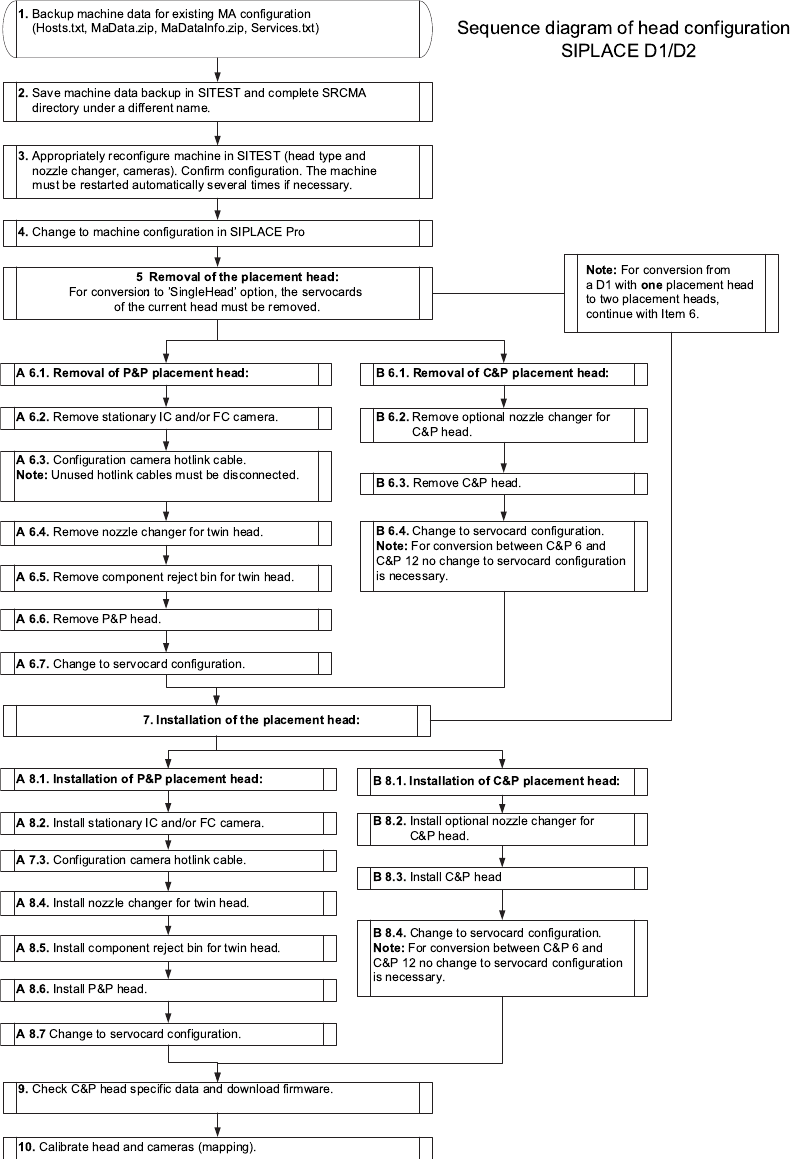
2.5 Placement head replacement sequence
2

Assembly instructions Head Reconfiguration SIPLACE D1 / D2
Edition 03/2007
55
2.6 Preparatory measures
: Back-up the machine data for the existing MA configuration
(Hosts.txt, MaData.zip, MaDataInfo.zip, Services.txt)
: Back-up the machine data in SITEST.
Back-up the complete SRCMA directory under a different name.
: Move out the component table or WPC4 if necessary and remove the tape container.
: Remove the waste chute:
Unscrew both screws about 8 mm and push the waste chute out to the back.
2.7 Installing the Pick&Place placement head
This converts a D1 Single head machine (with C&P placement head) to a D1. 2
2.7.1 Configuring the P&P head using the machine configuration wizard
: Start SITEST and select "Settings—Machine Configuration".
: Set the new placement head and the cameras (Standard-camera type 36 / Optional FC-ca-
mera type 25 / IC-camera type 33) and nozzle changers in the machine configuration wizard.
Save the result!
2
: Shut down the station computer.
: Switch the placement machine off at the main switch.
2Detailed instructions for configuring the placement head can be found in the SITEST online help
under Settings / Settings for the Twin Head. 2
Assembly instructions Head Reconfiguration SIPLACE D1 / D2
Edition 03/2007
56
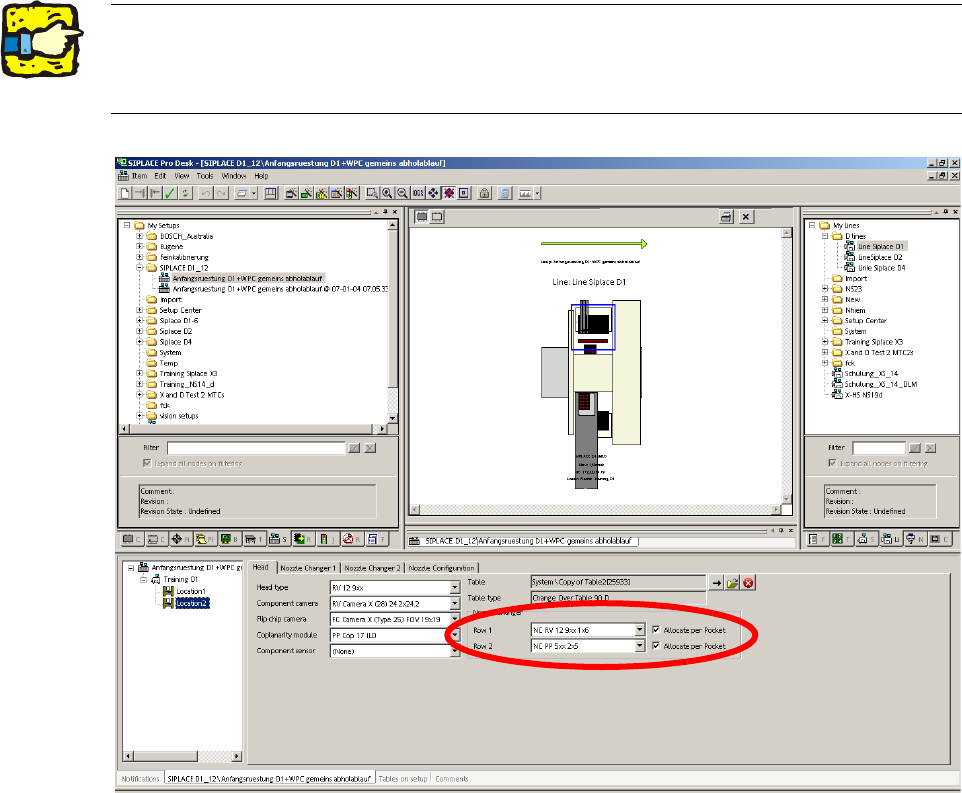
2.7.2 Configuring the P&P head with SIPLACE Pro
: Go to 'Setup editor' —'Location'—'head tab' and enter the C&P placement head.
2
2
: Reoptimize the set-up in SIPLACE Pro.
2The nozzle changer for the P&P head must be configured as row 2 at location 2. 2
For a D1S (with C&P placement head) for a location without placement head, "none" must be
entered for head type and nozzle changer. 2