OM-1455-004_w.pdf - 第45页
1-14 Tg1576-ID-SO 4.2 Fixing Pallets 071 1-003 4.2 Fixing Pallets Fixing Pallet Area where no tray should be put 136mm Fig. A6 Fixing Pallet Note No tray should be put in the shadowed area. • Attachment of T ray (1) Put …
1-13
Tg1576-ID-SO
0709-003
4.1 Single Tray Feeder
4.1 Single Tray Feeder
This mechanism is used for moving the pallet to the pick-up position.
This mechanism moves the pallet and transfers it to the component pick-
up position. Then, after the component pick-up, it houses the pallet at the
component replenishment position.
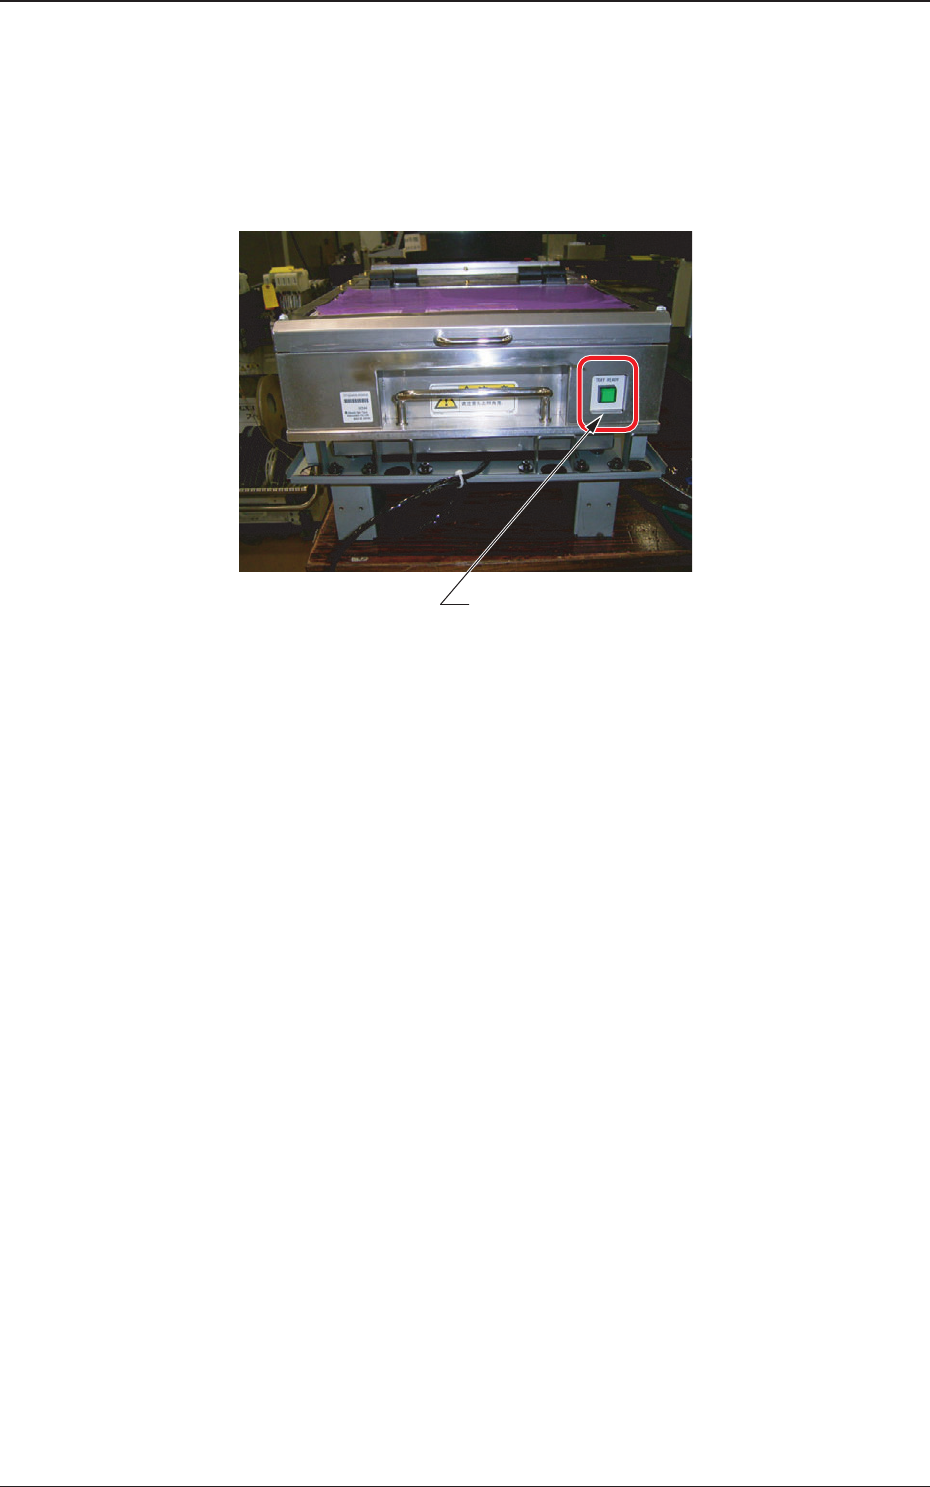
[TRAY READY] Switch
Fig. A5
[Traverse]
• This cylinder mechanism is used for transferring the pa
llet to the mponent
pick-up position. Using the cylinder forward and backward movement,
the pallet xed onto the cylinder is moved between the component pick-
up position (forward limit) and tray supply position (backward limit).
[TRAY READY]
• The tray supply door is opened or closed.
The LED shows the following conditions.
LED ON
: The door is locked.
LED OFF
: The door locking is cancelled.
1-14
Tg1576-ID-SO
4.2 Fixing Pallets
0711-003
4.2 Fixing Pallets
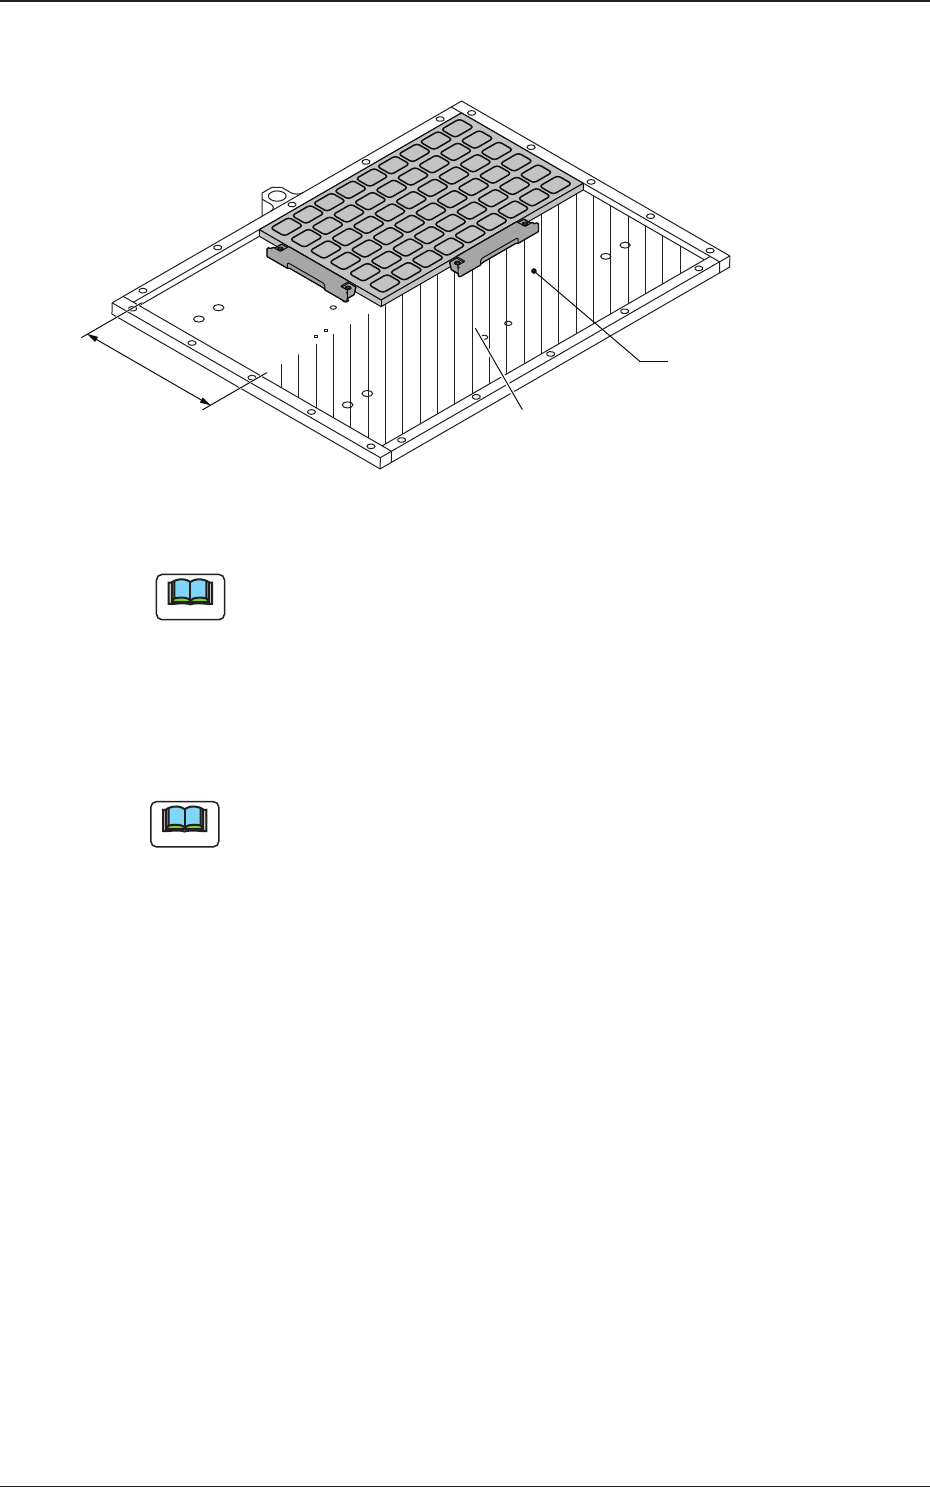
Fixing Pallet
Area where no tray should be put
136mm
Fig. A6 Fixing Pallet
Note
No tray should be put in the shadowed area.
•
Attachment of Tray
(1) Put the tray on the rear right side of the xing pallet.
(2) Hold the tray securely with the tray magnets.
Note
(a) Note that the tray magnets must be attached differently, depending on
the type or the shape of a tray.
(b) When the total mass (tray + components) exceeds "500 g", add the
tray magnets in the drawout direction of the pallet according to the
total mass.
Ref.:
One tray magnet has the capability to hold the weight of
approximately 500 g.
(c) It is recommended that up to 4 trays should be mounted when more
than one tray must be used although it is described in the
specications that up to 9 types of trays can be mounted.
(3) Check how the trays are mounted.
Check for any positional deviation of a component, missing
components, incorrectly seated trays (trays seated aoat), and incorrect
location of the tray magnets.
•
Detachment of Tray
(1) Detach the tray magnets.
(2)
Detach the tray from the xing pallet.

1-15
Tg1576-ID-SO
4.3 Tray Magnets
WARNING
Do not bring the tray magnet close to the area where a
pacemaker is implanted. Otherwise, the pacemaker may be
inuenced by electromagnetic impulses of the magnet, causing
the wearer to faint, etc.
CAUTION
Do not bring a magnetic card or a watch close to the tray
magnets
.
Otherwise, the data of the magnetic card might be cleared or a watch,
etc., may be damaged due to the strong magnetism.
•
Mass and Size of Tray Supportable by Tray Magnet
Mass
:
Approx. 500 g
Size
:
Max. 315 mm
Max. 315mm
Tray Magnets
Tray
Fig. A7 Tray Magnets
4.3 Tray Magnets
0711-002