00197543-01_SM_JTF-S_ JTF-M_en - 第37页
Service Works 2.4.3 Cleaning and Replacing Short P awls (SIPLACE JTF -S) Service Base Unit Service Manual SIPLACE JEDEC Tray Feeder 37 Checking pa wl fo r free movement Reinstalling the side cover ► Lift up the lower paw…
Service Works
Service Base Unit 2.4.3 Cleaning and Replacing Short Pawls (SIPLACE JTF-S)
36 Service Manual SIPLACE JEDEC Tray Feeder
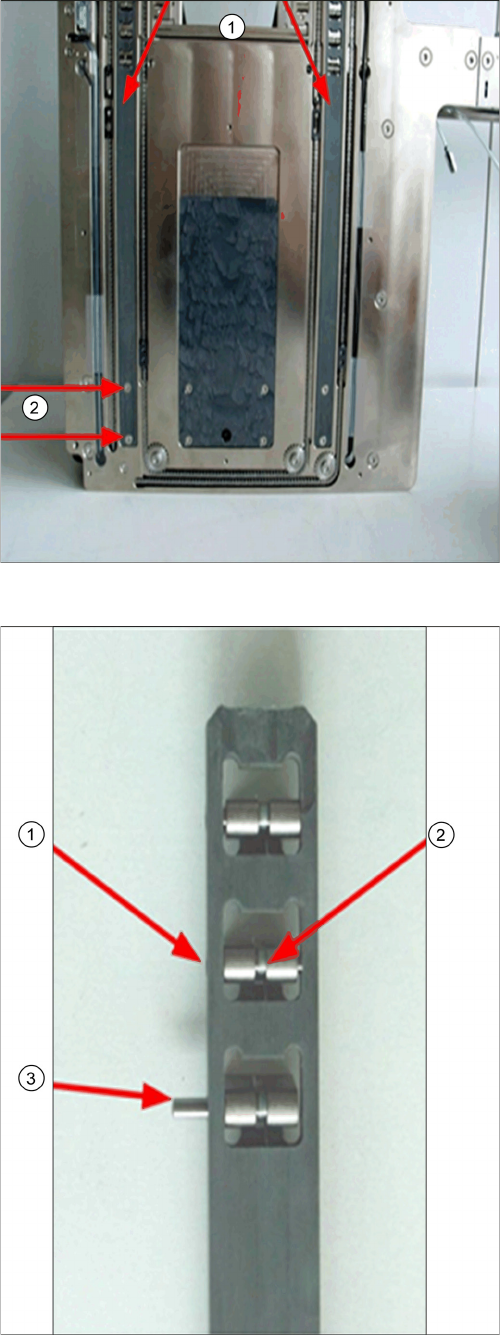
Removing the pawl lift rods
► Remove this two screws (2) to remove the pawl lift
rods (1).
Replacing the dowel pins or spring
► When reinstalling the dowel pin, be sure the pin is
flush with the side (1).
► Before reinstalling the pawl lift rod, be sure the pawl
moves nicely (2).
► Push out the dowel pin (3) to remove the pawl.
Service Works
2.4.3 Cleaning and Replacing Short Pawls (SIPLACE JTF-S) Service Base Unit
Service Manual SIPLACE JEDEC Tray Feeder 37
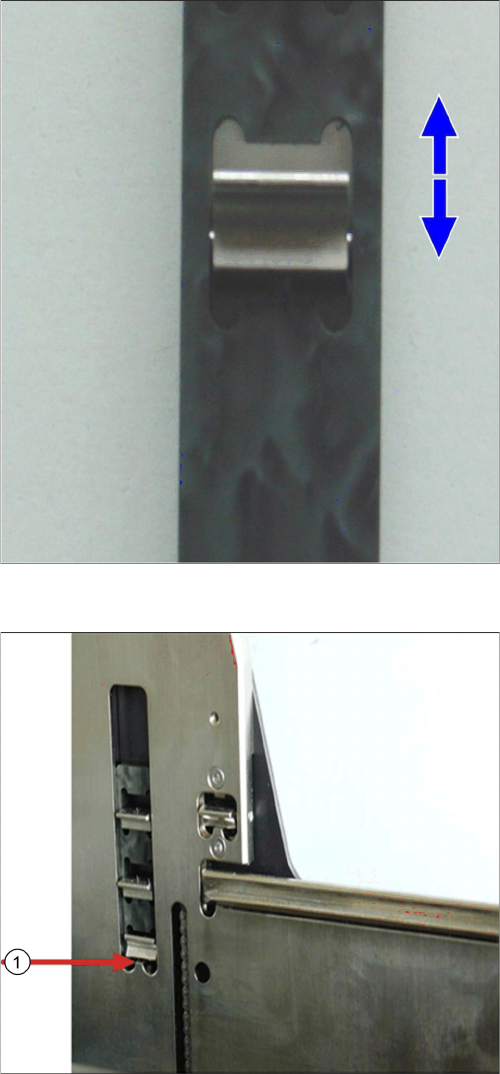
Checking pawl for free movement
Reinstalling the side cover
► Lift up the lower pawl (1) before tight the side cover
screws in order not to pinch the lower pawl with the
notch of the inner side plate as marked above.
Service Works
Setup and Adjustment Conveyor Unit 2.4.4 Checking Freedom of Movement for long Pawls (SIPLACE JTF-S)
38 Service Manual SIPLACE JEDEC Tray Feeder
2.4.4
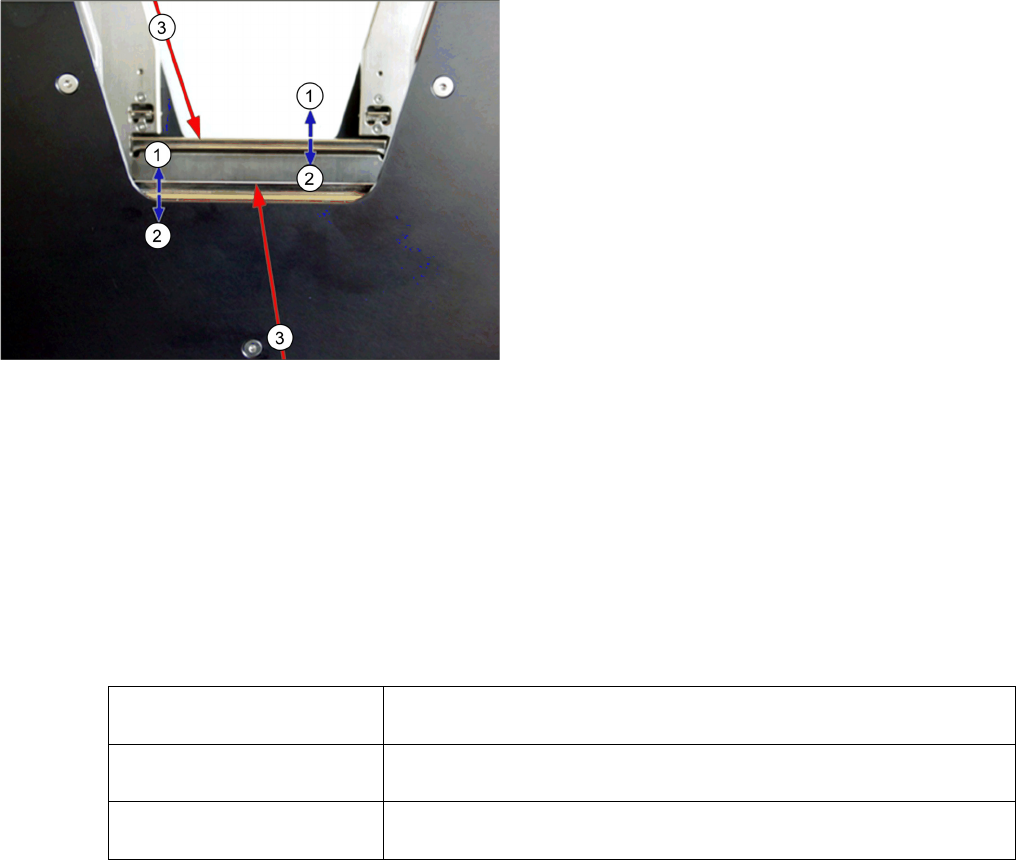
2.4.4 Checking Freedom of Movement for long Pawls (SIPLACE JTF-S)
Checking Freedom of Movement for long Pawls (SIPLACE JTF-S)
The long pawl should always fall down in place by gravity.
► Push the long pawl (3) to one side and test the upward movement as shown below.
► Push the long pawl (3) to the other side and test the upward movement again.
2.5
2.5 Setup and Adjustment Conveyor Unit
Setup and Adjustment Conveyor Unit
2.5.1
2.5.1 Introduction
Introduction
For a reliable operation it is important to set up the feeder correctly. If the tray moves too quickly, small
or lightweight parts may move out of position. In this section is described how to set up the JEDEC Tray
feeder correctly.
The unit may be set up to operate in three ways. There are differences in the setup procedure, so you
must identify the application for your particular feeder.
2.5.2
2.5.2 Conveyor Speed Settings Overview
Conveyor Speed Settings Overview
Most of the settings on the feeder are not particularly critical. These are set up at the factory. Unless they
are radically changed, they should not cause performance problems. In case you have to reset the feed-
er to the original settings you find these adjustments detailed in this section.
The lift mechanism must handle a wide range of load conditions. The lift mechanism is set up at the fac-
tory to handle a condition where it is holding just one unloaded tray - the lightest possible load. As more
trays are added, the operating speed of the lift mechanism simply slows down a bit.
The more critical settings control the motion of the conveyor. Performance problems may appear if the
type of die is changed. The operating speed of the conveyor is fi xed. The motion of the trays is affected
by the slow-down delays at each end of the travel. For example the feeder has been set up to handle
relatively heavy die, and then begins to process die which are very light, with a large surface area. If the
conveyor mechanisms are set up to move too quickly at the end of travel, the lighter die might tend to lift
or " fl y." At the factory, the feeder is set up to provide the best compromise performance for a wide range
of die types.
There are seven different stages in the process:
Tray moving out:
Checking the long pawls
1. Move the pawl (3) to the up position, release it and
make sure it is falling down all the way to the down
position.
2. Test for freedom of movement in both directions.
Unload application Full trays loaded at bottom of feeder, parts supplied to host machine,
empty trays unloaded at top.
Load application Empty trays loaded at bottom of feeder, parts taken from host machine,
full trays unloaded at top.
Handling application Full trays loaded at bottom of feeder, parts supplied to host machine,
parts returned from host machine, full trays unloaded at top.