00197543-01_SM_JTF-S_ JTF-M_en - 第51页
Service Works 2.6.2 Elevator Bar Alignment Procedure Setup and Adjustments Bas e Unit Service Manual SIPLACE JEDEC Tray Feeder 51 Bottom plate and mounting screws 1. Mountin g screws 2. Bottom plate 3. Mountin g screws E…
Service Works
Setup and Adjustments Base Unit 2.6.2 Elevator Bar Alignment Procedure
50 Service Manual SIPLACE JEDEC Tray Feeder
2.6.2
2.6.2 Elevator Bar Alignment Procedure
Elevator Bar Alignment Procedure
For the tray separation and lift function of the SIPLACE JTF-M feeder to work properly, the elevator bars
must be aligned. The elevator bars must be parallel to each other, and each elevator bar must be parallel
to the alignment holes drilled in each feeder side panel. The following procedure outlines the steps re-
quired to check the alignment, and if necessary, align the bars.
► (1) Remove all trays from the feeder and close the door. The elevator bars will move upward. The
alignment holes are shown in figure "Locations Of Elevator Bar Alignment Holes". Once the elevator
bars are close to the alignment holes, open the door and disconnect power to the feeder.
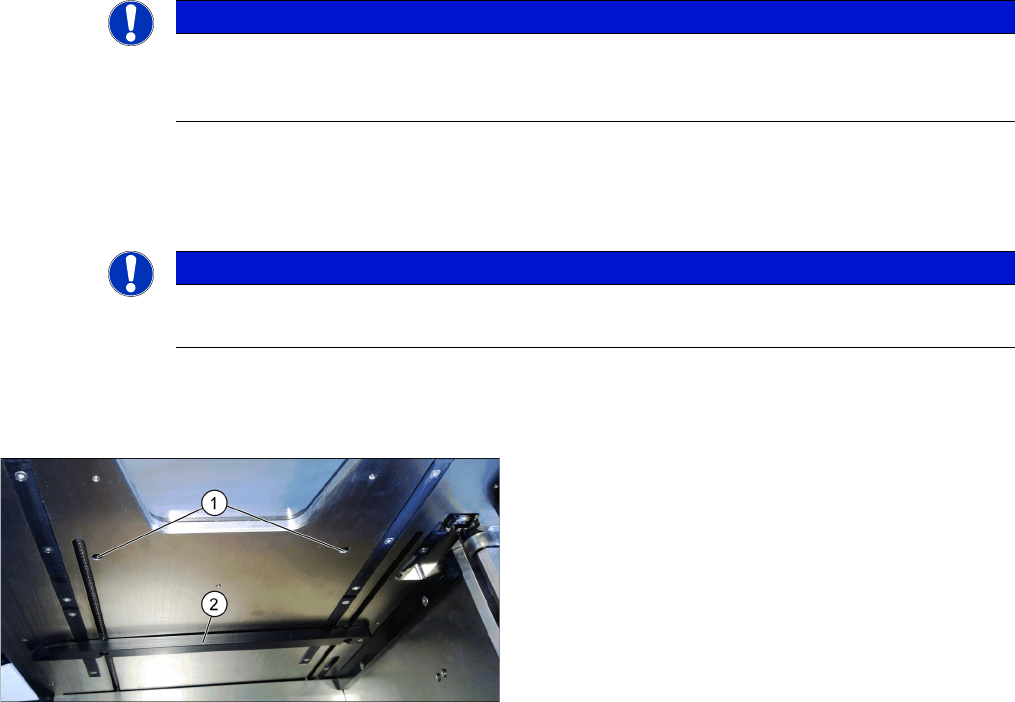
► (2) Remove the bottom support plate as shown in figure "Bottom Plate and Mounting Screws" by re-
moving the mounting screws.
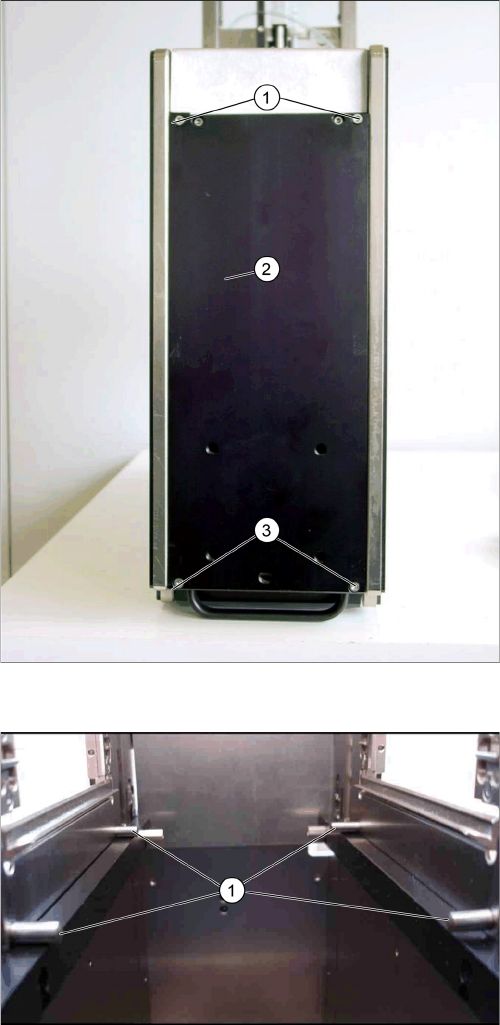
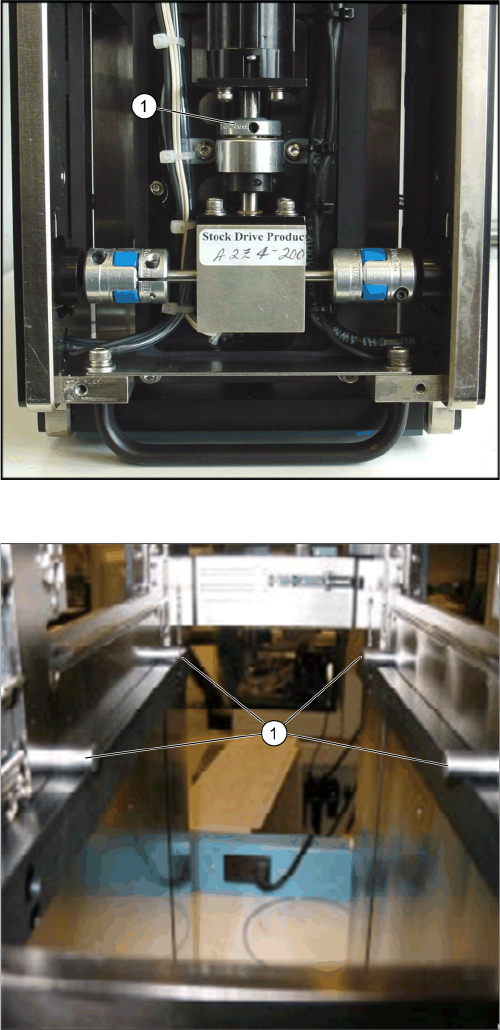
► (3) Insert the pins into the alignment holes (shown in figure "Elevator Bar Alignment Pins"). Manually
move the bars by turning the slip clutch (shown in figure "Slip Clutch Elevator") until the elevator bars
contact the pins.
► (4) Observe all four points where the elevator bars touch the pins. If all four points touch the pins
(see figure "Elevator Bar Alignment Pins - Correct Alignment"), the alignment is correct. If one bar
touches both pins and the other does not (shown in figure "Incorrect - Elevator Bar Is Not Level"),
see step 5. If one end of a bar touches a pin and the other does not (shown in figure "Incorrect -
Elevator Bar Is Not Level"), see step 6.
► (5) To align the elevator bars so that they are parallel to each other, loosen the screw on the fl ex
coupling on the side where the elevator bar does not touch the pins. See figure "Adjusting Couplings"
and figure "Elevator Bar Alignment Pins - Correct Alignment". Manually move the elevator bar up so
it touches the pins, and then tighten the screw on the fl ex coupling.
► (6) To align one elevator bar to the pins, remove the side cover on that side. On each side of the
feeder, there are two chain tensioning screws (see figure " Adjusting Chain Tension"). On the end
where the pin touches the elevator bar, loosen the screw 1⁄2 turn. Tighten the other chain tensioning
screw 1⁄2 turn. Repeat this process until the elevator bar touches the pins on both ends.
► (7) After making the adjustments, remove the alignment pins. Apply power to the feeder and close
the door. Allow the elevator to reach the top sensor and start moving downward. Open the door after
the elevator bar clears the alignment holes. Repeat steps 3 and 4 to verify the adjustments.
NOTICE
Tension of the elevator bar
Maintain the tension of the elevator bar against the pins when tightening the set screw on the
fl ex coupling.
NOTICE
Chain tension
By loosening one side and tightening the other equally, proper chain tension is maintained.
Locations of elevator bar alignment holes
1. Alignment holes
2. Elevator bar
Service Works
2.6.2 Elevator Bar Alignment Procedure Setup and Adjustments Base Unit
Service Manual SIPLACE JEDEC Tray Feeder 51
Bottom plate and mounting screws
1. Mounting screws
2. Bottom plate
3. Mounting screws
Elevator bar alignment pins
1. Alignment pins
Service Works
Setup and Adjustments Base Unit 2.6.2 Elevator Bar Alignment Procedure
52 Service Manual SIPLACE JEDEC Tray Feeder
Slip clutch elevator
1. Slip clutch
Elevator bar alignment pins - Correct alignment
1. Correct: The alignment pins contact four points on the
elevator bars at the same time.