00197543-01_SM_JTF-S_ JTF-M_en - 第54页
Service Works Setup and Adjustments Base Unit 2.6.2 Elevator Bar Alignment Pro cedure 54 Service Manual SIPLACE JEDEC Tray Feeder Adjusting couplings 1. Couplings 2. Loosen coupling wit h 2mm hex wr ench. Adjusting chain…
Service Works
2.6.2 Elevator Bar Alignment Procedure Setup and Adjustments Base Unit
Service Manual SIPLACE JEDEC Tray Feeder 53
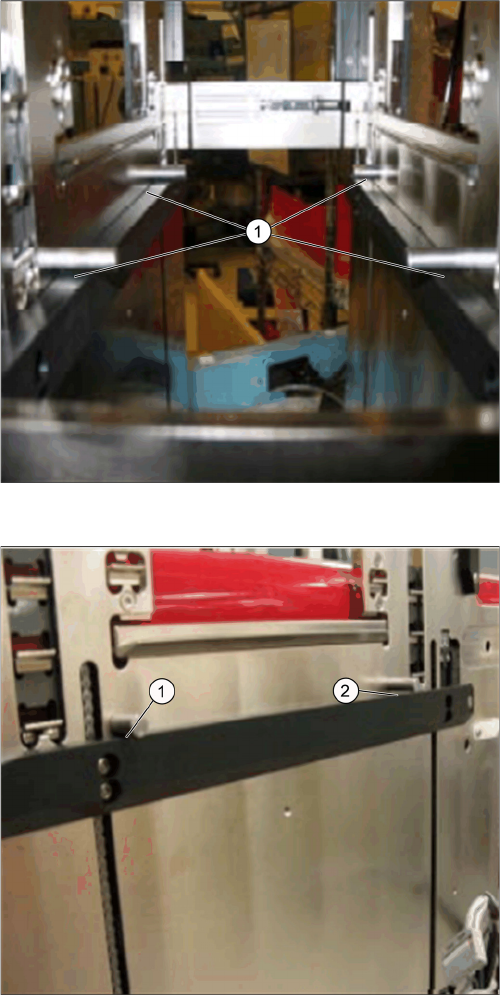
Incorrect - Elevator bars not at same level
The alignment pins contact the elevator bar on this side.
1. Incorrect: The alignment pins do not contact the ele-
vator bar on this side.
Incorrect - Elevator bar is not level
1. Alignment pin contacts elevator bar.
2. Incorrect : Alignment pin does not contact.
Service Works
Setup and Adjustments Base Unit 2.6.2 Elevator Bar Alignment Procedure
54 Service Manual SIPLACE JEDEC Tray Feeder
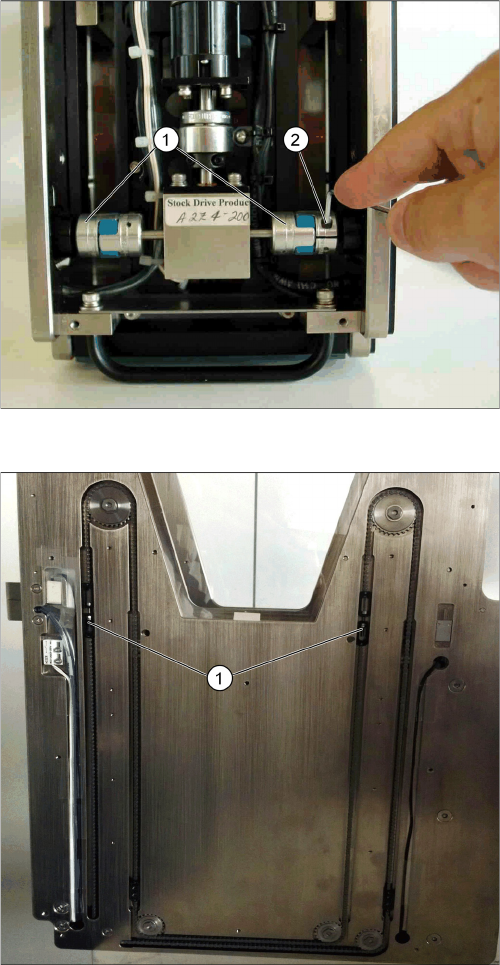
Adjusting couplings
1. Couplings
2. Loosen coupling with 2mm hex wrench.
Adjusting chain tension
1. Chain tensioning adjustment screws use a 2.5 mm
hex wrench.
Service Works
2.6.3 Feed Pusher Pneumatic Adjustment Setup and Adjustments Base Unit
Service Manual SIPLACE JEDEC Tray Feeder 55
2.6.3
2.6.3 Feed Pusher Pneumatic Adjustment
Feed Pusher Pneumatic Adjustment
The feed pusher assembly moves the tray from a stationary position in the magazine onto the moving
conveyor (see figure Tray feed pusher assembly (view from top)). A pneumatic fl ow control valve deter-
mines the speed of the "push" function. The "pusher return to home" function is controlled by spring ten-
sion. The following procedure outlines the feed pusher adjustments.
The feed pusher pneumatic fl ow control is located under the bottom plate (see figure "Removing the Bot-
tom Plate").
► Remove the front cover and then bottom plate to access the fl ow control valve (see figure "Feed
pusher flow control valve").
► To adjust the feed pusher speed; unlock the adjustment screw by loosening the locking nut (see fig-
ure "Feed pusher flow control valve").
► To increase the feed pusher speed, turn the adjustment screw in a counter clockwise direction.
► To decrease the feed pusher speed, turn the adjustment screw in a clockwise direction.
► Adjust pusher speed so trays reliably move onto conveyor without dislodging components.
► When adjustment is completed, tighten the locking nut and reattach bottom plate.
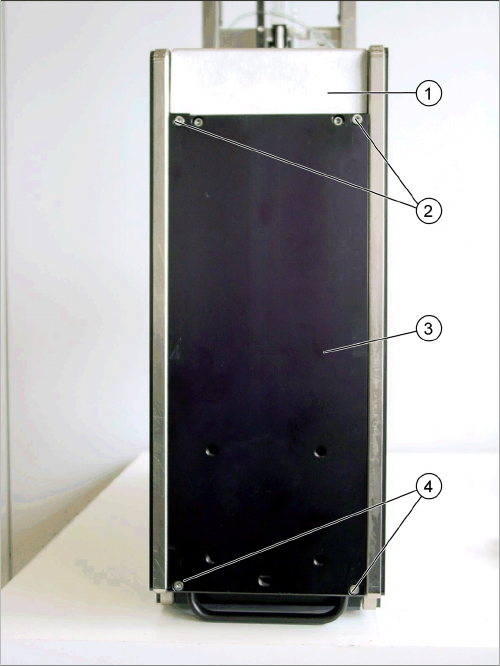
Removing the Bottom Plate
Bottom plate (1)
Front cover (3)
Bottom plate screws (4x) (2), (4)