YSi-V_Ope_E - 第46页
1-6 1 Part names and functions n Dual lane (Option) Y-axis X-axis Plus direction Minus direction Board Board Conveyor rail Lane 2 Lane 1 Axis configuration Example of dual lane, right-to-left flow W2-axis W1-axis CZ-axis…
1-5
1
Part names and functions
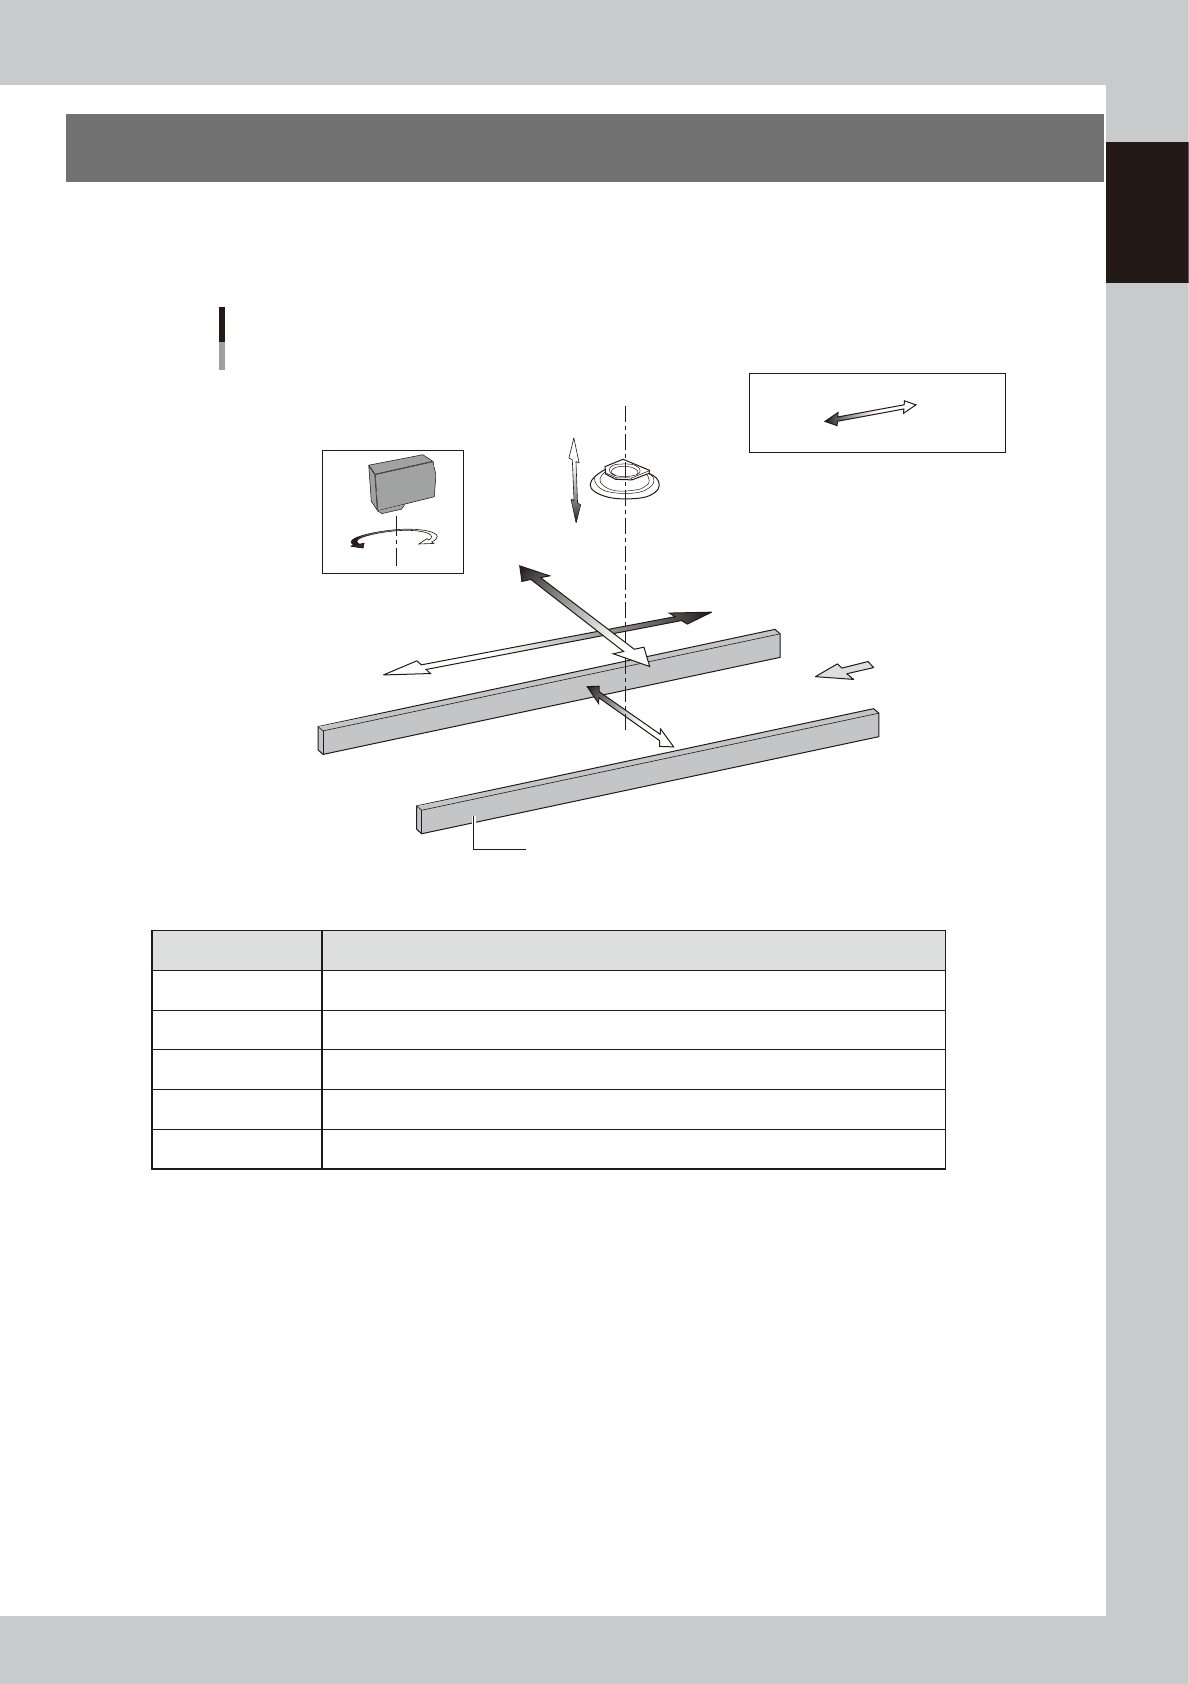
3. Axis configuration
The YSi-V servomotor-controlled axis configuration and movement are shown in the drawing and table below.
n
Single lane
Y-axis
X-axis
Plus direction
Minus direction
Board
Conveyor rail
Axis configuration
Example of single lane, right-to-left flow
W-axis
Laser height sensor : option
CZ-axis
(option)
R-axis
Inspection head
23113-M9-00
n
Function of each axis
Axis Function
X-axis Moves the camera in parallel with the board transport direction of the conveyor.
Y-axis Moves the camera perpendicular to the board transport direction of the conveyor.
CZ-axis * Changes the distance between the inspection head and board.
W-axis Changes the conveyor width.
R-axis Rotates the laser height sensor. (Single lane)
* Option
1-6
1
Part names and functions
n
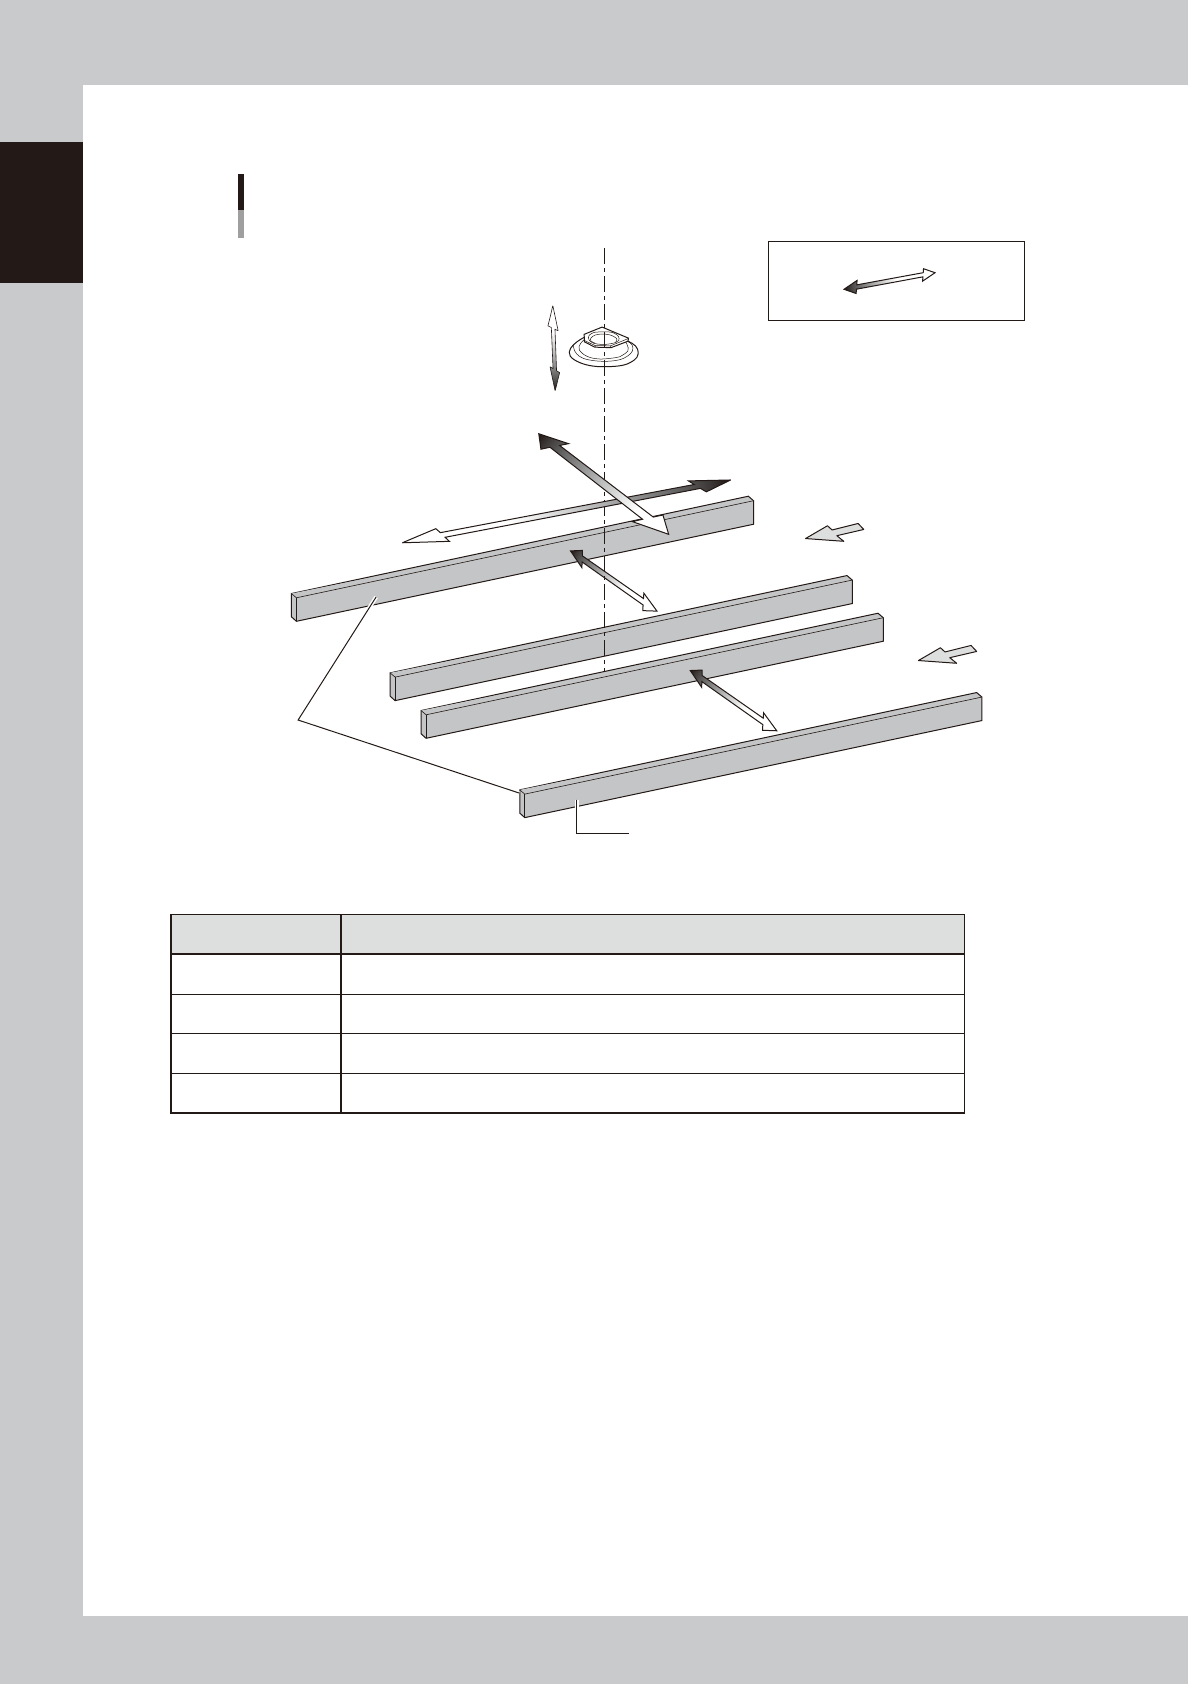
Dual lane (Option)
Y-axis
X-axis
Plus direction
Minus direction
Board
Board
Conveyor rail
Lane 2
Lane 1
Axis configuration
Example of dual lane, right-to-left flow
W2-axis
W1-axis
CZ-axis
(option)
Inspection head
Conveyor on
reference side
23113-M9-00
n
Function of each axis
Axis Function
X-axis Moves the camera in parallel with the board transport direction of the conveyor.
Y-axis Moves the camera perpendicular to the board transport direction of the conveyor.
CZ-axis * Changes the distance between the inspection head and board.
W1, W2-axis Changes the conveyor width.
* Option
1-7
1
Part names and functions
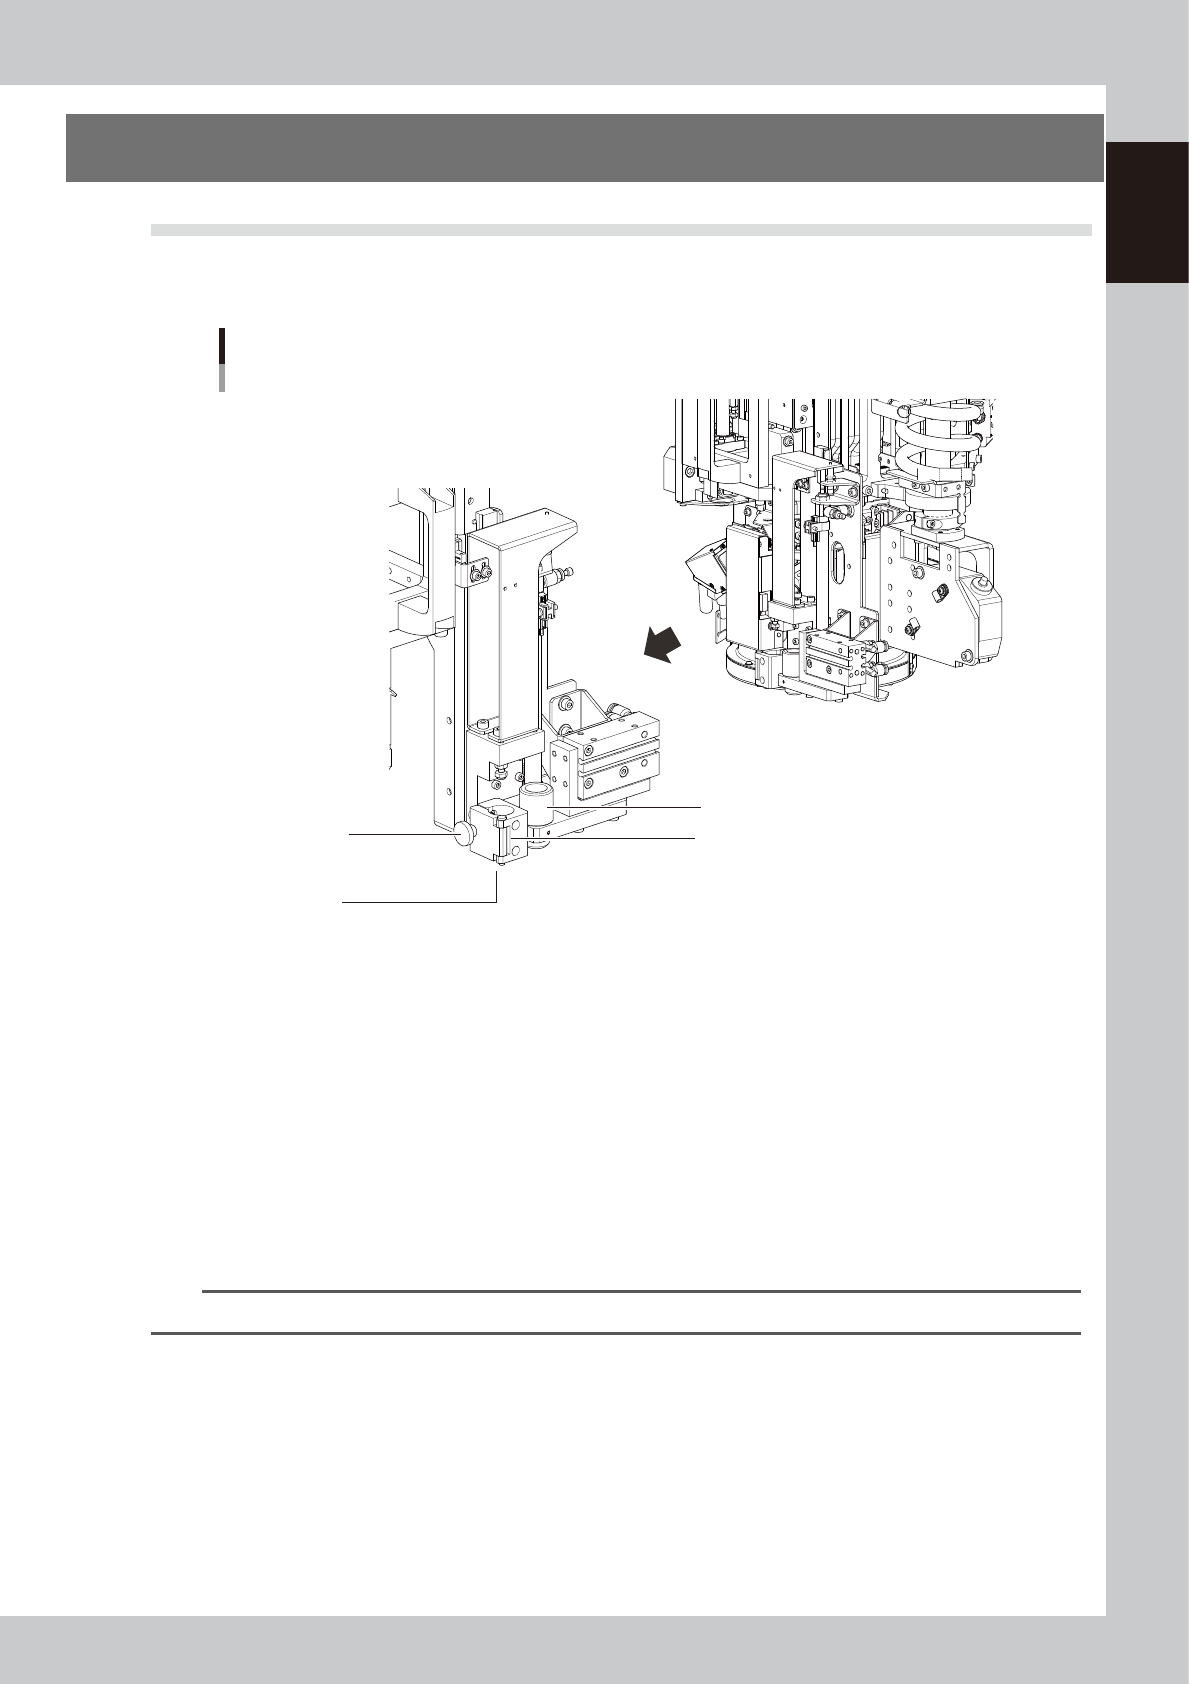
4. Option units
4.1 Marking unit
The YSi-V can be optionally equipped with a marking unit that draws marks and writes character strings on
boards depending on the results of board inspection.
Marker pen holder
Marker pen
insertion hole
Pen cap (moves back and forth)
Marking unit
YSi-V
Marker pen
clamp knob
23104-M9-00
n
Marker pen
Draws marks and writes character strings on boards.
n
Marker pen holder
Holds the marker pen. When the dedicated pen is in contact with the stopper (upper) of the pen holder, the height
becomes correct.
n
Marker pen clamp knob
Use this knob to clamp the marker pen. Turning the knob clockwise tightens the clamp and turning it counterclockwise
loosens the clamp.
n
Pen cap
This is used as the cap for the marker pen tip. The cap moves back and forth, and is in the back position when the
marking pen is being used.
TIP
For instructions on how to use the marking unit, see the option manual "Marking unit" at the end of this manual.