YSi-V_Ope_E - 第84页
4-20 4 Maintenance 7. Six-month inspection 7.1 Cleaning and greasing the marking unit (option) cam n Required tools • Lent-free cleaning wipe • Specified grease (NSL) • Hex wrench (3mm) • Protective glasses • Protective …
4-19
4
Maintenance
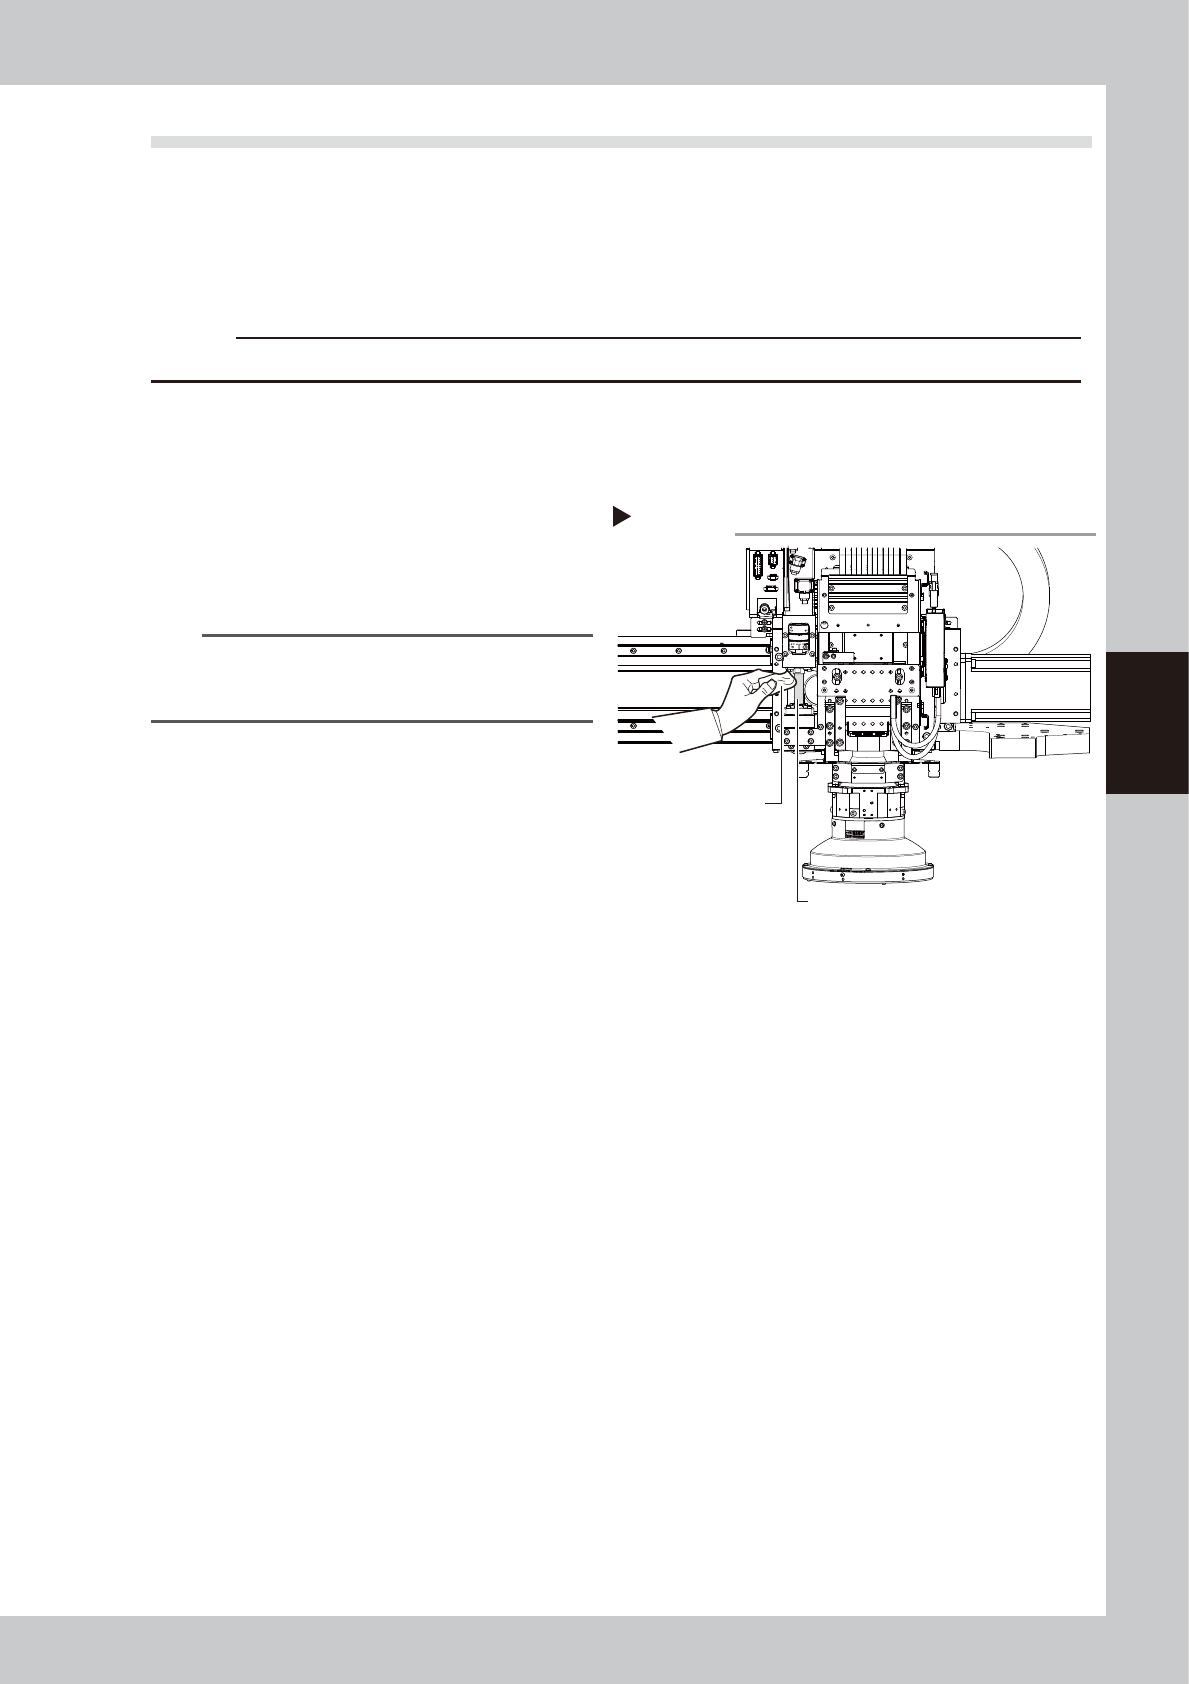
6.2 Cleaning and greasing the CZ axis (option) ball screws
n
Required tools
• Lent-free cleaning wipe
• Specified grease (NSL)
• Protective glasses
• Protective gloves
c
CAUTION
Wear protective glasses and gloves when handling grease.
e
1
Press the emergency stop button.
The YSi-V must be in emergency stop to
ensure safety during work.
2
Clean the W axis ball screw.
Wipe away the old grease and dirt from the
entire ball screw with a paper wipe.
53466-M9-00
n
NOTE
Wipe away the old grease and dirt in the lead groove
of the ball screw.
Also check that no debris or residue
remains in the lead groove.
3
Apply grease to the ball screw.
Apply the specified grease (NSL) by hand
uniformly over the entire ball screws.
4
Wipe away excess grease
.
After moving the CZ axis up and down, wipe
away excess grease with a paper towel.
Cleaning theCZ axis ball screw
Step 2
Ball screw
Paper wipe
4-20
4
Maintenance
7. Six-month inspection
7.1 Cleaning and greasing the marking unit (option) cam
n
Required tools
• Lent-free cleaning wipe
• Specified grease (NSL)
• Hex wrench (3mm)
• Protective glasses
• Protective gloves
c
CAUTION
Wear protective glasses and gloves when handling grease.
e
1
Press the emergency stop button.
The YSi-V must be in emergency stop to
ensure safety during work.
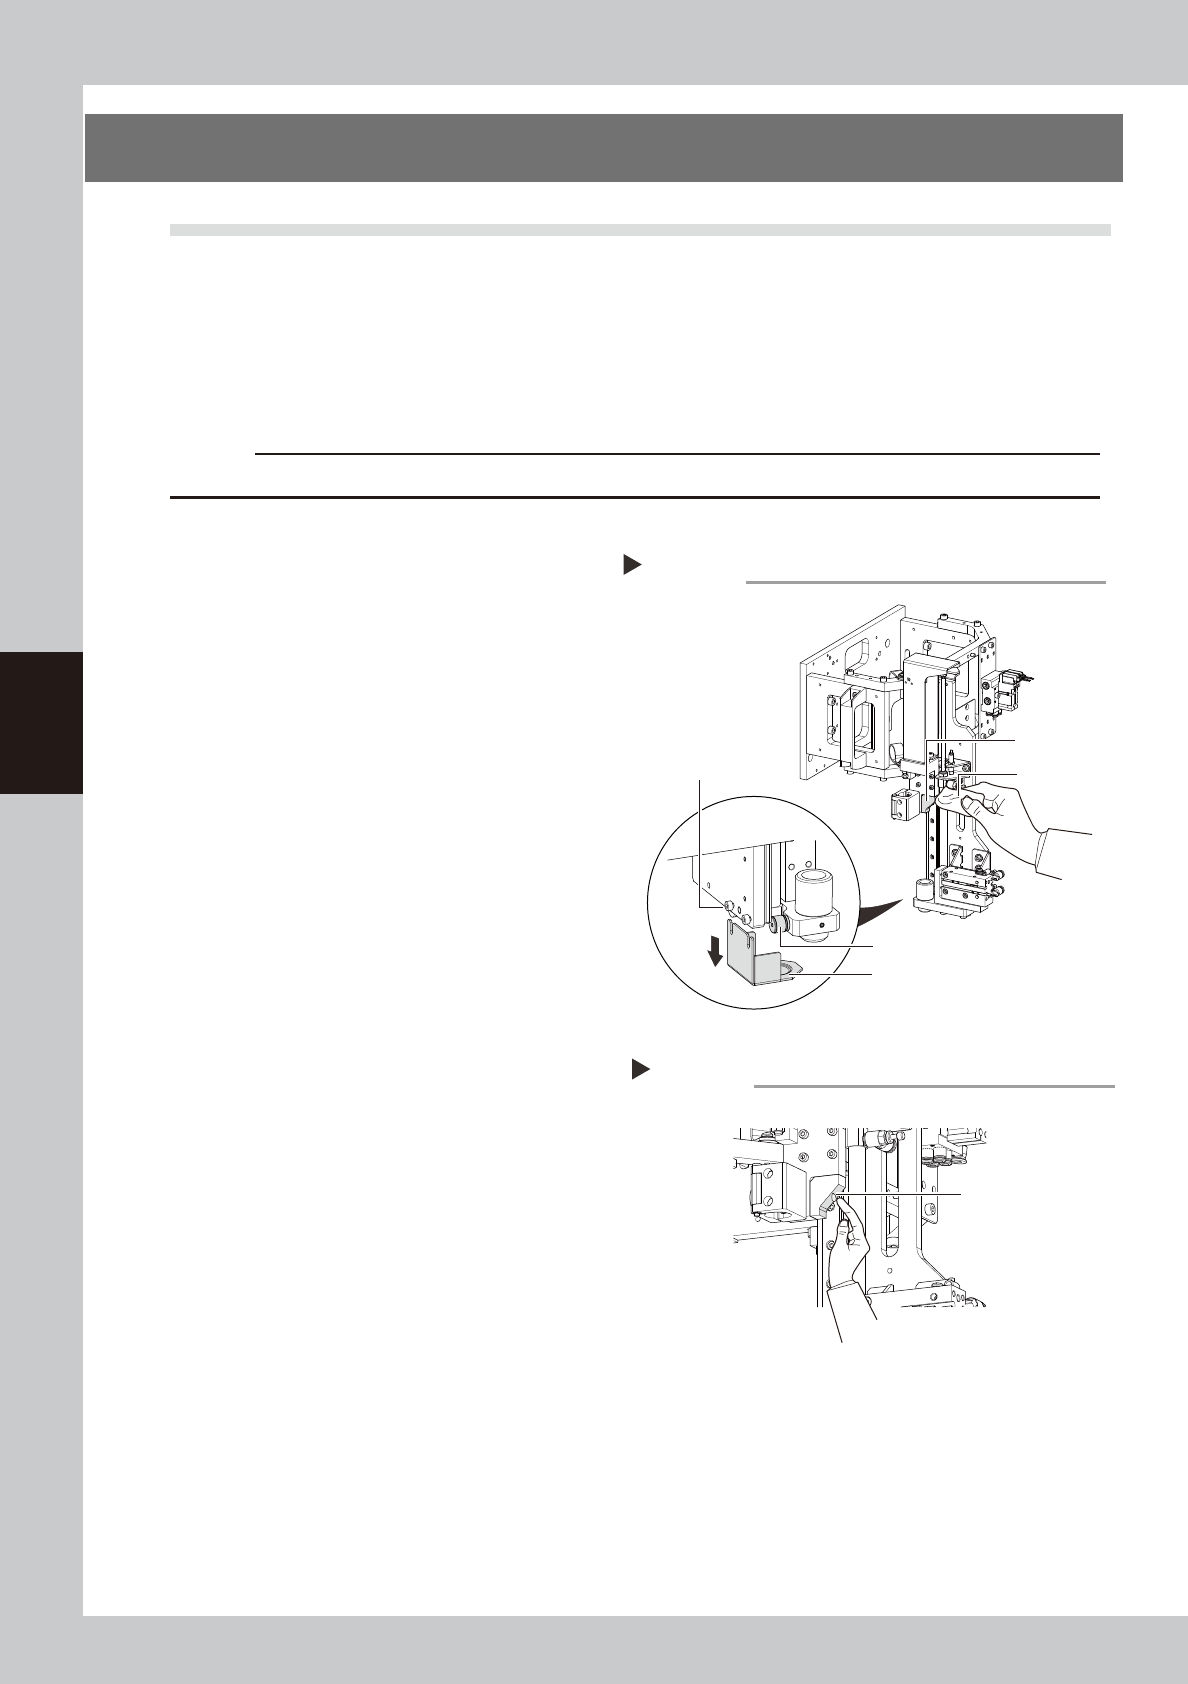
2
Remove the grease cover.
Using the hex wrench, loosen the bolts that
secure the grease cover and remove the
cover.
53452-M9-10
3
Clean each part.
Wipe away the old grease and dirt from the
cam block, cam follower, and grease cover
with a lint-free cloth.
4
Apply the grease.
Apply the specified grease (NSL) by hand
uniformly over the slant surface of the cam
block.
53453-M9-00
5
Remove excess grease.
After moving the marking unit up and down,
wipe away excess grease with a lint-free
cloth.
6
Reattach the grease cover.
Reattach the grease cover in place that has
been removed in Step2.
Cleaning each part
Step 2,3
Cleaning cloth
Cam block
Cam follower
Grease cover
clamp bolt (2 pieces)
Grease cover
Applying the grease
Step 4
Grease
4-21
4
Maintenance
7.2 Cleaning controller filter (For Type HS2 only)
The controller for controlling the YSi-V is equipped with a filter. Depending on the operation of the YSi-V, the
filter requires cleaning every 6 months as a guideline.
n
Required tools
• Vacuum cleaner or vacuum assembly (option)
1
Turn off the power supply to the
YSi-V.
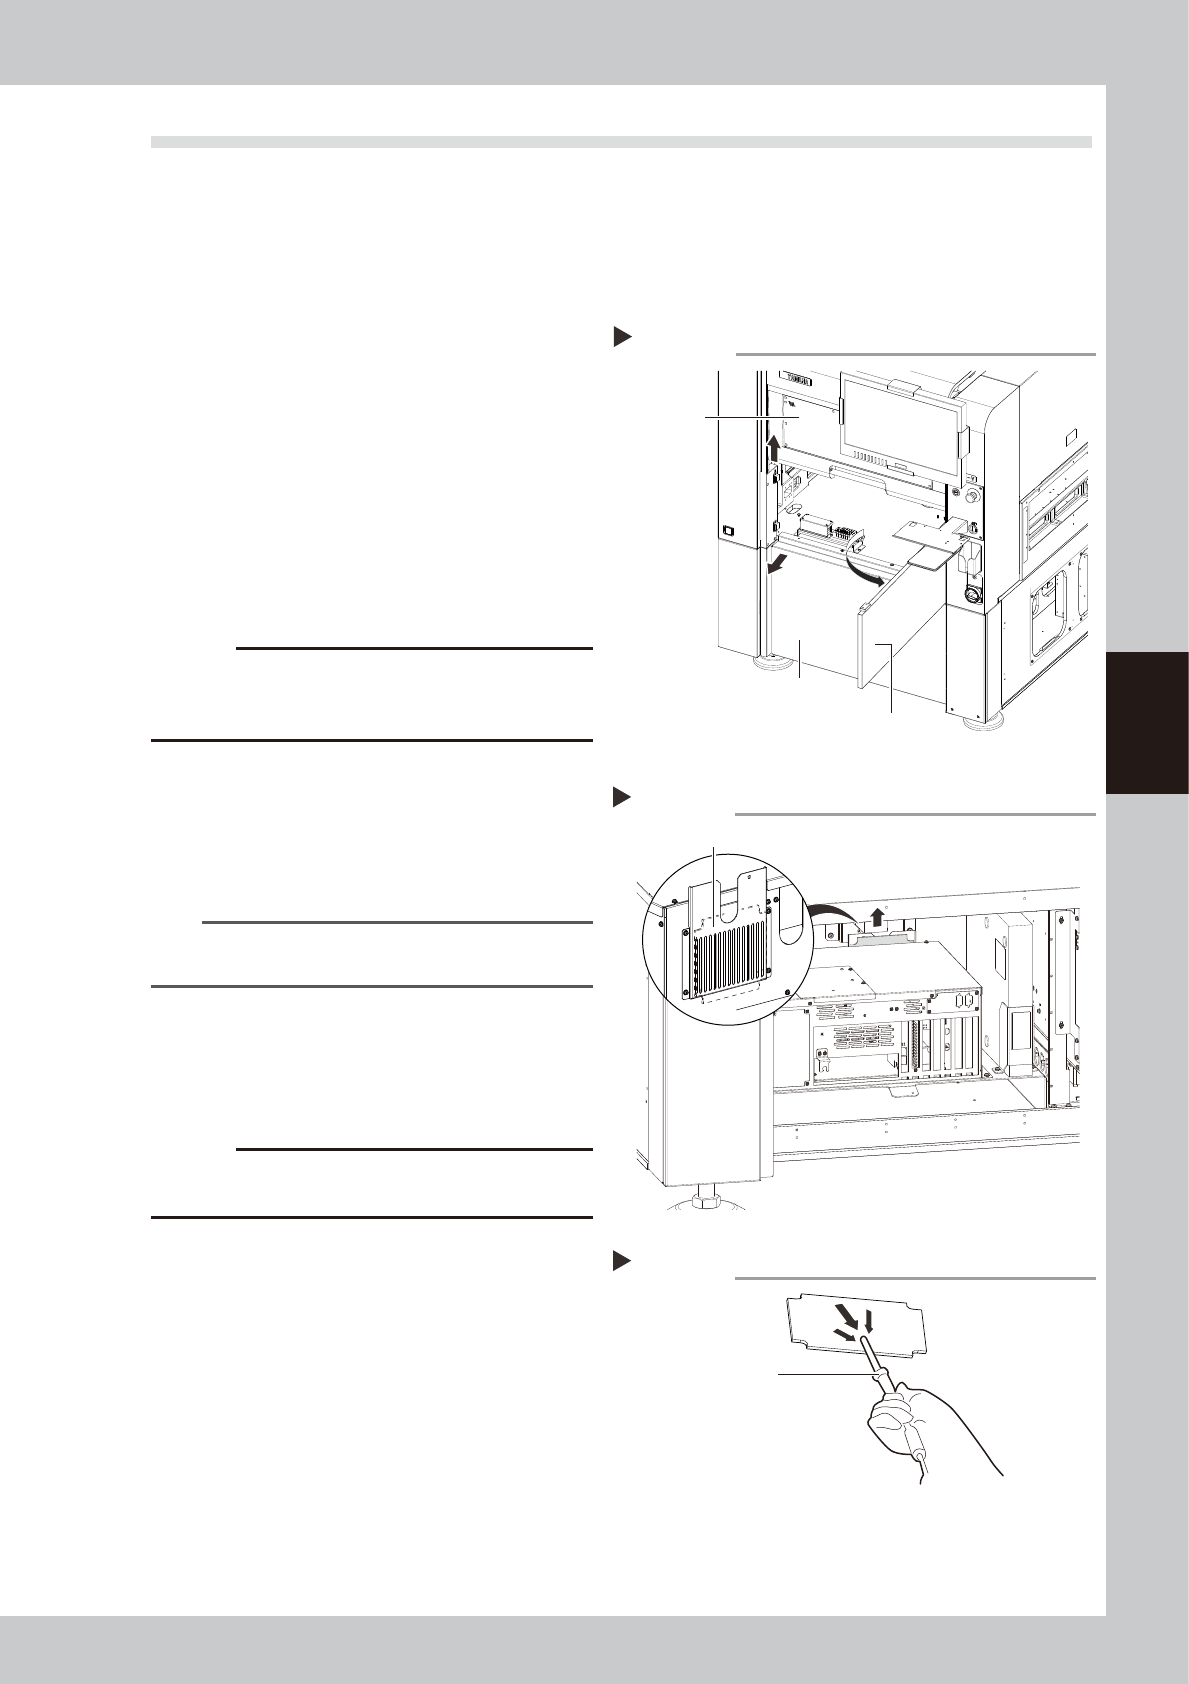
2
Remove the front lower panel.
1. Open the safety cover.
2. Pull out the front center panel.
3. Pull out front lower panel.
53454-M9-00
3
Remove the filter.
Remove the filter installed on the back of
the controller with hands.
53455-M9-00
c
CAUTION
Note that the circuit breaker is near the filter. Do not
unintentionally turn off the circuit breaker when pulling
out the filter.
4
Remove the dirt on the filter.
Use a vacuum cleaner or a vacuum
assembly (option) to remove dirt on the
filter.
53456-M9-00
n
NOTE
If the dirt is too excessive to remove or if the filter is
deteriorated, replace the filter with a new one.
5
Re-assemble the filter.
1. Install the filter in the original place.
2. Install the front lower panel. Close the
front center panel and safety cover.
c
CAUTION
When installing the filter, do not unintentionally turn off
the nearby circuit breaker.
Removing front lower panel
Step 2
Front center panel
Front lower panel
Safety cover
Removing filter
Step 3
Filter
Cleaning filter
Step 4
Vacuum assembly