YSi-V_Ope_E - 第90页
4-26 4 Maintenance 5 Remo ve the filter element. Air filter T ur n the baffle in the direction shown in the figure at right to remove it from the element assembly. Mist filter T ur n the filter element in the direction s…

4-25
4
Maintenance
8.2 Inspecting and cleaning the air/mist filters
Air/mist filters are used to prevent oil, mist and other impurities in the air compressor from penetrating into the
YSi-V. These filters should be inspected and cleaned periodically as instructed below.
c
CAUTION
Remove the coupler to ensure safety during work. At this time, pay special attention so that oil, water, or impurity does
not scatter.
Additionally, be aware that a large air exhaust sound is heard when removing the coupler.
n
Required tools
• Neutral detergent
• Air blow tool (Option tool to be purchased)
• Cloth rag
• Slotted precision screwdriver
• Hex wrench (2.5mm)
• Dust-proof goggles
• Dust-proof mask
c
CAUTION
The cleaning blow air may be in contact with your face. So, be sure to wear dust-proof goggles and dust-proof mask
before starting the air blow.
1
Check the inside of the filter cup.
Check the inside of the cup for oil or water.
If the inside of the cup is contaminated,
follow the steps below to clean it.
2
Separate the air and mist filters.
1. Using the hex wrench (2.5), loosen the
bolts.
2. Slide the pin downwards. Remove the
bracket. Separate the air filter and mist
filter.
53431-M9-00
3
Remove the filter cup.
Air filter
1. Turn the air filter counterclockwise as
shown in the figure at right to pull it
downward.
2. Put the slotted precision screwdriver in
the groove close to the snap fit of the
deflector and remove the element
assembly from the filter cup.
Mist filter
Turn the filter cup counterclockwise as
shown in the figure at right to pull it
downward.
53432-M9-10
4
Remove the contamination inside
the filter cup.
1. Lightly wash the cup with water.
2. Further wash the inside of the cup with
neutral detergent diluted with water.
3. After blowing the air with the air blow
tool, wipe away water with a cloth rag.
Removing the filter cup
Step 2,3
Filter cup
Remove the air coupler.
Air filter
Pin
Bolt
Bracket
Oil mist filter
Removing the element assembly
Step 3
Deflector
Snap fit
Filter cup
Air filter
Slotted precision screwdriver
4-26
4
Maintenance
5
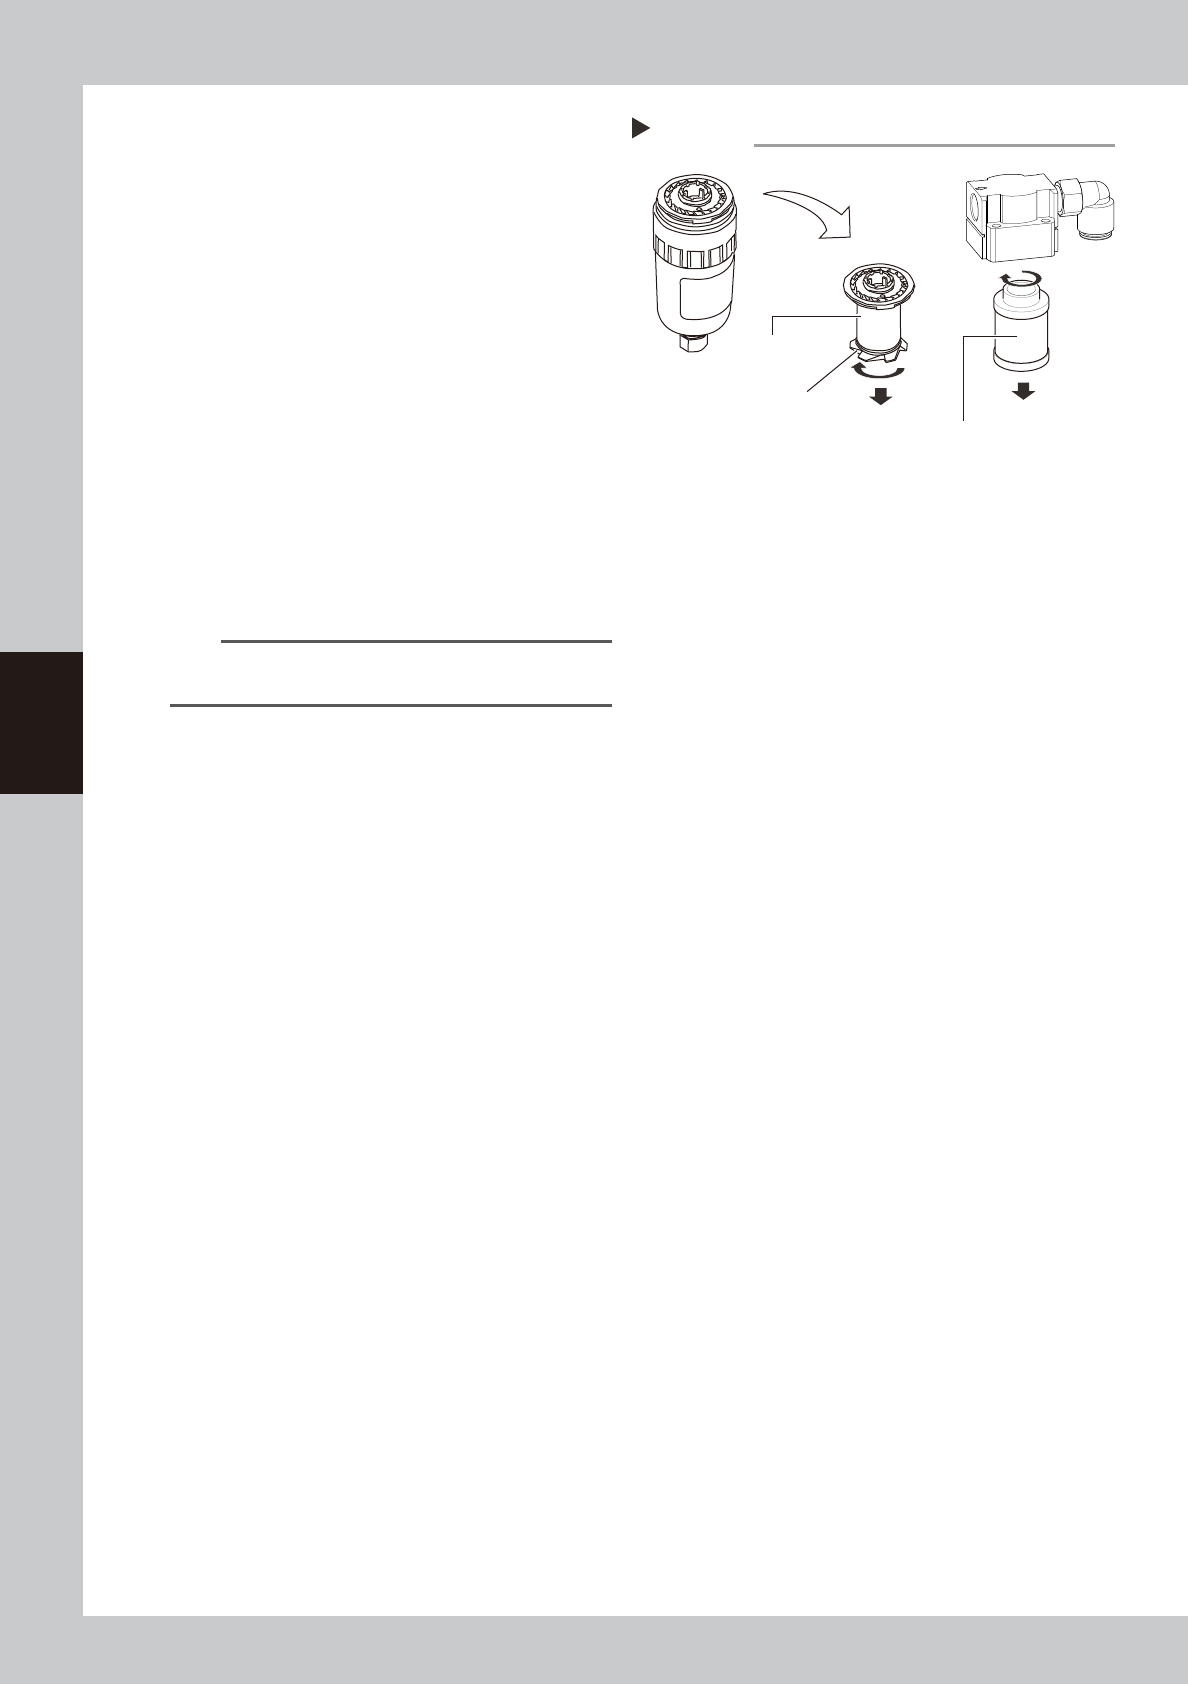
Remove the filter element.
Air filter
Turn the baffle in the direction shown in the
figure at right to remove it from the element
assembly.
Mist filter
Turn the filter element in the direction shown
in the figure at right to remove it.
53433-M9-00
6
Check the filter element conditions.
Check the filter element for contamination
or clogging.
If the filter element is contaminated, replace
it with the new filter element stated in the
consumable parts list.
7
Reattach the filter element and
filter cup.
Reattach the filter media and cup in the
reverse order of the removal procedures.
TIP
The manual tightening torque for the cup must be set
to approximately 2.2N·m.
8
Reattach the air coupler.
Connect the air coupler and check that no
air is leaking.
Removing filter element
Step 5
Oil mist filter
Air filter
Baffle
4-27
4
Maintenance
9. How to replace consumable parts
9.1 Cleaning and replacing the conveyor belts
n
Required tools
• Hex wrenches 3mm, 4mm, 5mm
• Paper wipe
• Fine brush
• New conveyor belt
• Square piece of cloth
e
1
Press the emergency stop button.
The YSi-V must be in emergency stop to
ensure safety during work.
2
Open the front safety cover of the
YSi-V.
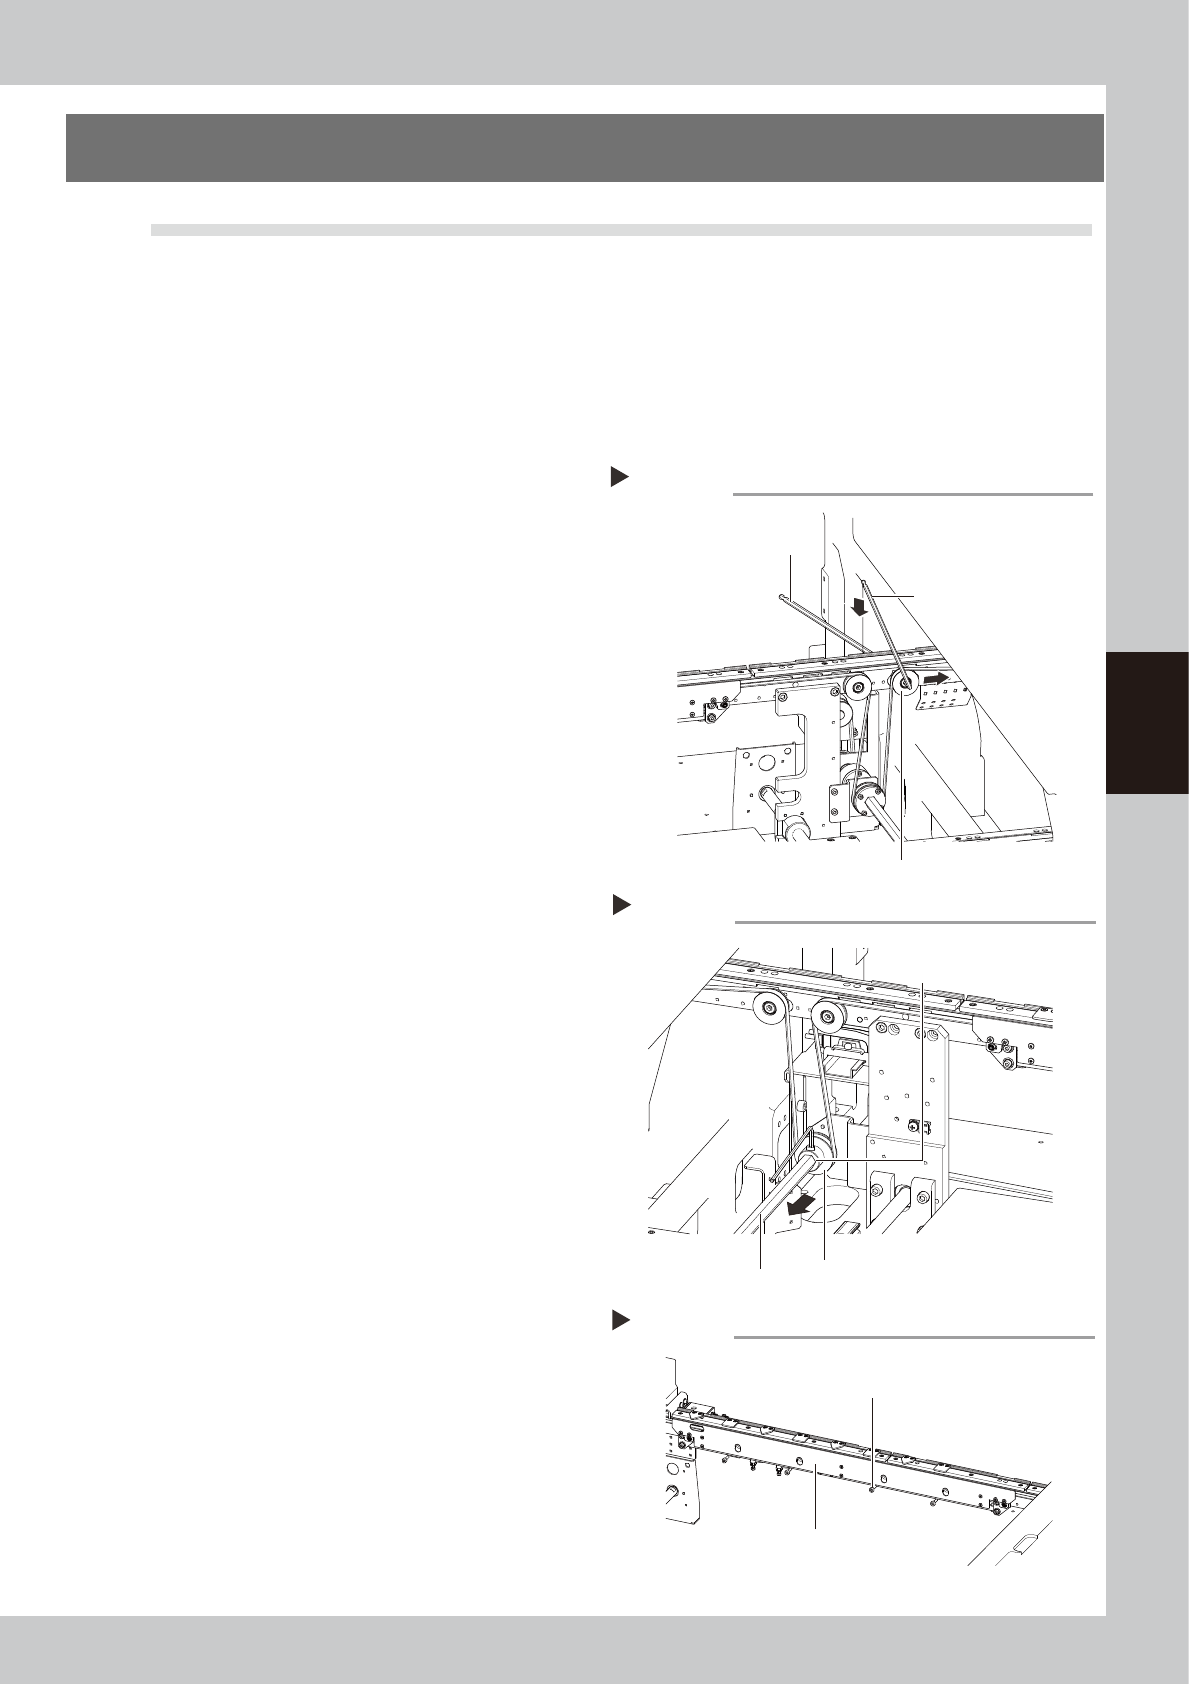
3
Loosen the belt.
1. Place a square piece of cloth over the
guide and ball screw.
2. While referring to the figure on the right,
loosen the tension pulley with the hex
wrenches (4 and 5) and then slide it fully
along the elongated hole (in the
direction of slackening the belt).
53441-M9-00
4
Detach the belt.
Using the M3 hex wrench, loosen the bolt
securing the belt drive pulley and pull out
the shaft. Then detach the belt from the
pulley and take it out through the space
between the pulley and the shaft.
53442-M9-00
5
Remove the board clamp board.
Using the hex wrench (3), remove the bolts
(4 locations) that secure the board clamp
board and remove the board clamp board.
53443-M9-00
Loosening the belt tensioner bolt
Step 3
Tensioner bolt
Hex wrenches (4)
Hex wrenches (5)
Removing the shaft
Step 4
Shaft
Drive pulley
Pull out the belt from
this clearance.
Removing the board clamp board
Step 5
Board clamp board mounting bolt
Board clamp board