F4000N_revD.pdf - 第16页
F4000N Series Operating Manual Section 3: T eaching Overview Part # 562187N - 1 Rev . D Sep 2012 15 © 20 12 Fisnar Inc. 2. Using the T each Pen dant The teach pendant enables the user to jog the robot and input program d…
F4000N Series Operating Manual
Section 3: Teaching Overview
Part # 562187N-1
Rev. D Sep 2012
14
© 2012 Fisnar Inc.
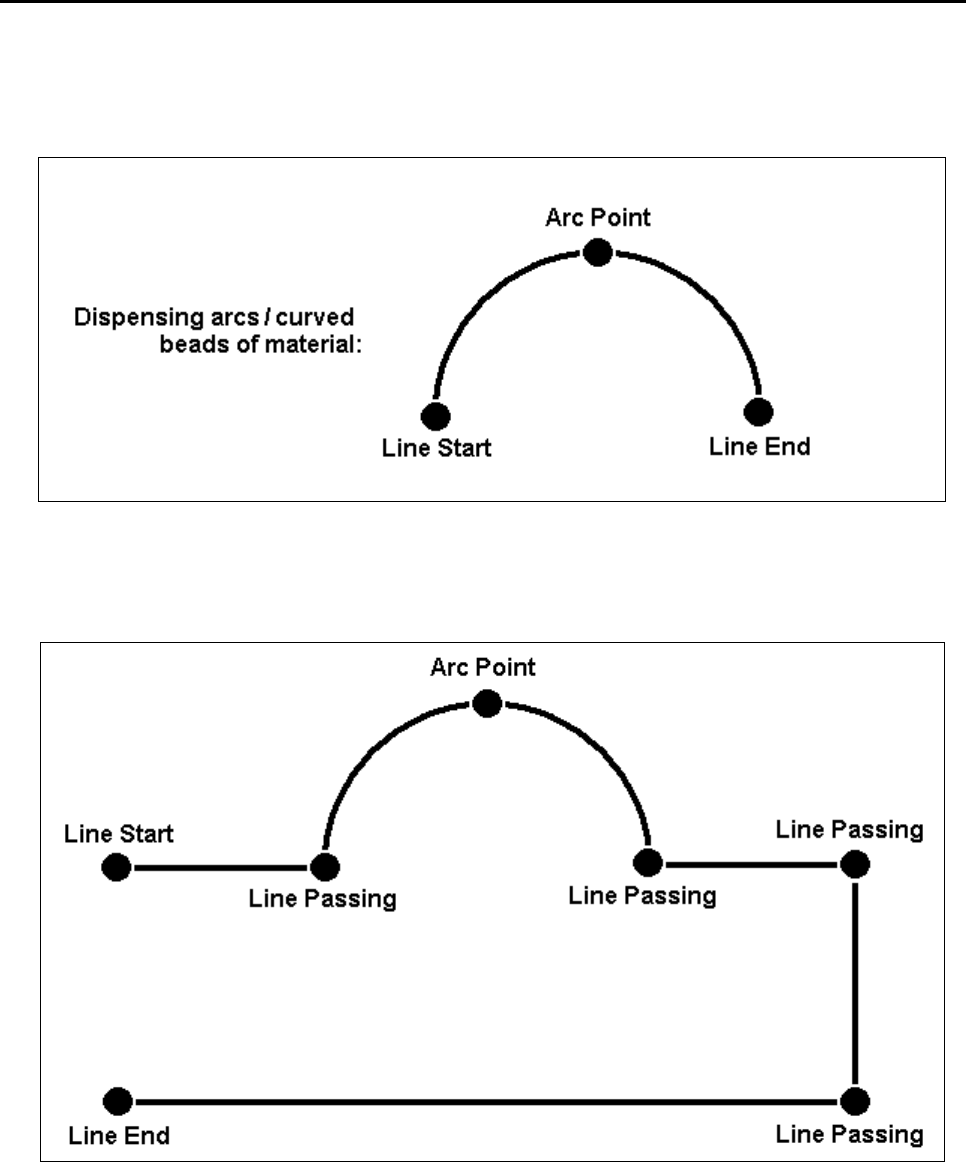
To dispense a bead of material in an arc, the XYZ location of the start of the line is
registered as a LINE START point type. The high point of the arc is registered as an ARC
POINT. The end of the arc is registered as a LINE END point:
Lines and arcs can also be combined to dispense a bead of material along a complex
path:
Once the required point locations for your program have been taught, the teach pendant is
no longer required. The unit can be switched to RUN mode and operated using the
buttons and switches on the main unit control panel.
F4000N Series Operating Manual
Section 3: Teaching Overview
Part # 562187N-1
Rev. D Sep 2012
15
© 2012 Fisnar Inc.
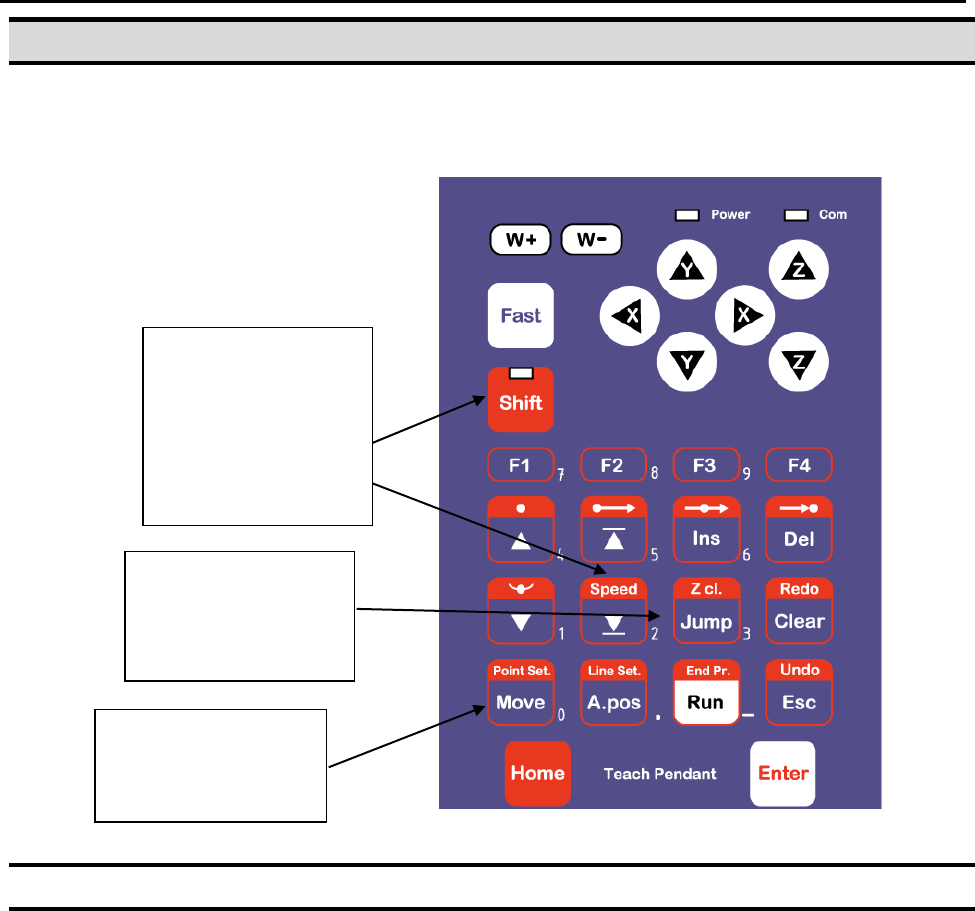
2. Using the Teach Pendant
The teach pendant enables the user to jog the robot and input program data.
2.1 Key Selection
There are several functions assigned to most keys on the Teach pendant. When a key is
pressed alone, the function shown in the blue colored area on the key is executed. For
example, Ins, Del, Jump, Clear and Esc are the default key functions, which are
executed when that key is pressed alone.
To access the function shown in the red colored area at the top of a key, press and
release the Shift key first (the LED on the Shift key will be flashing), then press the
desired key. For example, to select the Speed function, press and release Shift, then
press the Speed key.
When a number is required, the teach pendant will automatically switch to numeric entry
mode. The number represented by each key is shown in the lower right corner of the key.
If Shift is pressed,
released, then the
Speed key is
pressed, Speed
Setup is executed.
If this key is
pressed alone,
Jump is executed.
When entering
numbers, this key is
0.
F4000N Series Operating Manual
Section 3: Teaching Overview
Part # 562187N-1
Rev. D Sep 2012
16
© 2012 Fisnar Inc.
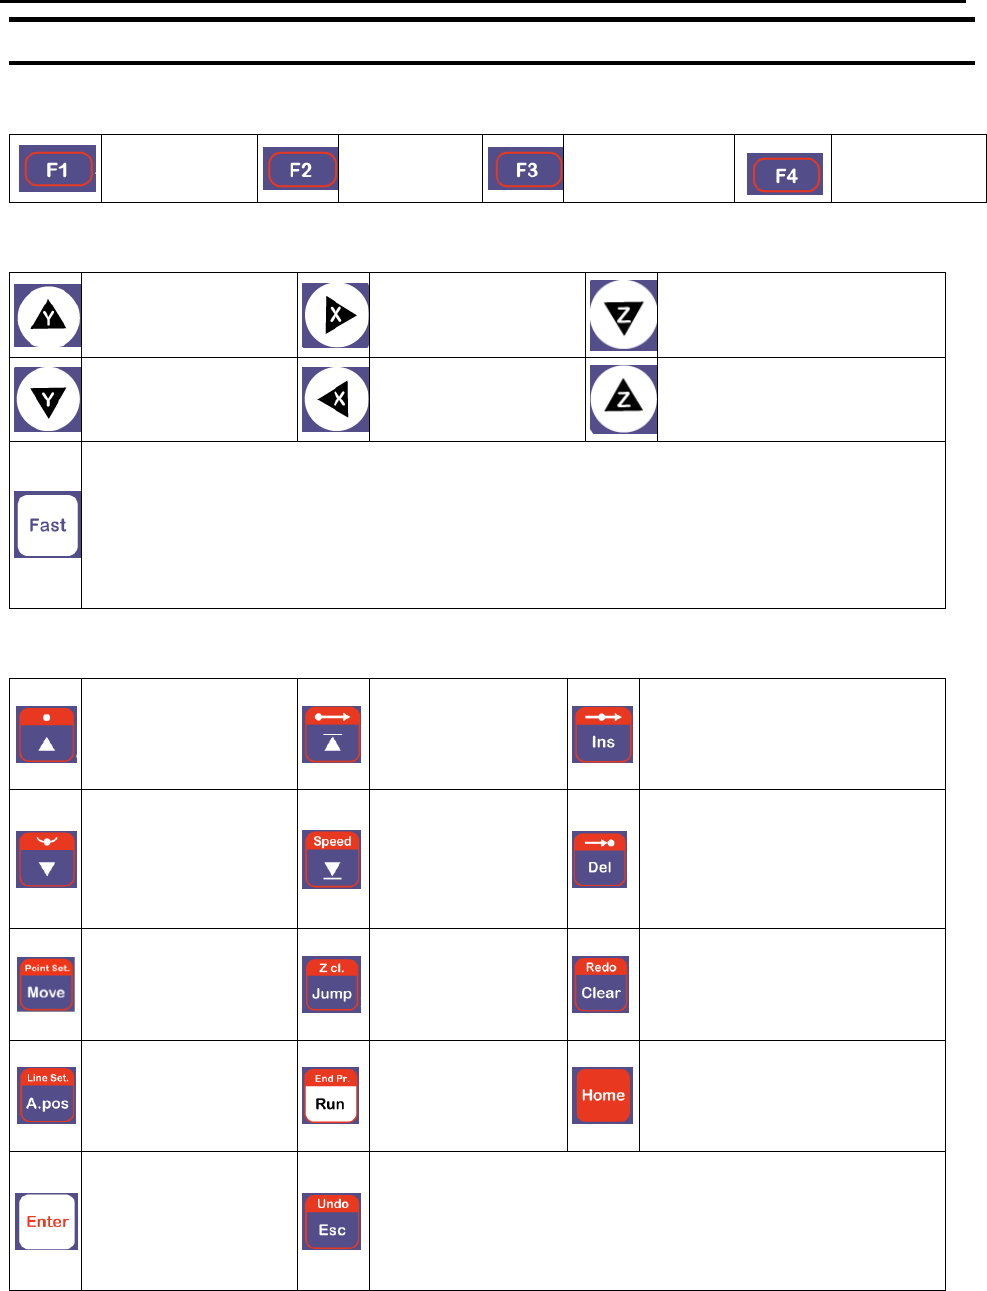
2.2 Key Assignments
Menu Keys
Opens the
Point Menu.
Opens Menu
1.
Opens Menu 2.
Opens the
Setup Menu.
Jog Keys
Jogs the Y-axis in
the forward
direction.
Jogs the X-axis in
the right direction.
Jogs the Z-axis DOWN.
Jogs the Y-axis in
the backward
direction.
Jogs the X-axis in
the left direction.
Jogs the Z-axis UP.
Accelerates jog speed – used with X+, X-. Y+, Y-, Z Up, Z Down
If the FAST button is pressed and held first, then one of the jog buttons is
pressed, the axis will be jogged at the maximum jog speed.
If one of the jog buttons is pressed first, then the FAST button is pressed, the jog
motion will accelerate.
If the FAST button is released, the jog motion will decelerate.
Key Assignments
Moves backward
(-1) memory
address.
Changes the
display to
memory address
number 1.
Inserts a memory address
before the current address.
Moves forward
(+1) memory
address.
Changes the
display to the last
memory address
used in the
program.
Deletes the current memory
address.
Moves the tip to the
point location
currently in the
display.
Jumps to a
specified memory
address
Clears / erases the numeric
value currently shown in the
display.
Adjusts the tips
position after a
barrel change
To run the
program
Homes the robot. Initializes
all axes and moves the
head to the position (0, 0,
0).
(Enter)–used to
confirm data
entries.
Opens the Point
registration menu.
If pressed once, clears the current numeric value.
If pressed twice, cancels the current function.
If a program is running, cancels the running program.
Changes from Point List display mode to Single Point
display when teaching point data.