F4000N_revD.pdf - 第43页
F4000N Series Operating Manual Section 5: Point T ype & Function Reference Part # 562187N - 1 Rev . D Sep 201 2 42 © 20 12 Fisnar Inc. The previous example was d one using S Path. The diff erence between S Path and N…
F4000N Series Operating Manual
Section 5: Point Type & Function Reference
Part # 562187N-1
Rev. D Sep 2012
41
© 2012 Fisnar Inc.
The program will run in the following pattern and consists of the following instructions:
Address
Instruction
1
Dispense End Setup:
H.Speed = 100 mm/s, L.Speed = 15 mm/s, L.Length = 5mm
2
Z Clearance:
Relative 10 mm
3
Point Dispense Setup:
Disp.Time = 0.25 s Tail Time = 0.10 s
4
Dispense Point
5
Dispense Point
6
Dispense Point
7
Dispense Point
8
Step & Repeat X:
Cols: 4, Rows: 3, X Off: 30mm, Y Off: 25mm, Addr. 4, S Path
9
End Program
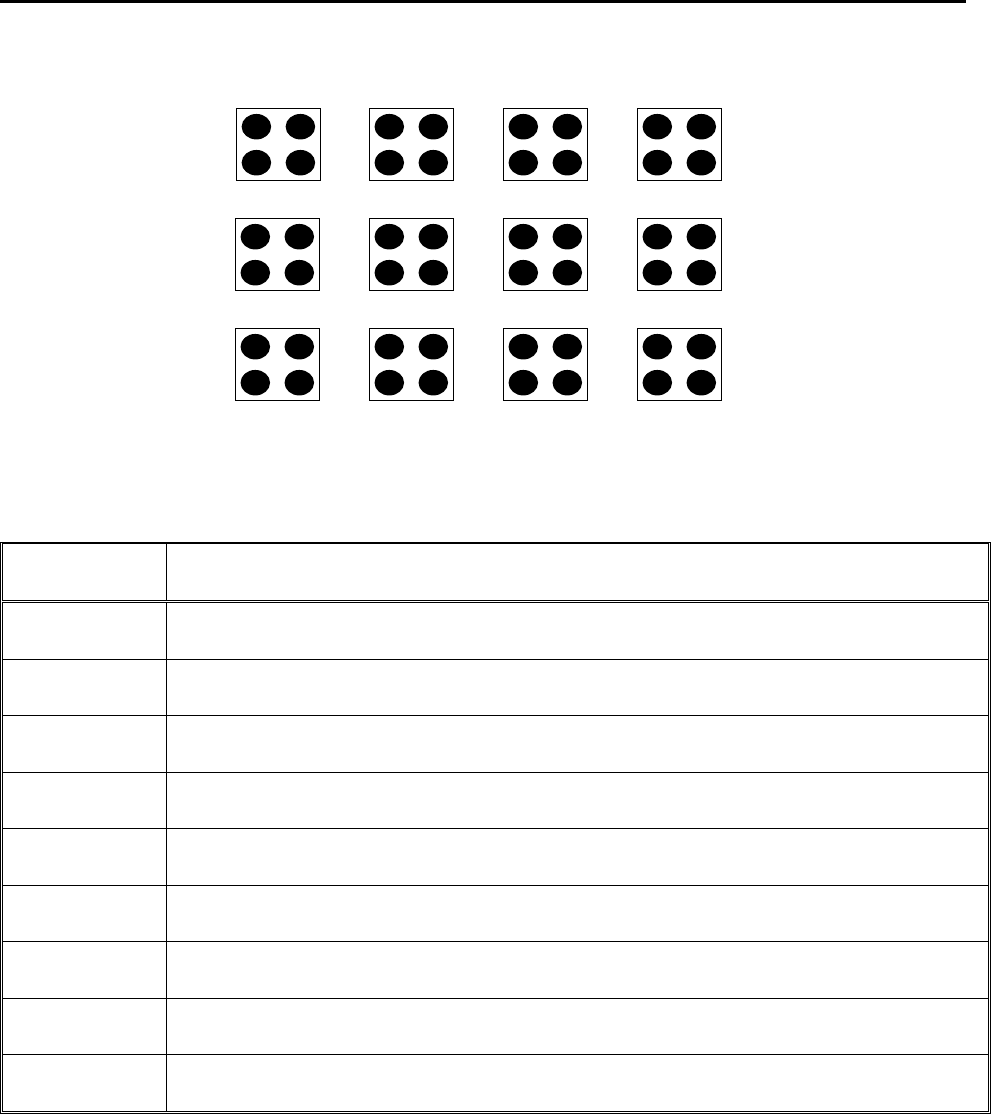
1
2
3
4
8
7
6
5
9
10
11
12
F4000N Series Operating Manual
Section 5: Point Type & Function Reference
Part # 562187N-1
Rev. D Sep 2012
42
© 2012 Fisnar Inc.
The previous example was done using S Path. The difference between S Path and N Path
is the order in which the pieces are run:
Step & Repeat X:
1.11 Step & Repeat Y
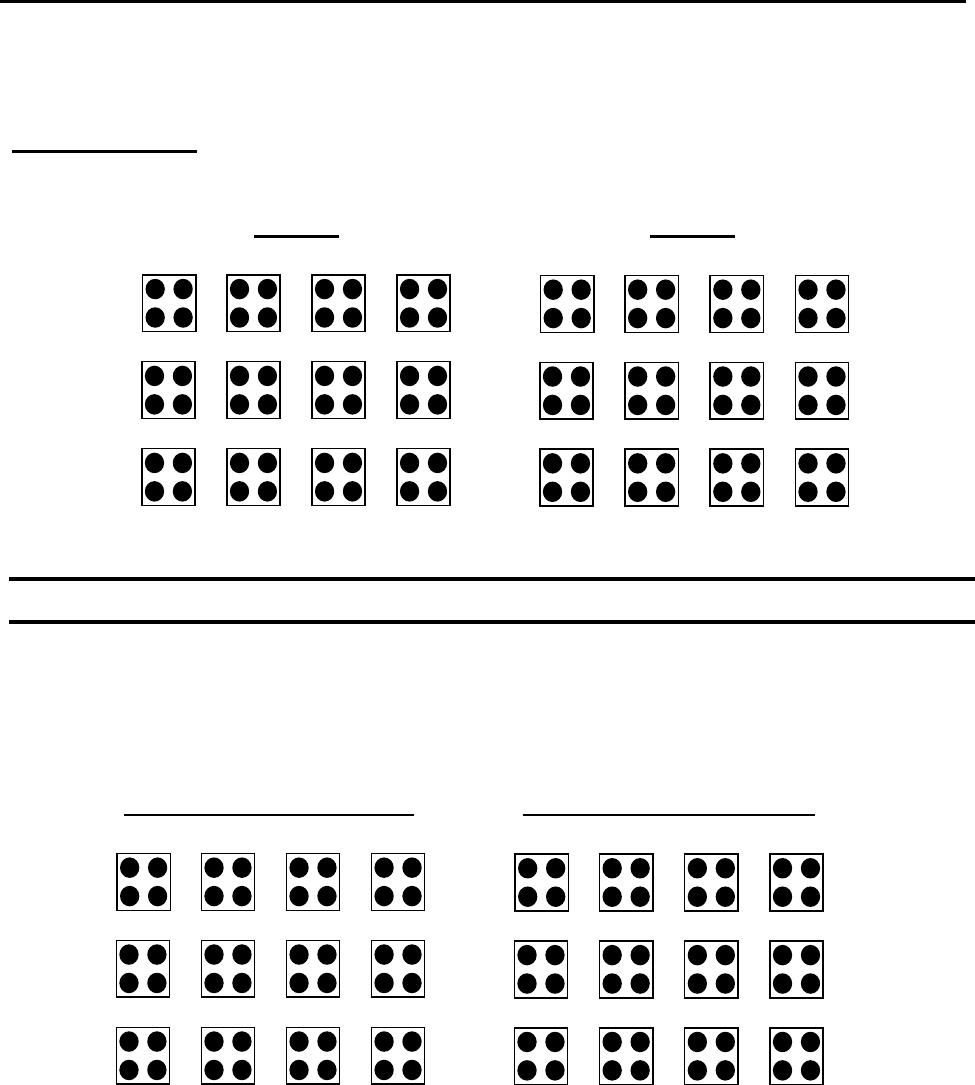
Step & Repeat Y works just as Step & Repeat X does, with one difference: priority is given
to the Y-axis instead of the X-axis.
1
2
3
4
5
6
7
8
9
10
11
12
N PATH
1
2
3
4
8
7
6
5
9
10
11
12
S PATH
1
6
7
12
2
5
8
11
3
4
9
10
Step & Repeat Y - S PATH
1
4
7
10
2
5
8
11
3
6
9
12
Step & Repeat Y - N PATH
F4000N Series Operating Manual
Section 5: Point Type & Function Reference
Part # 562187N-1
Rev. D Sep 2012
43
© 2012 Fisnar Inc.
1.12 Brush Area
The Brush Area command causes the tip to „paint‟ a defined area.
There are six Brush Area types: Rectangle, Circle, Rectangle 1, Rectangle Band, Circle
Band and Circle1. The next pages provide a detailed description of all the Brush area
types.
To register a Brush Area command, follow the instructions below.
Instruction
Display Shows
1
Press F1/ENTER to open the Point Menu
[POINT] 1/3
1 Dispense Dot
2 Line Start
.
.
7 End Program
2
Press X, to go to page 2
[POINT] 2/3
.
.
4 Brush Area
.
3
Press 4 to select Brush Area.
Brush Area Setup
------------------
1.Rectangle 4.Rect Band
2.Circle 5.Circle Band
3.Rectangle 1 6. Circle 1
Select:
4
Press the numeric key corresponding to
the brush area type then press ENTER
Brush Area Setup
------------------
1.Rectangle 4.Rect Band
2.Circle 5.Circle Band
3.Rectangle 1 6.Circle 1
Width(mm):
Band(mm):
5
Type the width value and press ENTER.
Type the band value and press ENTER.
Width and band values will be explained
further in this section.