fx3r.pdf - 第154页
FX-3R Maintenance Guide 12-25 12-2-4-2. Installing the FlexlineDB 1) Prepare the USB or othe r media containing the FlexlineDB installation f iles. 2) Click the [Start] button of Windows and run Explorer from Programs in…
FX-3R Maintenance Guide
12-24
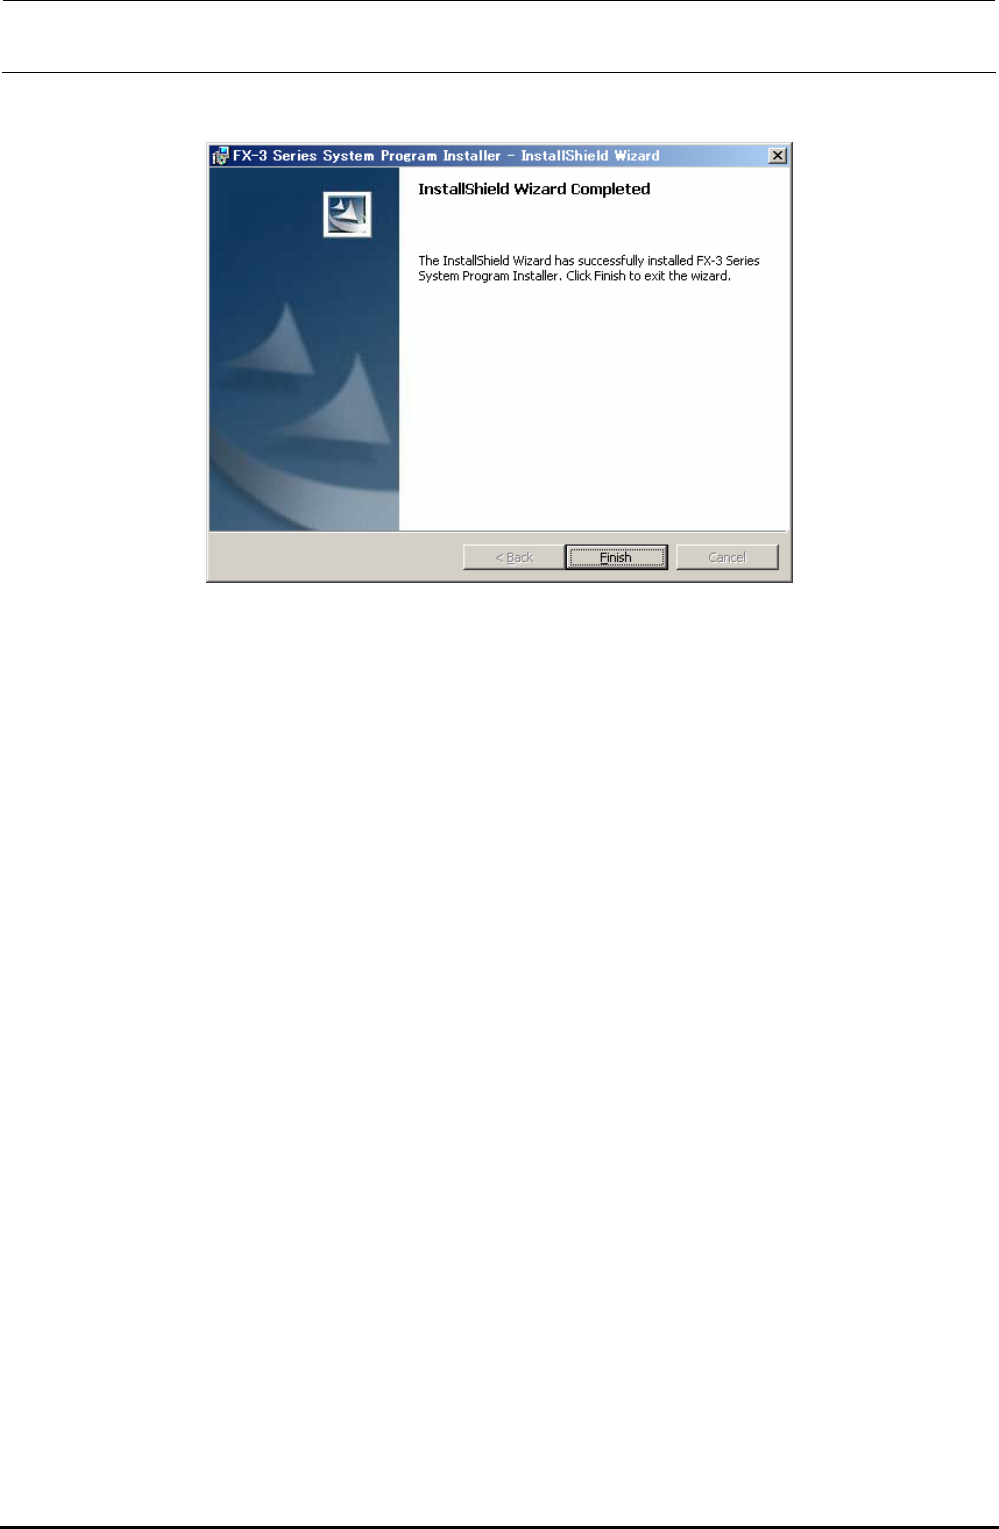
10) When the installation is completed, the “InstallShield Wizard Completed” screen will appear.
Click the [Finish] button to complete the installation.
Rev. 1.00
FX-3R Maintenance Guide
12-25
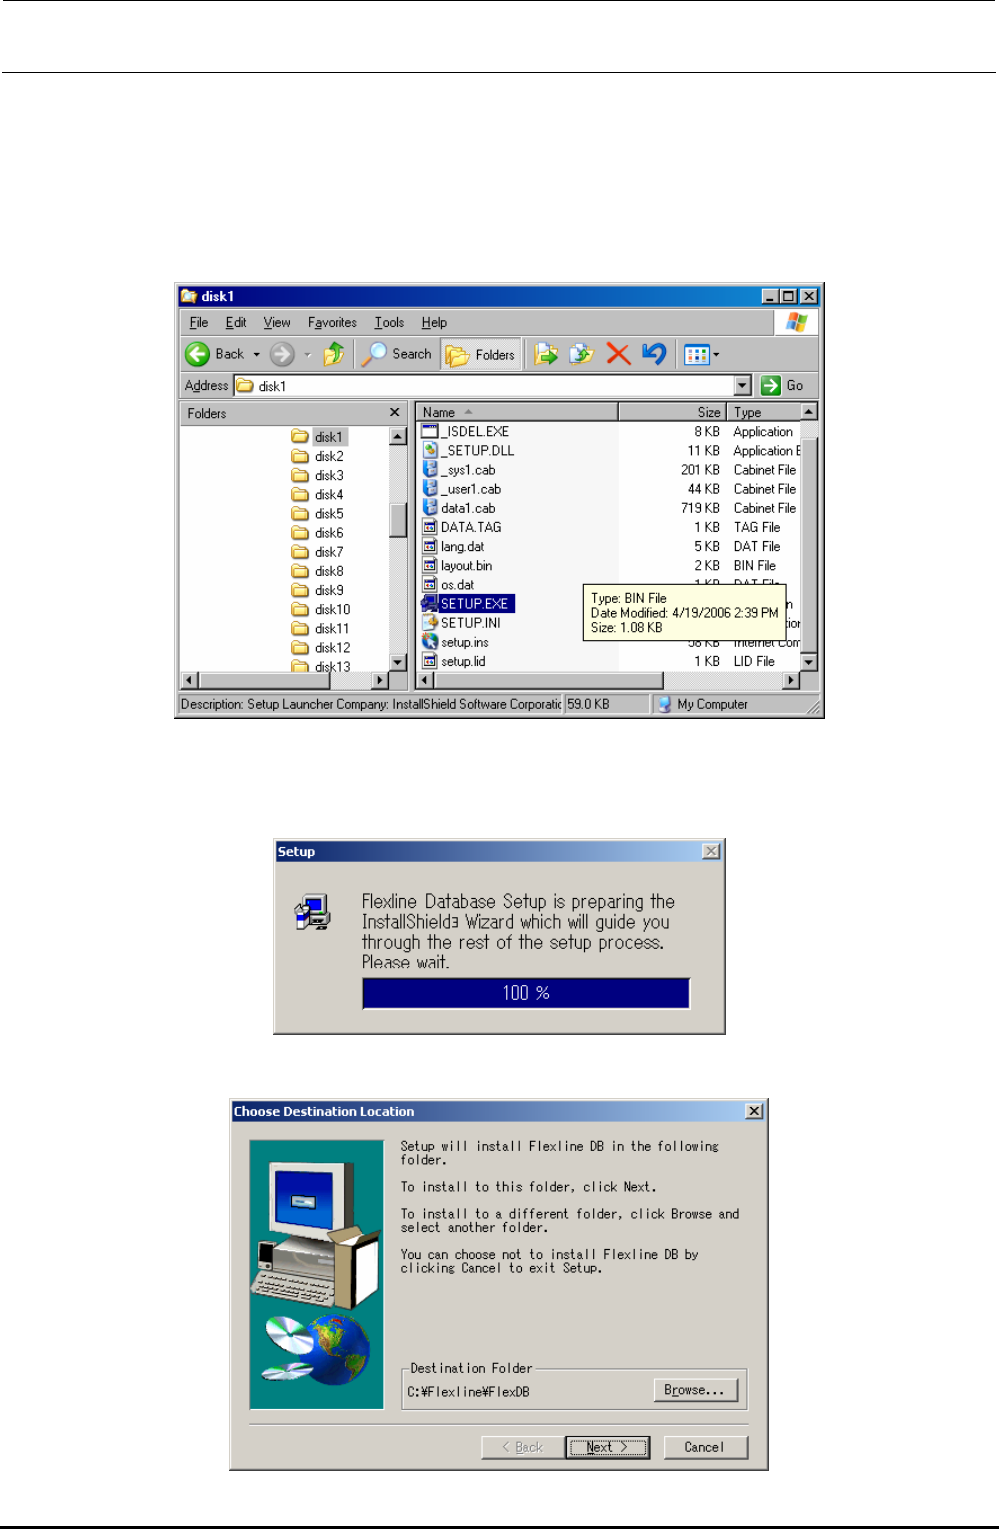
12-2-4-2. Installing the FlexlineDB
1) Prepare the USB or other media containing the FlexlineDB installation files.
2) Click the [Start] button of Windows and run Explorer from Programs in the Start menu.
3) Select “Setup.exe” from the FlexlineDB installation disk prepared in step 1).
In the Explorer window, double-click “Setup.exe” you have selected to start the installation.
4) As “Setup.Exe” is started up, the “Setup” screen will appear to make the preparations for
installation.
This screen will disappear quickly and the operation automatically moves to step 5).
5) The “Choose Destination Location” screen will appear.
Rev. 1.00
FX-3R Maintenance Guide
12-26
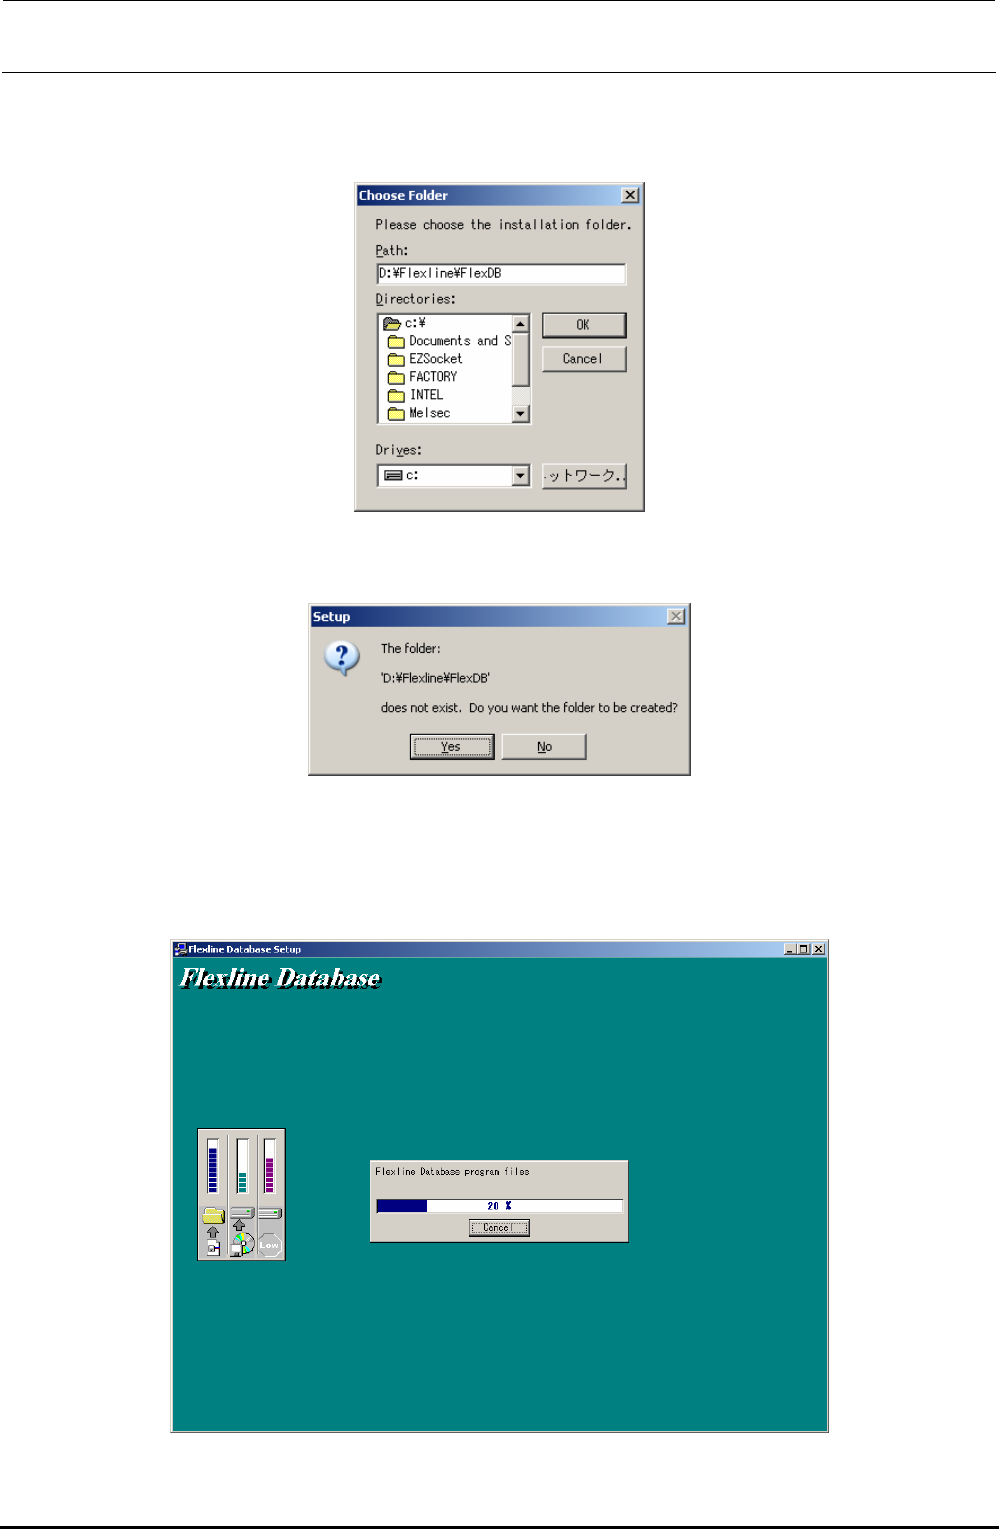
6) Since it is necessary to change the installation destination, click the [Browse...] button. The
“Choose Folder” screen will appear. Change the default installation destination path from
“C:¥Flexline¥FlexDB” to “D:¥Flexline¥FlexDB” and click the [OK] button.
7) If any installation destination directory does not exist, the “Setup” screen will appear, prompting
you to confirm the directory creation. Click the [Yes] button.
∗ CAUTION The button displays may vary depending on
the language specification of the OS.
8) When clicking the [Next] button on the screen stated in step 5) or when clicking the [Yes] button
on the screen stated in step 7), the installation is started and the following screen will appear.
Rev. 1.00