fx3r.pdf - 第191页
FX-3R Maintenance Guide 13-22 13-4-7. MOUSE/KEYBOARD Selector (40003281) [Functions] This MOUSE/KEYBOARD selector is intended to switch between the keyboard and mouse console. [DIP switch settings] The DIP switches have …
FX-3R Maintenance Guide
13-21
13-4-6. IP-X5 Board Assembly (40047528)
[Functions]
This IP-X5 board is an image processing board that processes image data, such as board mark
and IC mark captured by the OCC camera to calculate values necessary for correction of the
board position and/or part position.
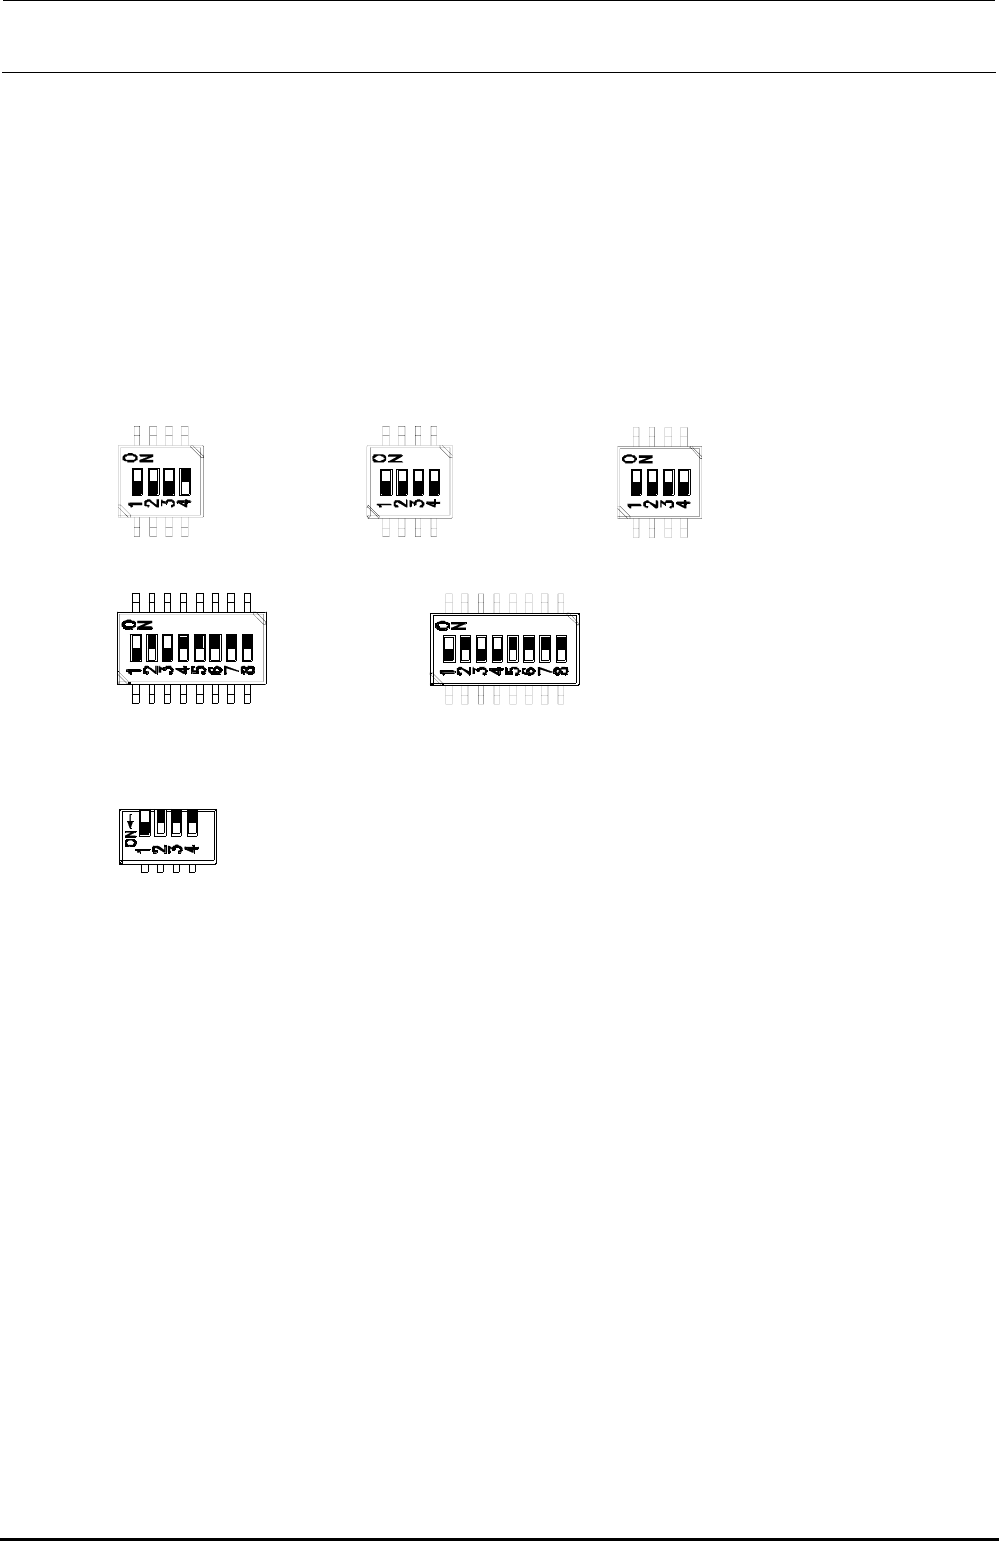
[DIP switch settings]
The DIP switches have been set properly at the delivery of the machine. When setting the board
in the control unit, check the DIP switch settings. ( portions show the switch positions.)
SW3-1 :OFF
SW3-2 :OFF
SW3-3 :OFF
SW3-4 :ON
SW6-1 :OFF
SW6-2 :OFF
SW6-3 :OFF
SW6-4 :OFF
SW8-1 :OFF
SW8-2 :OFF
SW8-3 :OFF
SW8-4 :OFF
SW4-1 :OFF
SW4-2 :ON
SW4-3 :OFF
SW4-4 :ON
SW4-5 :ON
SW4-6 :ON
SW4-7 :ON
SW4-8 :ON
SW5-1 :OFF
SW5-2 :ON
SW5-3 :OFF
SW5-4 :OFF
SW5-5 :ON
SW5-6 :ON
SW5-7 :ON
SW5-8 :ON
SW7-1 :OFF
SW7-2 :OFF
SW7-3 :OFF
SW7-4 :OFF
Figure 13-4-6-1 DIP switches on IP-X5 Board Assembly
∗ SW7 is a piano type switch, which is operated from the front panel.
[Front panel switches] ∗ Basically, do not operate these switches.
RESET SW: Resets this board.
ABORT SW: Issues NMI to the CPU.
DIP switch: Changes the settings of the board.
[Adjustment items after replacement]
After that, follow the steps below to update the FLASH memory.
c Select [Options] and [Change User Group], and then select [Serviceman].
d Select [Maintenance] and [MS Parameter Setup].
e Select [Upgrade] and [Display].
f Clicking [Exec.] will start the upgrading process.
Rev. 1.00

FX-3R Maintenance Guide
13-22
13-4-7. MOUSE/KEYBOARD Selector (40003281)
[Functions]
This MOUSE/KEYBOARD selector is intended to switch between the keyboard and mouse
console.
[DIP switch settings]
The DIP switches have been set properly at the delivery of the machine. When setting the board
in the control unit, check the DIP switch settings. ( portions show the switch positions.)
Figure 13-4-7-1 MOUSE/KEYBOARD SELECTOR DIP SW
SW-1 :ON
SW-2 :OFF
SW-3 :OFF
SW-4 :OFF
[Meaning of LED]
There are no LEDs on the MOUSE/KEYBOARD selector.
[Adjustment items after replacement]
There are no particular adjustment items.
Rev. 1.00
FX-3R Maintenance Guide
13-23
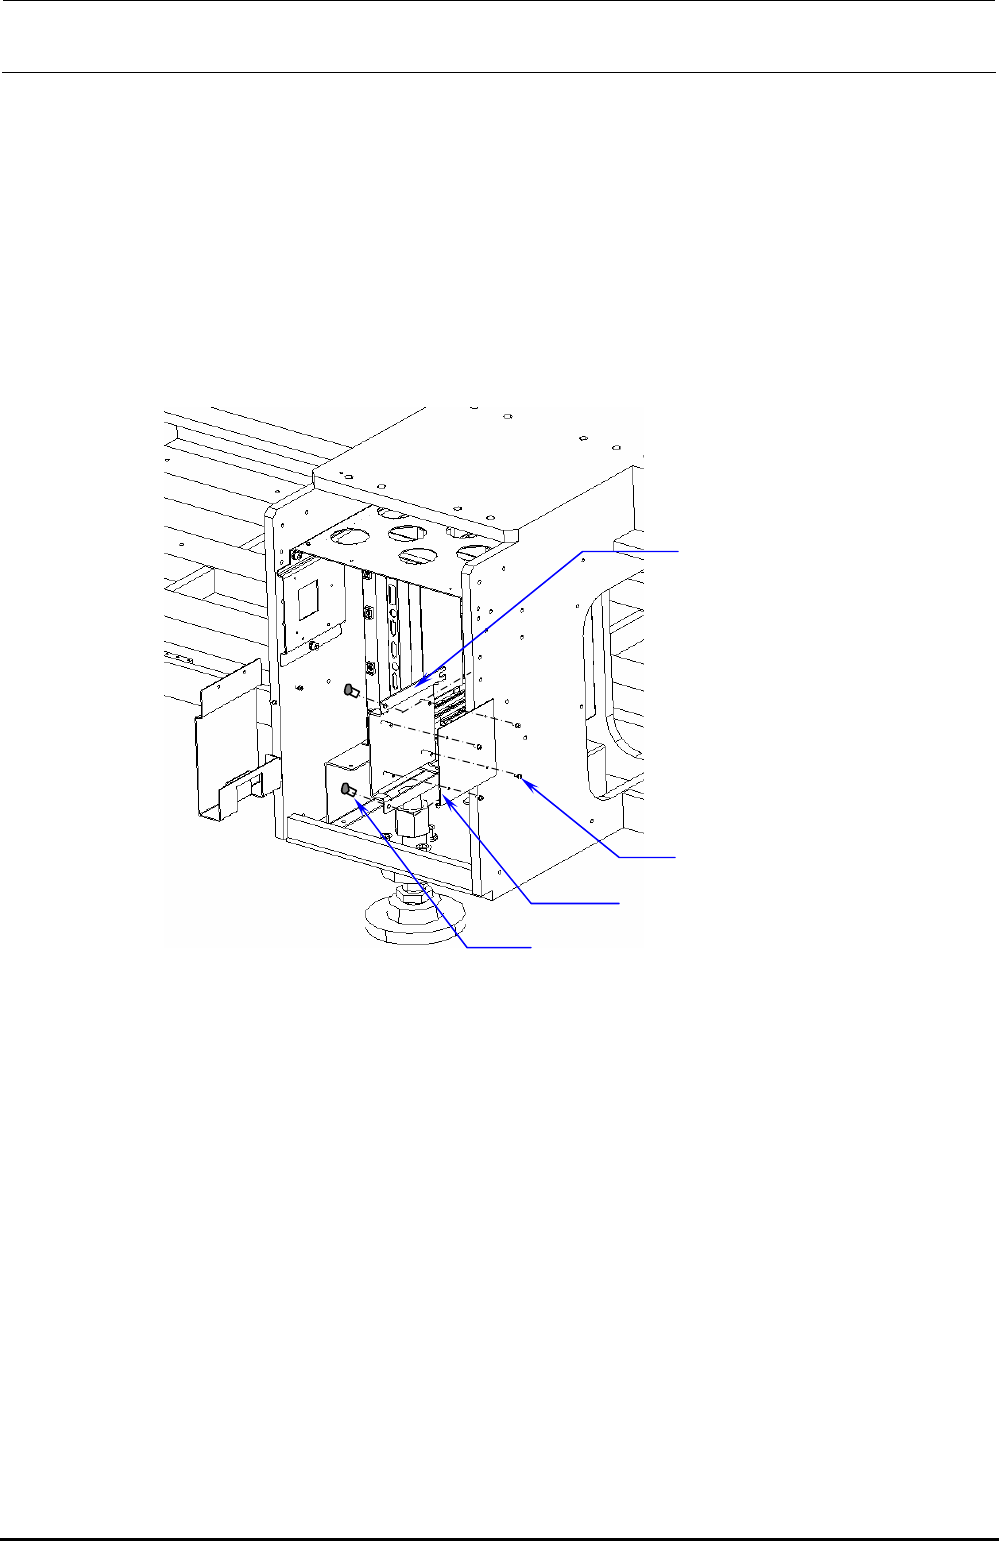
[Replacement procedure]
c Before starting the replacement work, always turn OFF the main power, main circuit breaker,
and main switch.
d Remove the bolts (SL6061292, 2 pcs.) to detach the MOUSE/KEYBOARD SELECTOR from
the MK_SELECTOR_BRACKET located on the right side of the control box and replace it
with a new one.
e After MK_SELECTOR_BRACKET has been taken out, remove SL4030691SC (4 pcs.) to
detach the KEYBOARD/MOUSE selector (40003281).
f Replace the detached MOUSE/KEYBOARD selector with a new one and reassemble the
parts and components in the reverse order of disassembly.
MK_SELECTOR_BRACKET
SL4030691SC ×4
SL6061292TN
×
2
MOUSE/KEYBOARD SELECTOR
Figure 13-4-7-2 Control Unit
Rev. 1.00