fx3r.pdf - 第47页
FX-3R Maintenance Guide 4-3 4-3. Replacing the OCC Coaxial/Angle Light Board Assemblies 1) Detach the light assembly from the XM base using the procedure described in section 4-1, Replacing the OCC Assembly . 2) Remove t…
FX-3R Maintenance Guide
4-2
4-2. Replacing the CCD Camera and Lens
1) Detach the lens assembly from the XM base A (B) using the procedure described in section
4-1, Replacing the OCC Assembly.
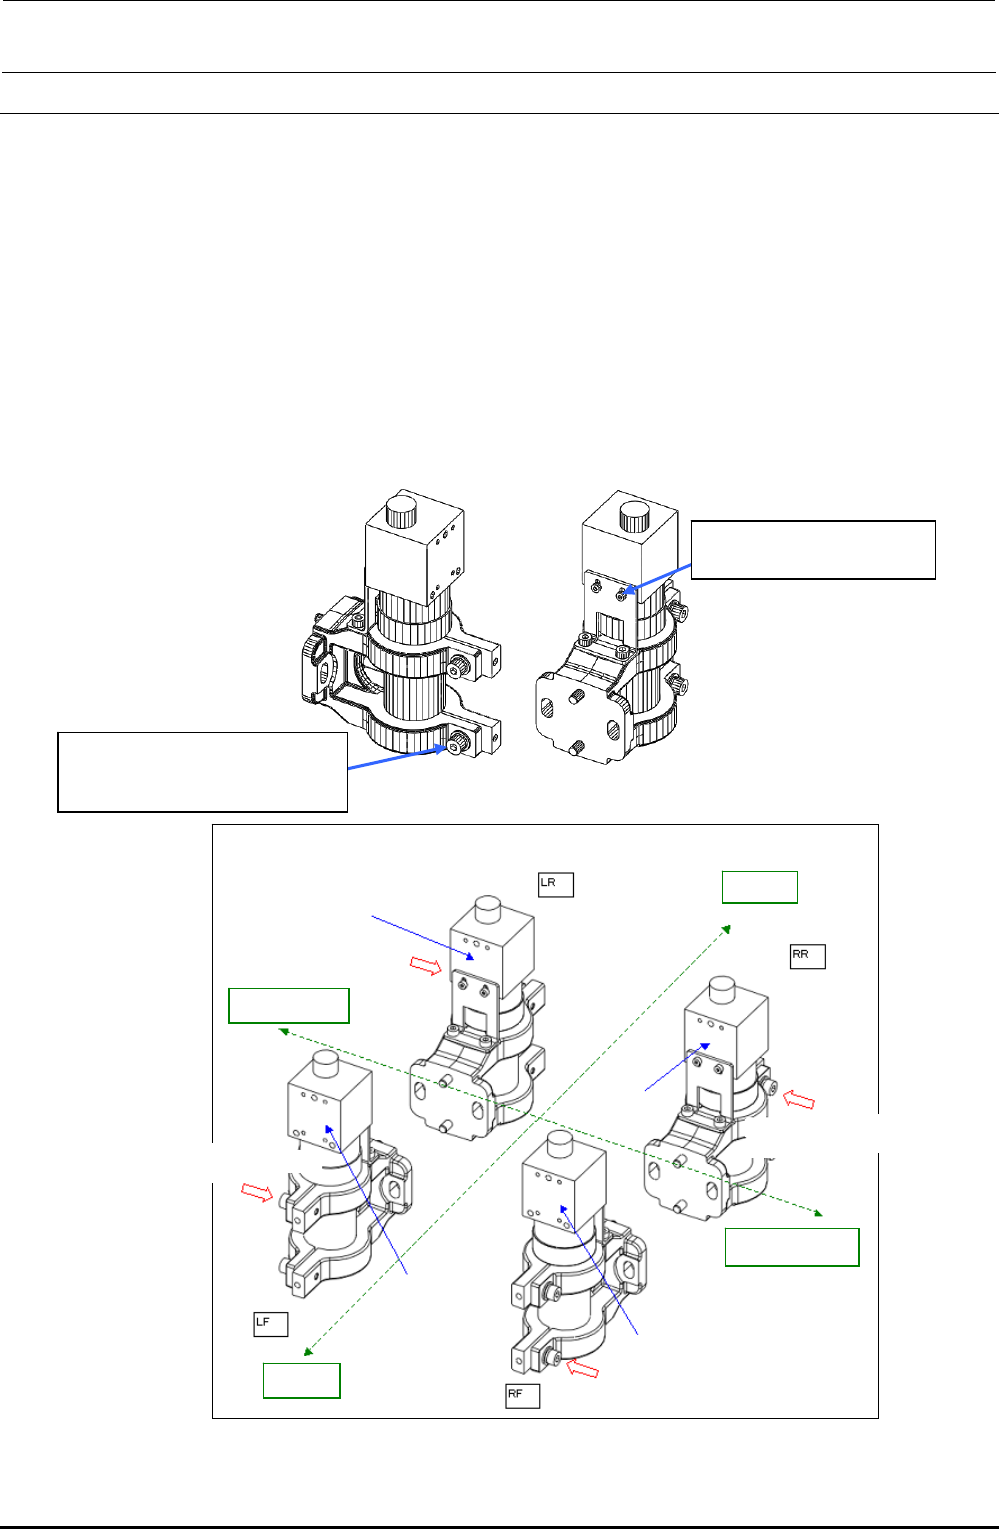
2) Remove the SEMS cap bolts c (×2) and SEMS cap bolts d (×2) securing the CCD camera and
lens to replace the CCD camera and lens assembly.
(At this time, apply ThreeBond 1401B to the screw thread parts of the lens assembly.)
3) Reassemble the components in the reverse order of disassembly. The camera mounting
orientation may vary depending on the type of the head.
(Apply Loctite 242 to the SEMS cap bolts c (×2), and then fix them with a tightening torque of
1.0N⋅m.)
4) After the CCD camera and lens have been replaced, adjust the focus and input the MS
parameters. (See 4-8, List of Readjustment Items after Replacement.)
d SM6020302UZ
SEMS cap bolt M2×3
c SL6041292TN
SEMS cap bolt with washer
M4×12
Rev. 1.00
Camera securing orientation
Label surface
Screw mounting direction
Rea
r
Left station
Label surface
Label surface
Label surface
Screw mounting direction
Screw mounting direction
Screw mounting direction
Right station
Front
Figure 4-2-1 CCD Camera/Lens
FX-3R Maintenance Guide
4-3
4-3. Replacing the OCC Coaxial/Angle Light Board Assemblies
1) Detach the light assembly from the XM base using the procedure described in section 4-1,
Replacing the OCC Assembly.
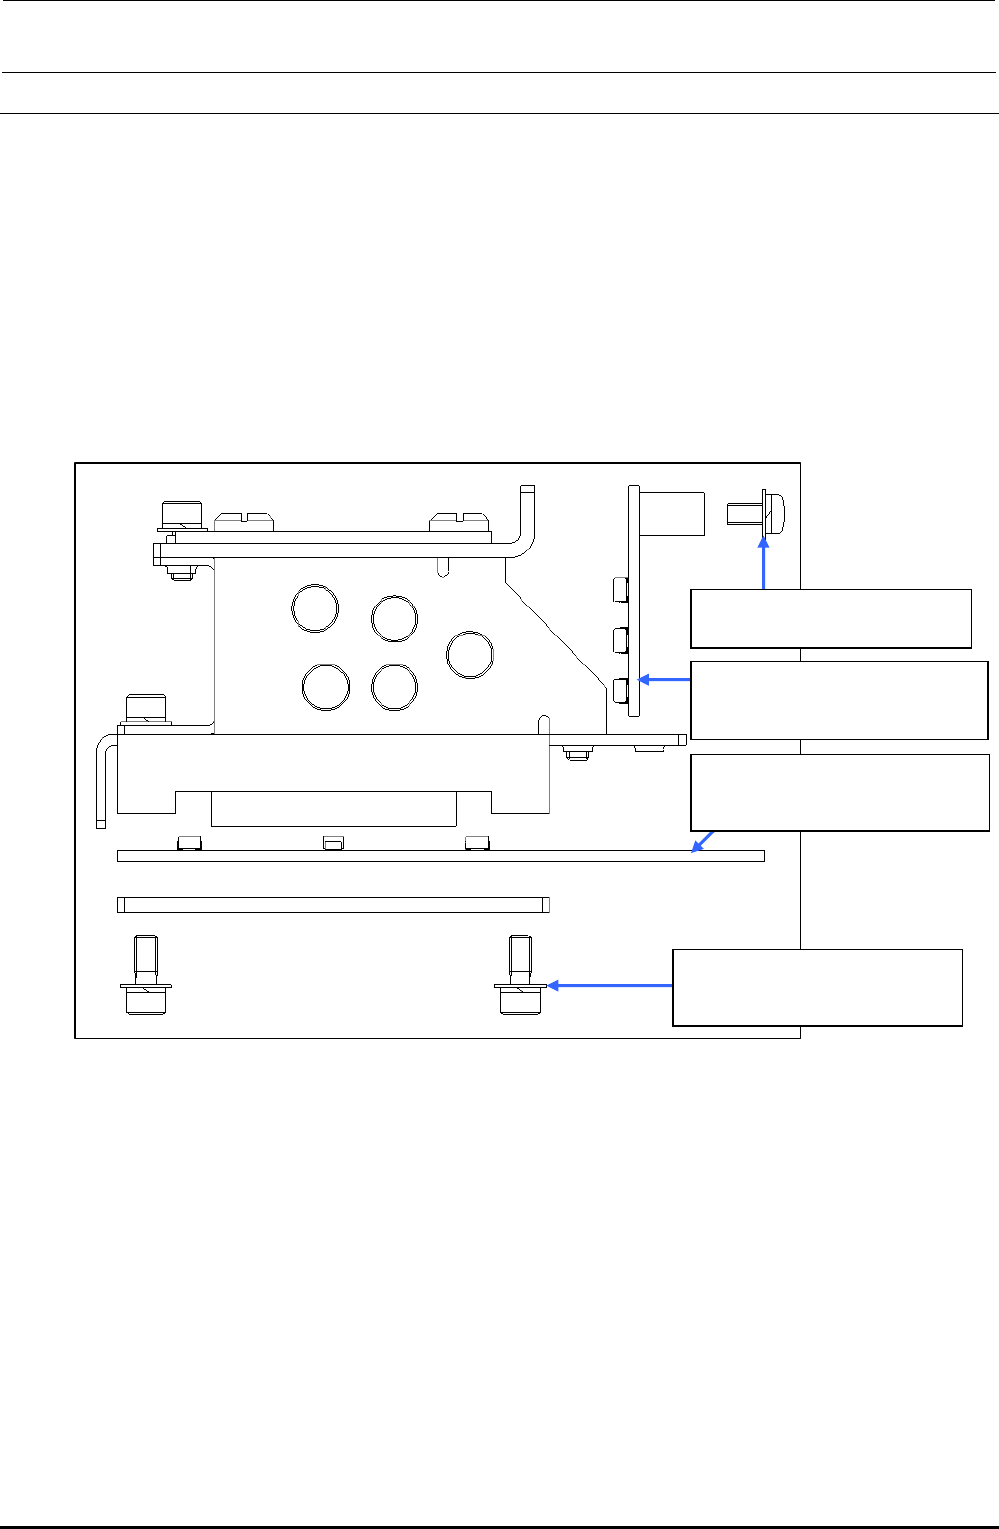
2) Remove the round head screws c (×2) to replace the OCC coaxial light board assembly.
3) Remove the SEMS cap bolts d (×4) to replace the OCC angle light board assembly.
4) Reassemble the components in the reverse order of disassembly.
5) After the OCC light board has been replaced, it is necessary to adjust the light filter U and OCC
light. (See 4-8, List of Readjustment Items after Replacement.)
c SL4030691SC
Round head screw M3×6
40047512
OCC C LIGHT board assembly
(coaxial)
40047508
OCC A LIGHT board assembly
(angle)
d SL6030892TN
SEMS cap bolt with washer
M3×8
Figure 4-3-1 Replacing the OCC Coaxial/Angle Light Board Assembly
Rev. 1.00
FX-3R Maintenance Guide
4-4
4-4. Replacing the Lens Filter
1) Detach the light assembly from the XM base using the procedure described in "Replacing the
OCC Assembly".
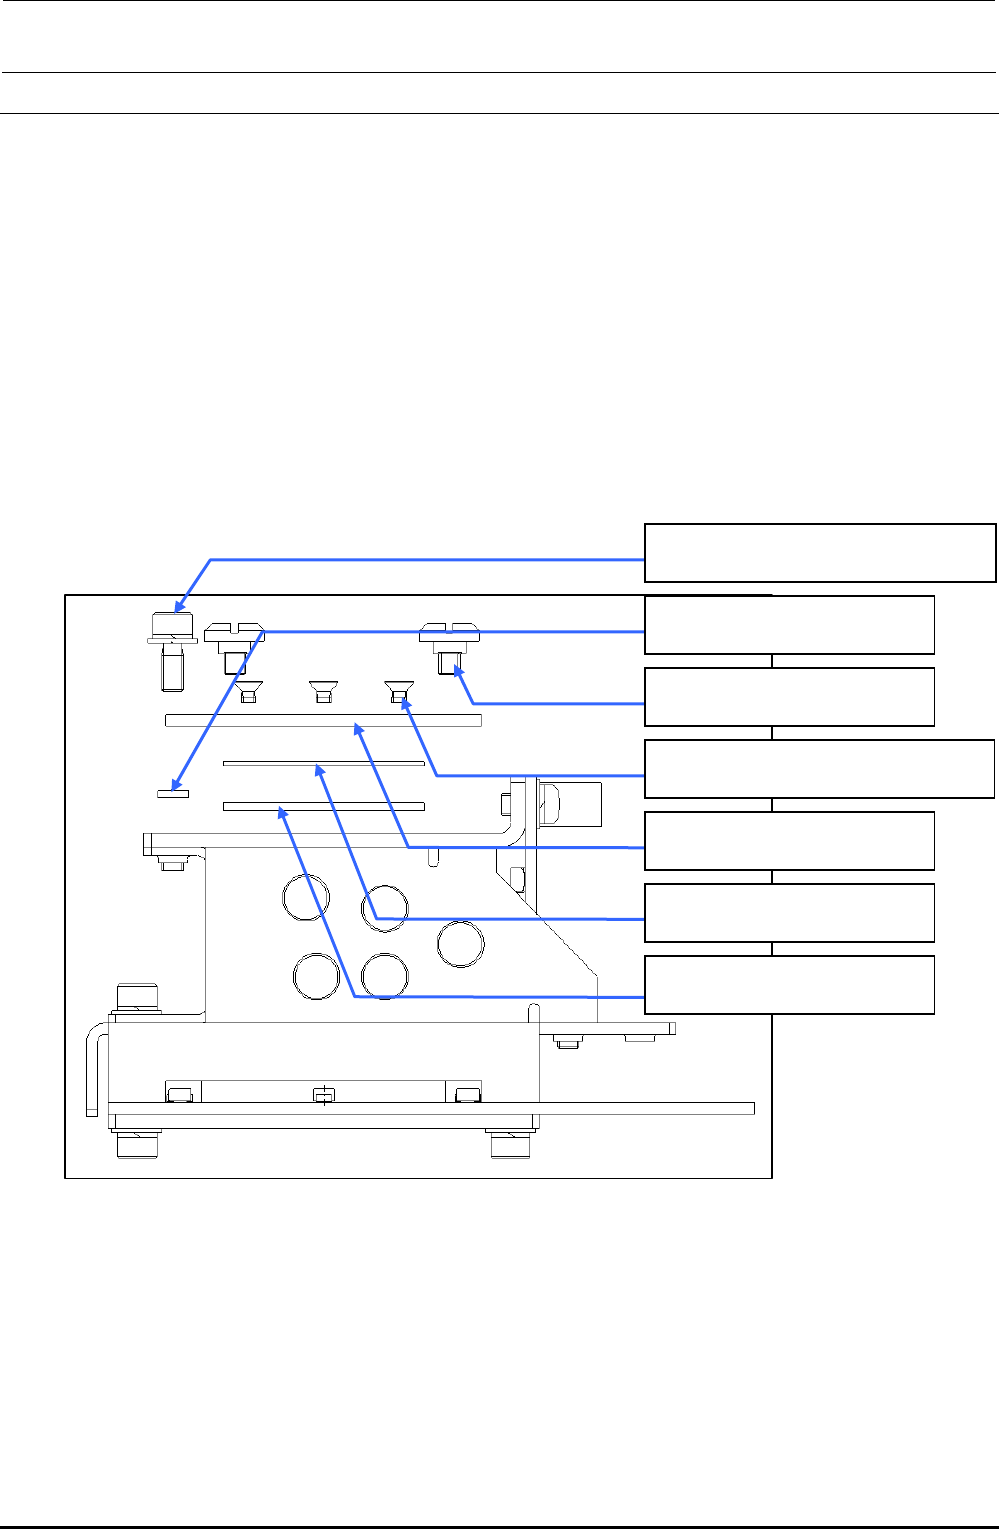
2) Remove the SEMS cap bolt c (×1), collar d (×1) and shoulder screws e (×2) to detach the
light filter U support, lens filter and guide plate.
3) Remove the countersunk-head screws f (×4) to detach the lens filter。
4) Reassemble the components in the reverse order of disassembly.
5) After the filter has been replaced, it is necessary to adjust the polarizing filter and OCC light.
(See 4-8, "List of Readjustment Items after Replacement".)
c SL6030892TN
SEMS cap bolt with washer M3×8
d 40015847
OCC collar
e E1038871000
Platen lock cam screw
f SM1030501SC
Countersunk-head screw M3×5
40013949
Light filter U support
40043896
Lens filter
40013948
Guide plate
Figure 4-4-1 Replacing the Lens Filter
Rev. 1.00