VI User Manual.pdf - 第105页
.TST file creation Vision 2007 4.10 User Manua l Rev 01 4 - 31 Case 2 : a list of jedecs already define d for Joker zone will appear. 2. Select the jedecs by checking the left column a nd by check ing the centere d col- …
.TST file creation
4 - 30 Vision 2007 4.10 User Manual Rev 01
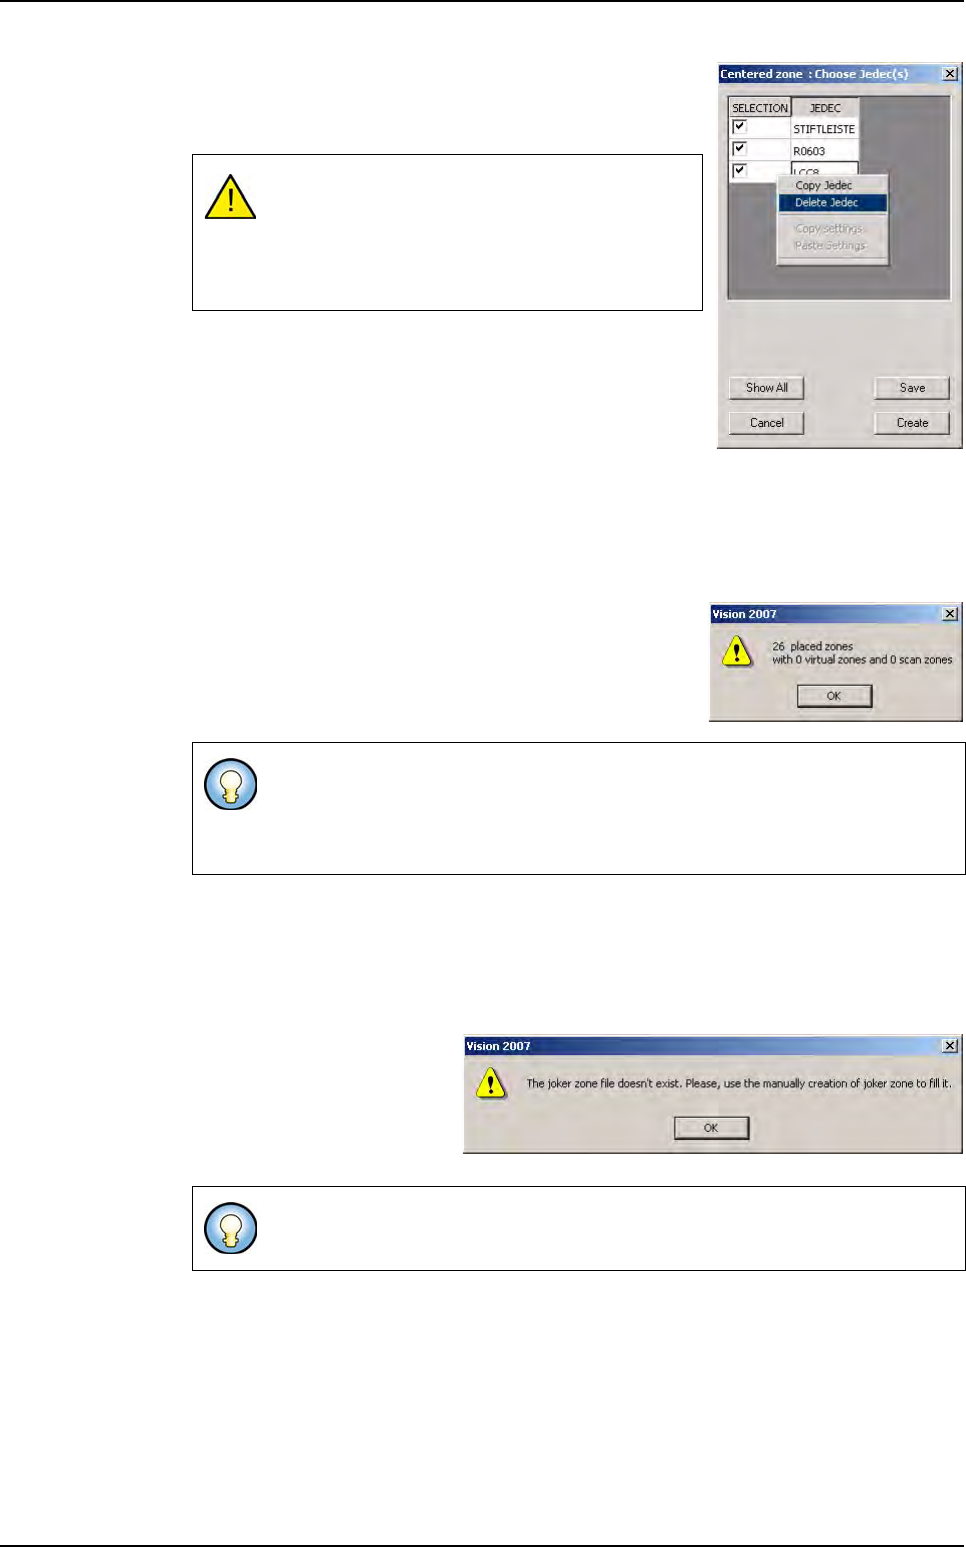
3. Select the jedecs by checking the left column.
4. Copy or delete jedecs if necessary by clicking on the je-
dec codification with the right button of the mouse.
5.
Click on
Cancel
button to close the dialog box without taking
the modifications into account and without creating centered
zones but the standard zones creation is still processing.
Click on Save button to keep of all the modifications in
the zones.dsc file.
Click on Create button to keep of all the modifications in the zones.dsc file and launch
the creation of the centered and standard zones.
Click on Show all button to display all the jedecs in the zones.dsc file concerned by
the centered zones even if they are not in the tst file.
6. Following the creation, a information message will ap-
pear with the number of created zones for standard and
centered ones, multi-zones.
Click on OK button to display zones.
4.8.4.4 Automatic Joker zones creation
The menu Create Joker zones allows the creation and the management of zones.dsc
file concerning the jedecs associated to Joker zones.
1. Select Create Joker zones in the pulldown menu.
Case 1
: A message will appear
meaning that the zones.dsc has
not been created yet or that the
zones.dsc file exist but there
are no jedecs corresponding to
the .tst file pending.
The new jedec set could not be a jedec already
associated to a centered zone nor a jedec asso-
ciated to a joker zone, nor a jedec associated to
a multi-zone, the operator must correct the list
before creating the zones.
In the window displayed in order to select the jedecs,
only the jedecs that
belongs simultaneously to the zones.dsc file and the tst files appear
.
If the zones.dsc file is empty, no centered zones will be created, only standard,
scan, multi-zones will be created directly.
In order to fill the zones.dsc file, create manually joker zones before activating
the menu.
Zones creation
.TST file creation
Vision 2007 4.10 User Manual Rev 01 4 - 31
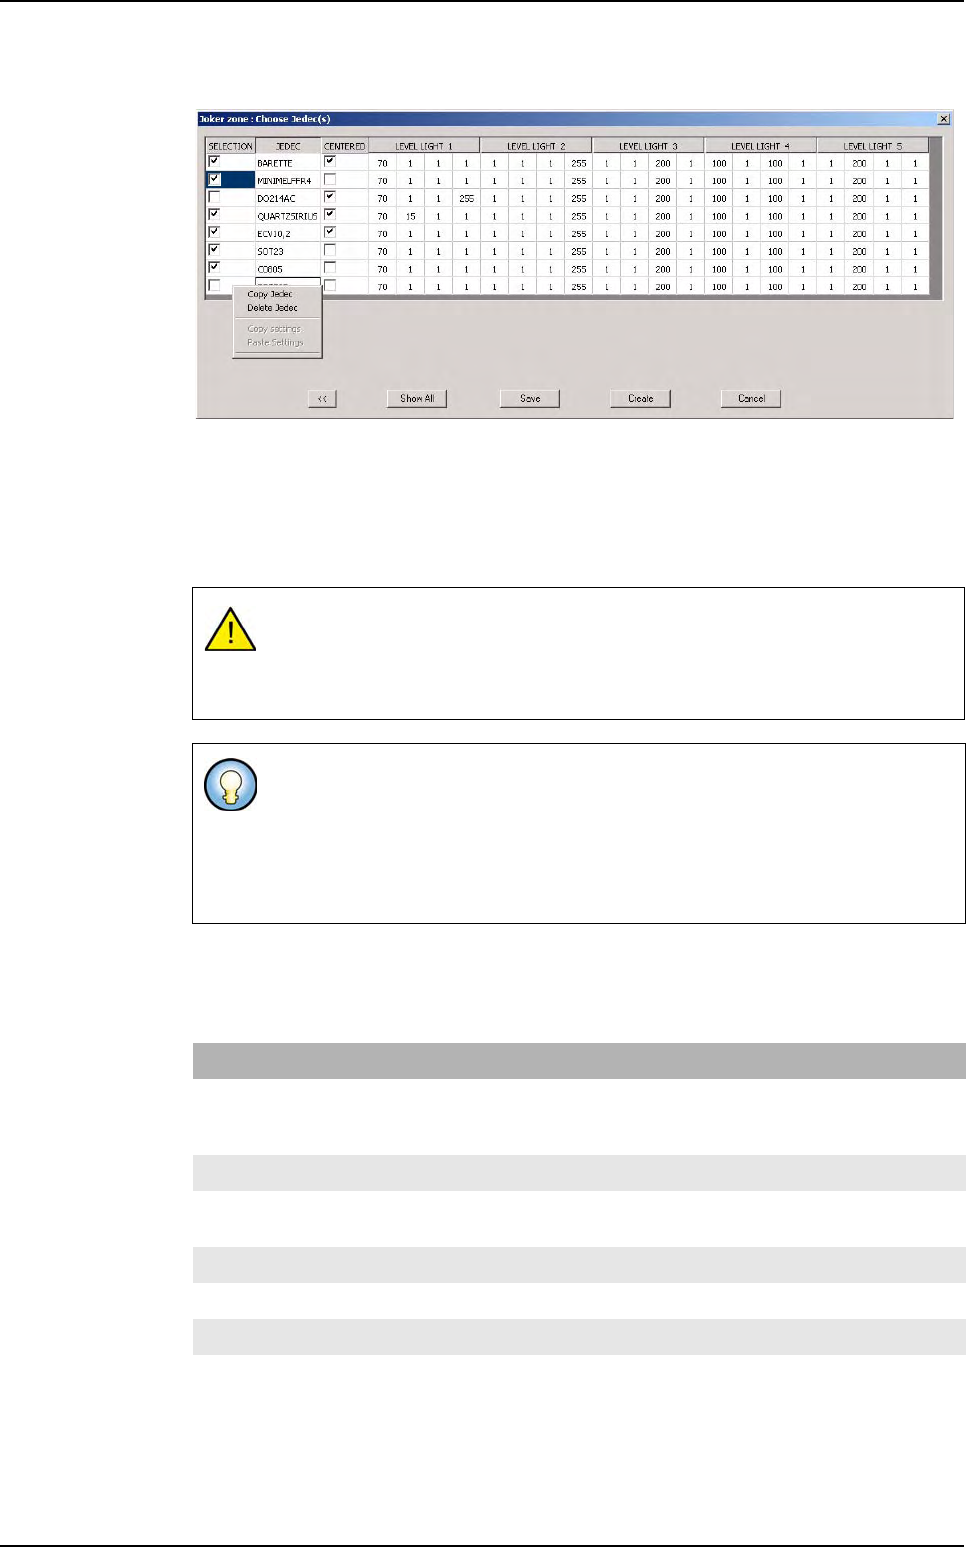
Case 2: a list of jedecs already defined for Joker zone will appear.
2. Select the jedecs by checking the left column and by checking the centered col-
umn if the jedec must be centered.
3. Copy or delete jedecs if necessary by clicking on the jedec codification with the right
button of the mouse.
4. Copy or modify light settings.
4.8.4.5 Automatic zones deletion and automatic attach, re-attach components
Some menus are defined in order to deletes zones or re-attach components to zones au-
tomatically.
The new jedec set, could not be a jedec already associated to a joker zone nor
a jedec associated to a centered zone, nor a jedec associated to a multi-zone,
the operator must correct the list before creating the zones otherwise he will not
be able to save or create the zones.
In the window displayed in order to select the jedecs,
only the jedecs that
belongs simultaneously to the zones.dsc file and the tst files appear
.
In the window displayed the light settings come initially from the default.ini file
when modified the light settings come from the zones.dsc file.
The buttons are similar to the centered zones dialog box, the difference is <<
button that allow the handling of the light settings.
Menu Description
Attach a component in zones F6 This menu (or F6 command) attach components not already attach
in zones. In case of moving some zones, the user can reattach the
components using the menu.
Re-attach all components F7 This menu (or F7 command) reattach all the components.
Assign multi-zones This menu attach very large components not already attach in multi-
zones.
Delete no protected zones Deletion of all no protected zones.
Delete all zones Deletion of all zones (protected or not).
Delete empty zones Deletion of empty zones with no attached components.
Executable component If this menu is checked, only the executables components are
attached to zones, if not, all components of the tst file are attached.
Zones creation
.TST file creation
4 - 32 Vision 2007 4.10 User Manual Rev 01
4.8.4.6 Manual zones creation
Floating menu allows a manual creation of the different zones.
4.8.4.7 Centered zone manual creation
1.
In the .tst edition tools bar, click on
Display zones
button to display all acquisition zones.
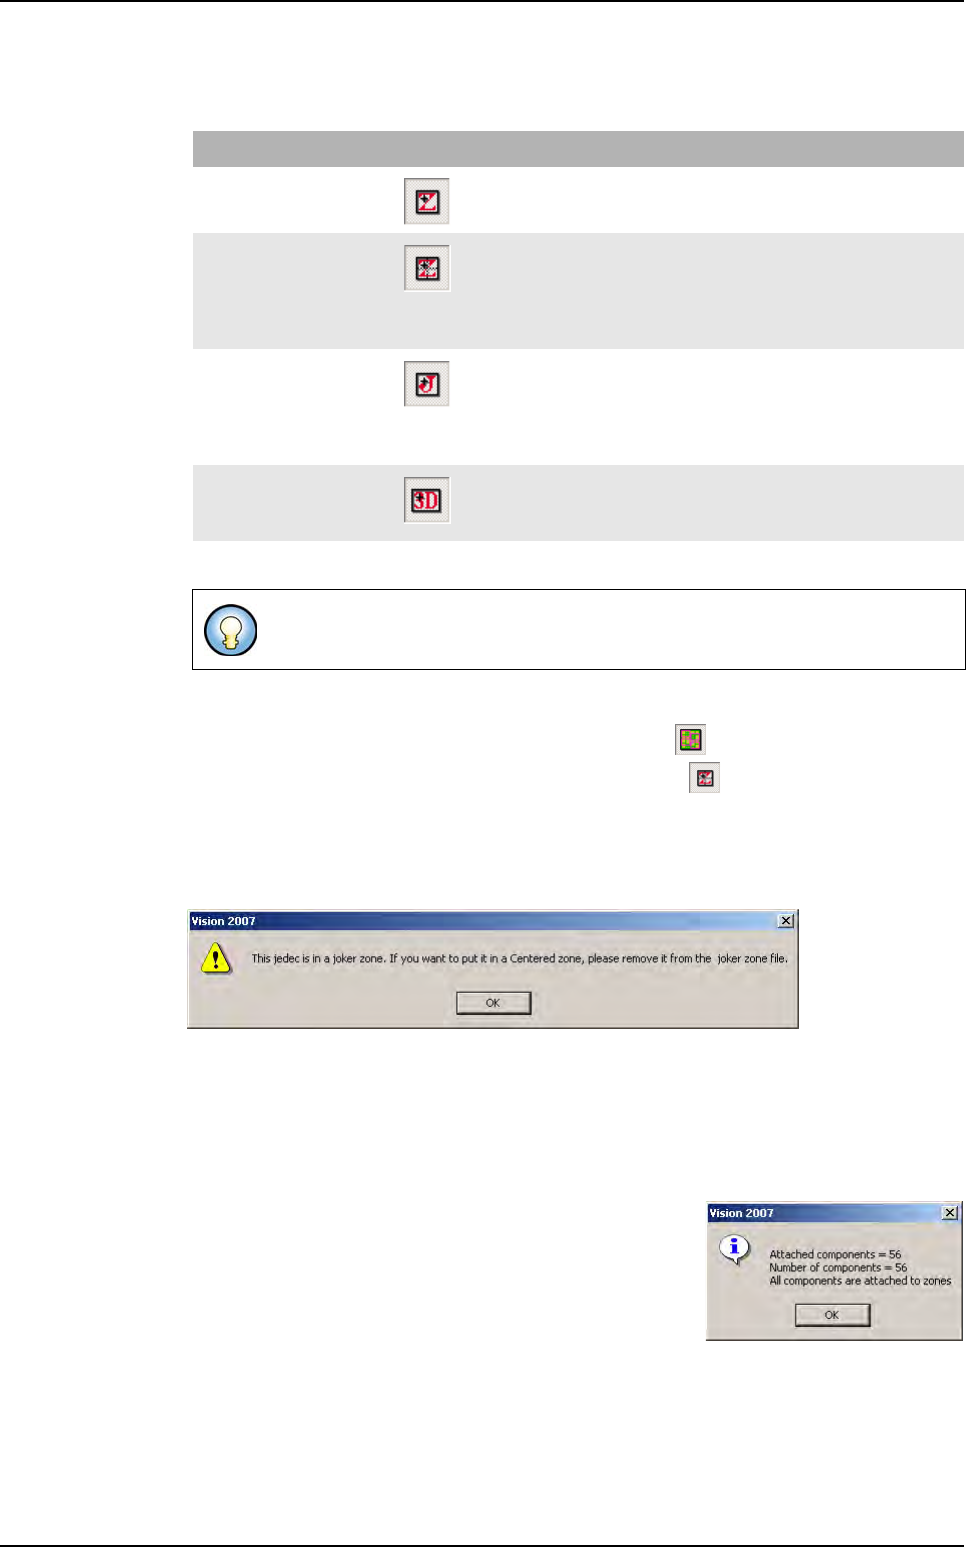
2. On the floating menu, select the Centered zone icon .
3. Click on the component that require a centered zone.
Case 1: the component is already defined in the zone file as a component associated to
a joker zone. An error message appears.
.
Remove the jedec from the zones .dsc file before to create a joker zone on this component.
Case 2: the component is a component that needed a multi-zone. The operator cannot
create a centered zone on multi-zone component (no message).
Case 3: the component is not defined in the zone file or the zone file is empty. The Zone
edition window is displayed, adjust the light settings.
Click on OK to validate settings, the zones file is updated
with the new Jedec name. An information message will
appear confirming the re-attachment of the components.
Case 4: the component is already defined in the zone file as a component associated to
a centered zone. The Zone edition window is displayed, adjust the light settings.
Click on OK to validate your settings, the zones file is updated with the new Jedec name.
A second zone will be created associated to the component.
Zone type Icon Action description
Standard zone The operator can click every where on the .tst file, the components
included in the zone area will be attached to the zone.
Centered zone The operator must click on a chosen component, the components
included in the zone area will be attached to the zone.
The chosen component must be either defined in the zone file as a
centered component or either not defined at all. It cannot be a multi-
zone or a component already defined in a joker zone.
Joker zone The operator must click on a chosen component, only this compo-
nent will be attached to the zone.
The chosen component must be either defined in the zone file as a
joker component or either not defined at all. It cannot be a multi-
zone or a component already defined in a centered zone.
Scan zone The operator can click everywhere on the .tst file, the components
included in the zone area will be attached to the zone. The area will
depend on the width set.
In the floating menu, the left menu allow the moving and the selection of a zone.
Zones creation