VI User Manual.pdf - 第156页
Match Maker 6 - 22 Vision 2007 4.10 User Manu al Rev 01 6.5 Wizard TST after use of Match Maker After having chosen models which match to the unk nown components, if the tota lity of Jedec Client are not linked to a Jede…
Match Maker
Vision 2007 4.10 User Manual Rev 01 6 - 21
6.4.5 Bottom part
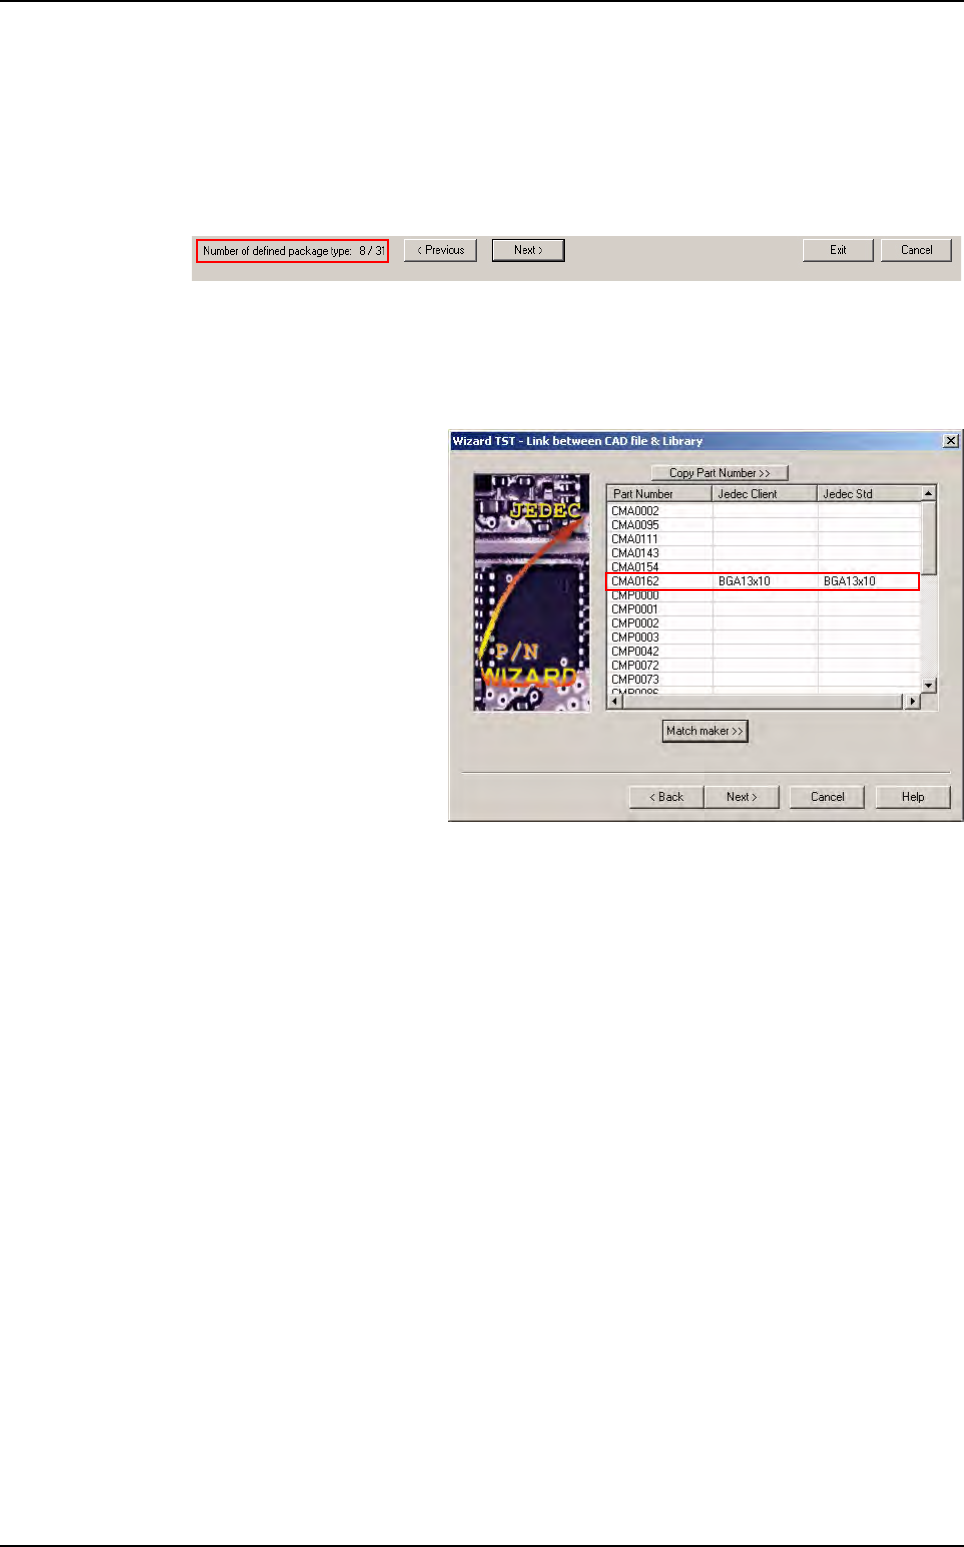
6.4.5.1 Number of defined package type
This information is automatically present and indicates the number of Part Number al-
ready associated to a model family on the total number to define.
6.4.5.2 The buttons
< Previous: The Match Maker page of the previous Part Number from the list appears.
Next >: The Match Maker page of the next Part Number from the list appears.
Exit: The Wizard TST -
Link between CAD file &
Library
window
appears
(see: §
6.6
Examples of
link between Part Number
and Library).
All the links between Part
Number and Jedec Stan-
dard are validated.
Cancel: A window appears to confirm or not:
If the user confirms, all the modifications are lost.
If the user does not confirm: the page stays.
Match Maker graphical user interface
Match Maker
6 - 22 Vision 2007 4.10 User Manual Rev 01
6.5 Wizard TST after use of Match Maker
After having chosen models which match to the unknown components, if the totality of Jedec Client
are not linked to a Jedec Standard the user can enter the size, then an empty model with those width
and height will be created in the customer library for this Jedec name.
Several actions are necessary since the Wizard TST window:
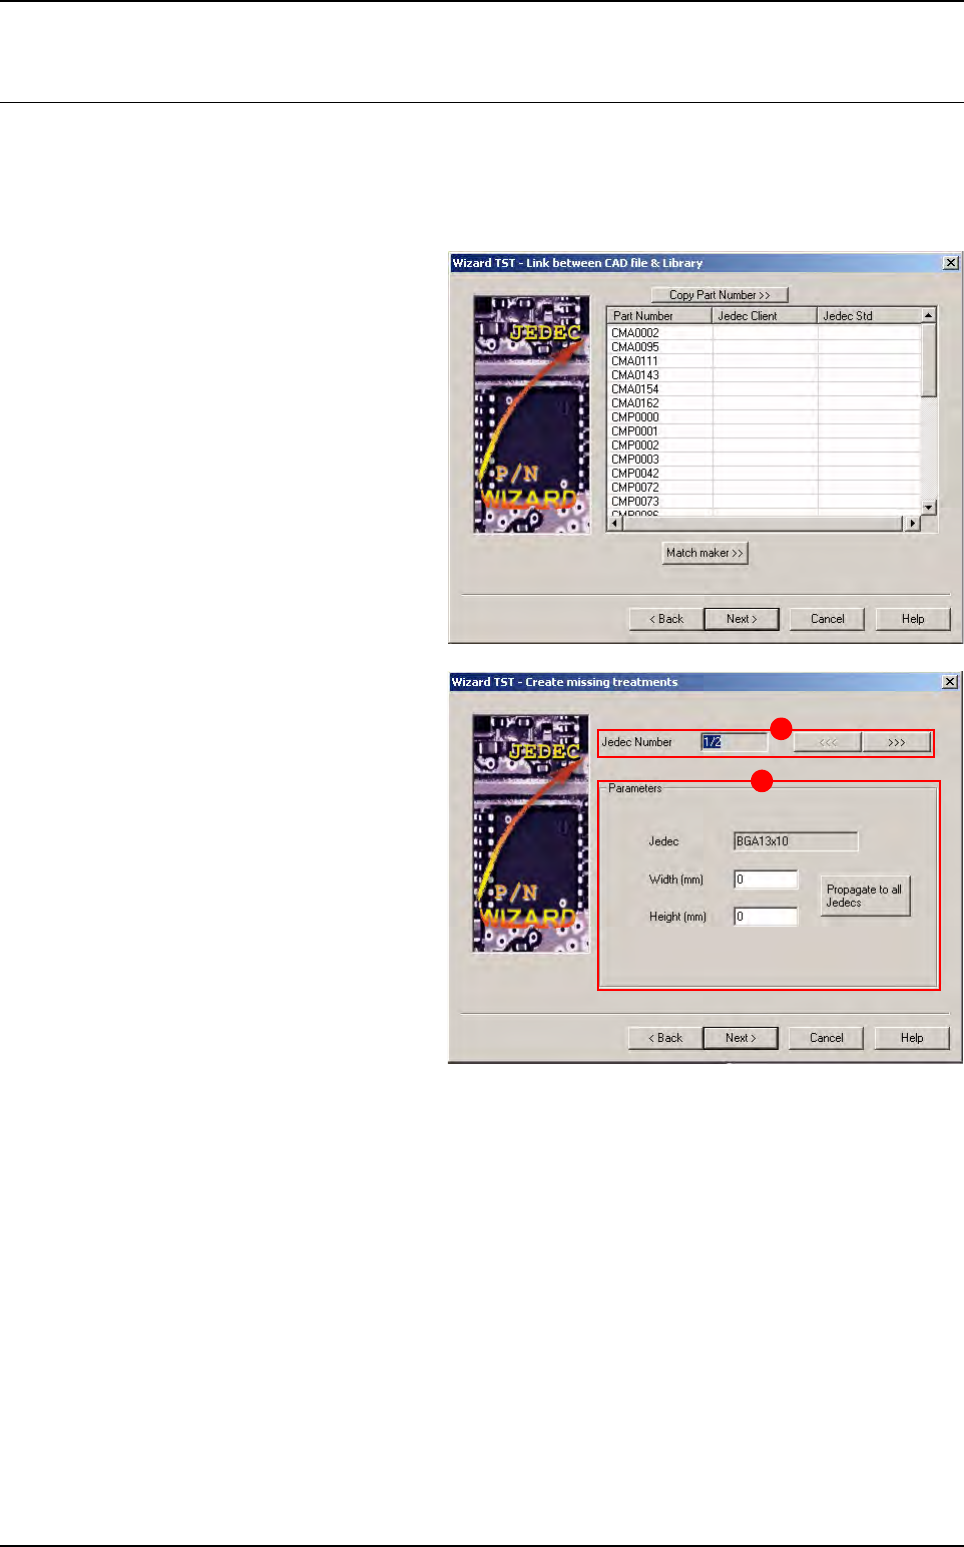
1. In Link between CAD file & Library
window, click on Next > button.
2. The Create missing treatments win-
dow appears.
Two parts compose this window:
A The Number of the Jedec Client
which is not associated to a Jedec
Standard.
The arrows <<< and >>> enable to
go to the previous or next Jedec
Number.
B The Parameters of the Jedec not de-
fined:
Jedec (Jedec Standard or Jedec
Client)
Width (to fill in)
Height (to fill in)
Click on Propagate to all Jedec to propagate the values (width and height) to all Jedec not defined.
Realize all the treatments.
Click on Next > button.
B
A
Match Maker
Vision 2007 4.10 User Manual Rev 01 6 - 23
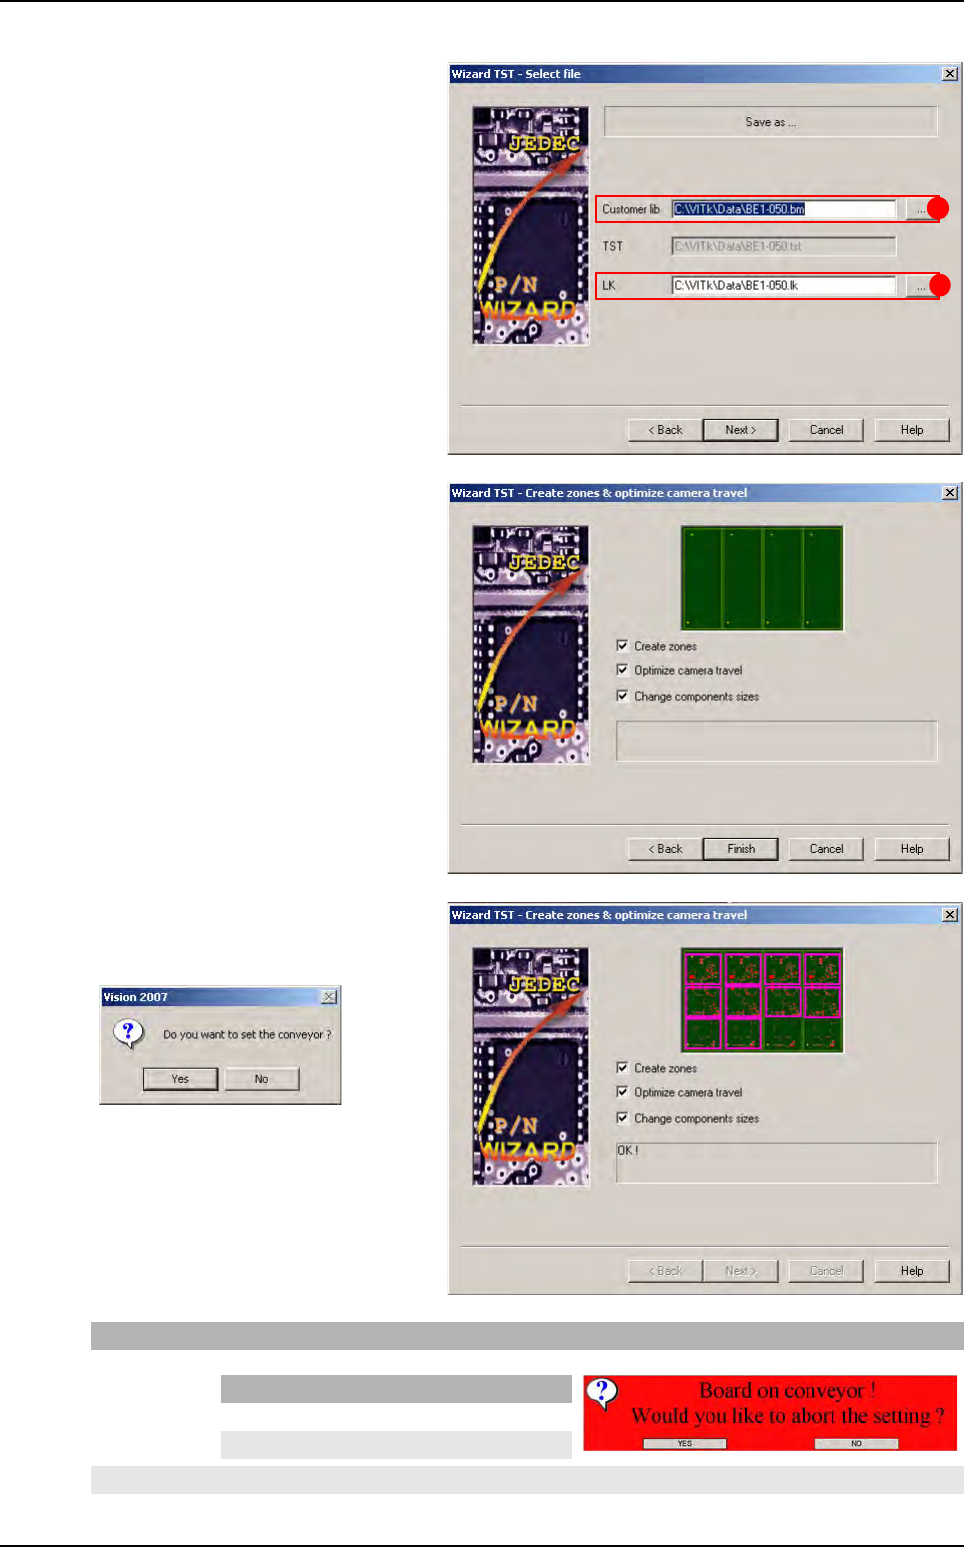
3. The Select file window appears.
Select the save files of the process.
Two fields can be selected:
A Customer Library field
B LK file field
Click on Next > button.
4. The Create zones and optimize cam-
era travel window appears.
Click on the Finish button.
A new message appears.
If you click on Then
Yes The board is ejected and an information is displayed
No The TST file displays (Step 4)
A
B
If Then
Yes The TST file displays (Step 4)
No The information stays displayed
Wizard TST after use of Match Maker