VI User Manual.pdf - 第241页
Tools library Vision 2007 4.10 User Manua l Rev 01 7 - 79 5. Press Test ( G ) button to lauch the Data Matrix r eading test. The standard resu lt (score, XY position, theta, ...) and the decoded character stri ng are dis…
Tools library
7 - 78 Vision 2007 4.10 User Manual Rev 01
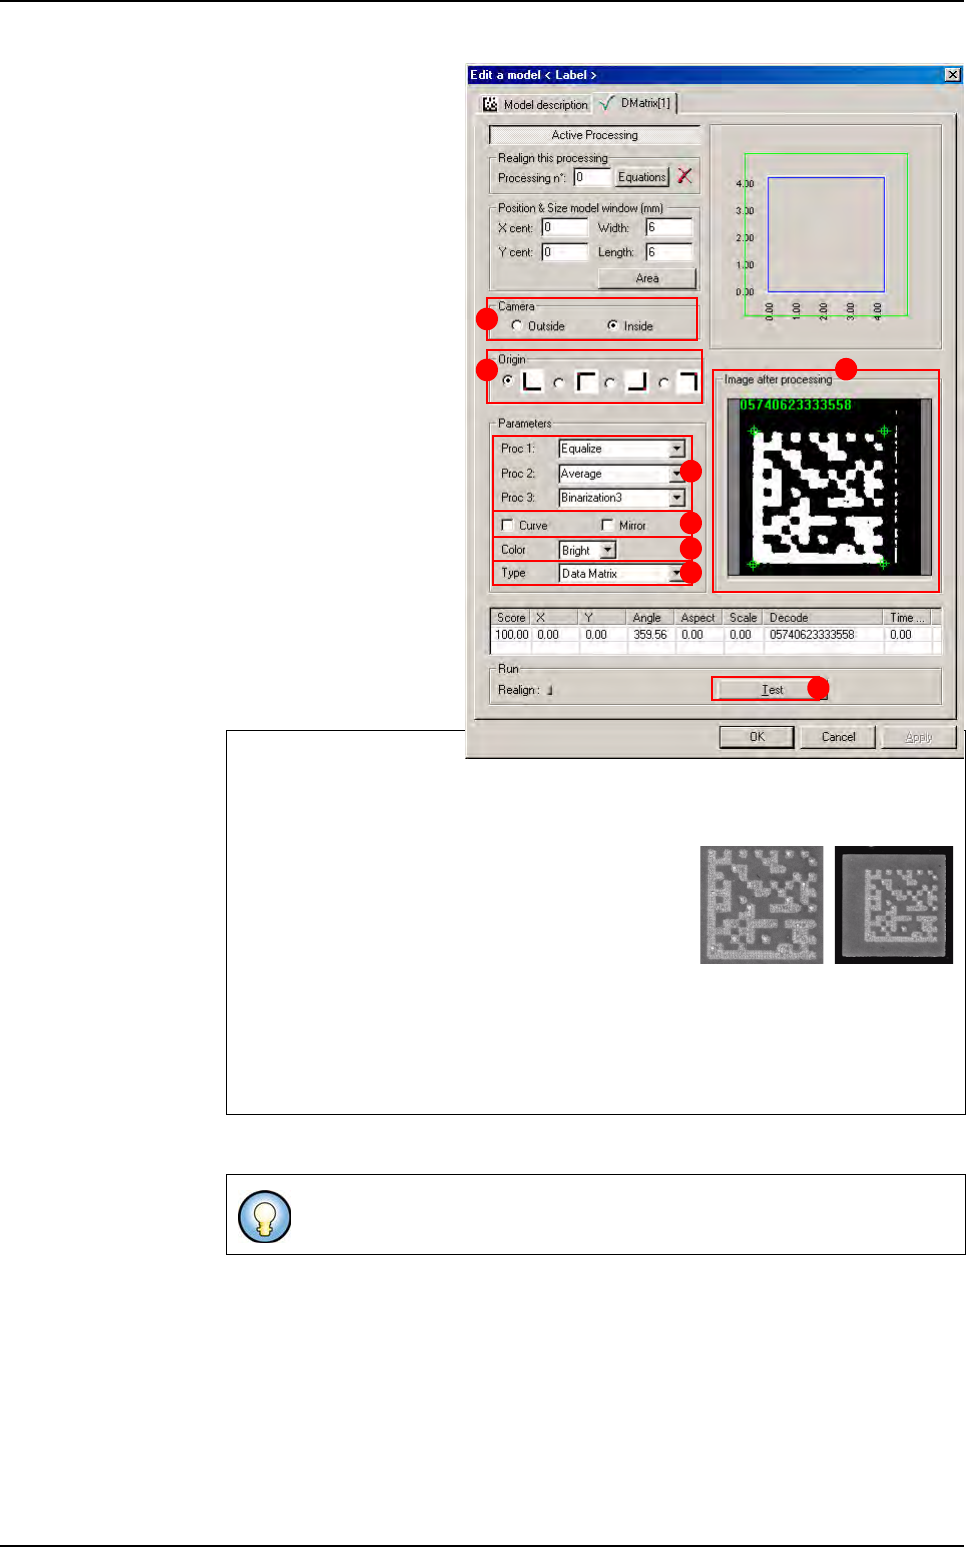
1. In Camera (A) section,
select the camera used to
read the Data Matrix. The
external camera takes
picture during the board
loading. If you have cho-
sen an external camera,
the search area is not
used, the software takes
care of the entire image.
2. In Origin (B) section,
you can select where is
the Data Matrix origin but
in most cases, the soft-
ware is able to find it it-
self.
3. In Parameters section,
when the picture is too
noisy to be decoded (ex:
Laser engraved data ma-
trix), it is possible to im-
prove the image quality.
Choose among the
Proc
...
(C) lists, the process-
ings to be executed on
the picture.
Tick
Curve or (and) Mirror (D) according to the Data Matrix type.
Select the Data Matrix
Color (E): dark on a bright background or bright on a dark bac-
kground.
Select the Data Matrix
Type (F) corresponding to the application.
Equalize: this processing increases the image dynamic to have pixel gray level
from 0 to 255.
Average
: this processing makes an average of the picture. It reduces the picture noise.
Binarization2: this processing computes 2 pixel
classes and returns a binary image based on these
2 classes.
Binarization3: this processing computes 3 pixel
classes and returns a binary image based on these
3 classes.
Inversion: this processing inverts the gray level scale. White pixels become black
and black become white.
Up to 3 processings will be applied one after the other.
Some Data Matrix are curved or (and) mirrored.
A
B
C
D
E
F
G
H
Data Matrix
Binarization2 Binarization3
Tools library
Vision 2007 4.10 User Manual Rev 01 7 - 79
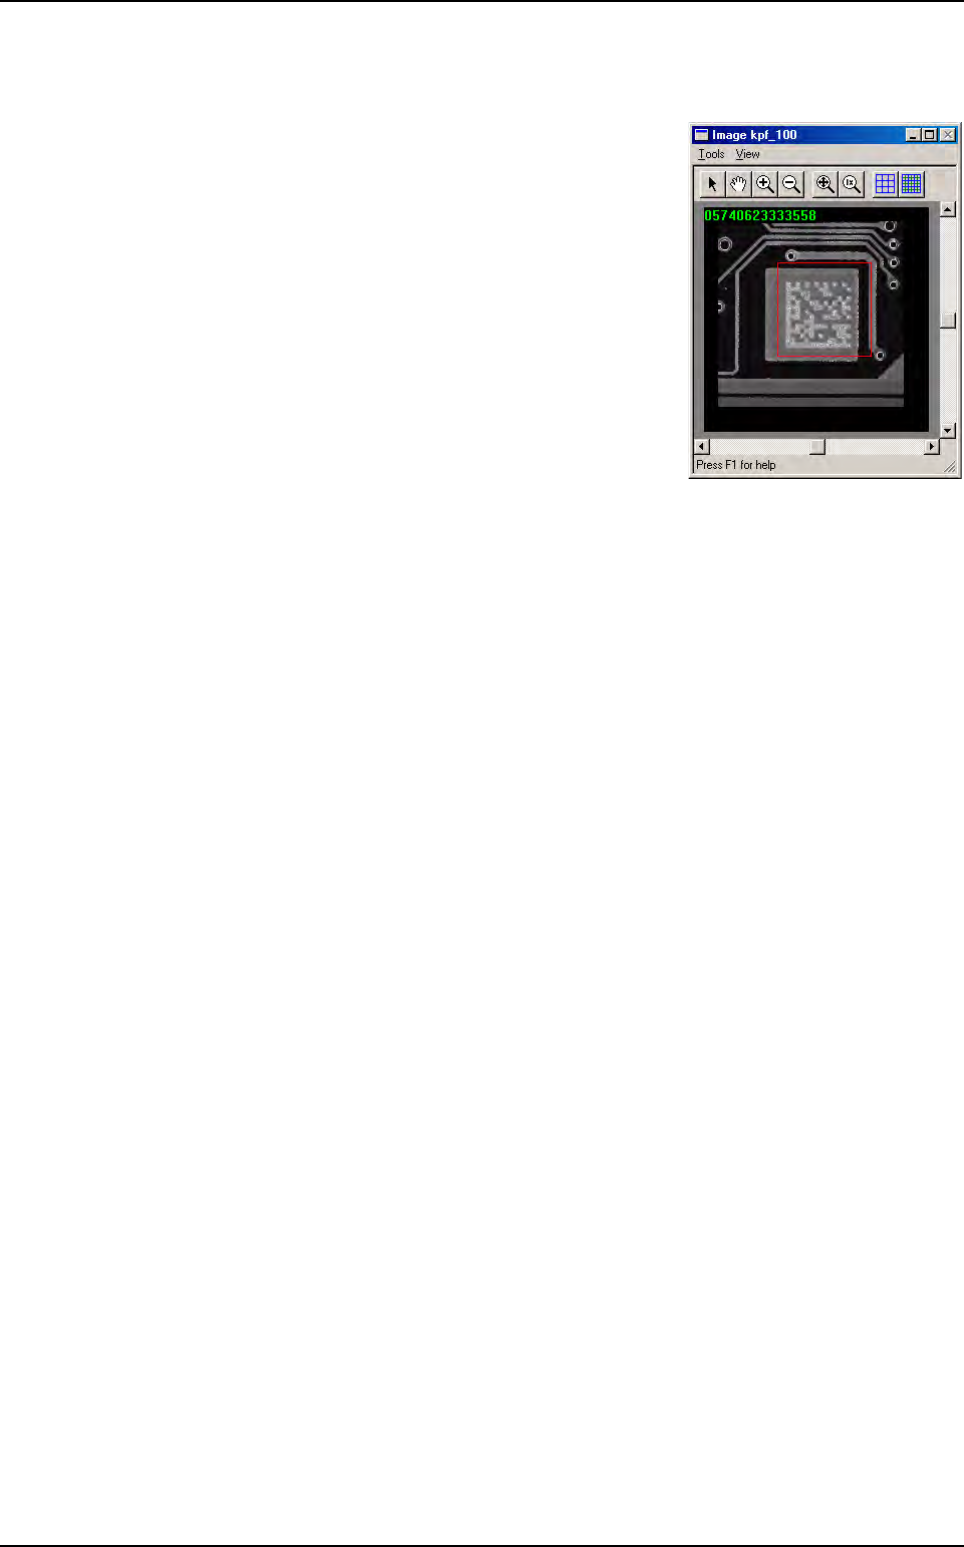
5. Press Test (G) button to lauch the Data Matrix reading test. The standard result
(score, XY position, theta, ...)
and the decoded character string are displayed.
You can also see the result in the COGNEX con-
sole
6. In Image after processing (H) section, the resulted image after processing is dis-
played to allow you to adjust the image processings.
Data Matrix
Tools library
7 - 80 Vision 2007 4.10 User Manual Rev 01
7.13 Bar code CVB model
7.13.1 Model description tab
1. On the Model description tab, in the Edit a model window, click on the button. The
.bmp file name to add in picture list window appears.
2. Select the image on which load the treatment.
3. Click on Edit area button to define the component size.
4. Choose the treatment operation: Barcode CVB. A new Bar code tab appears behind the
Model description tab.
7.13.2 Bar code tab
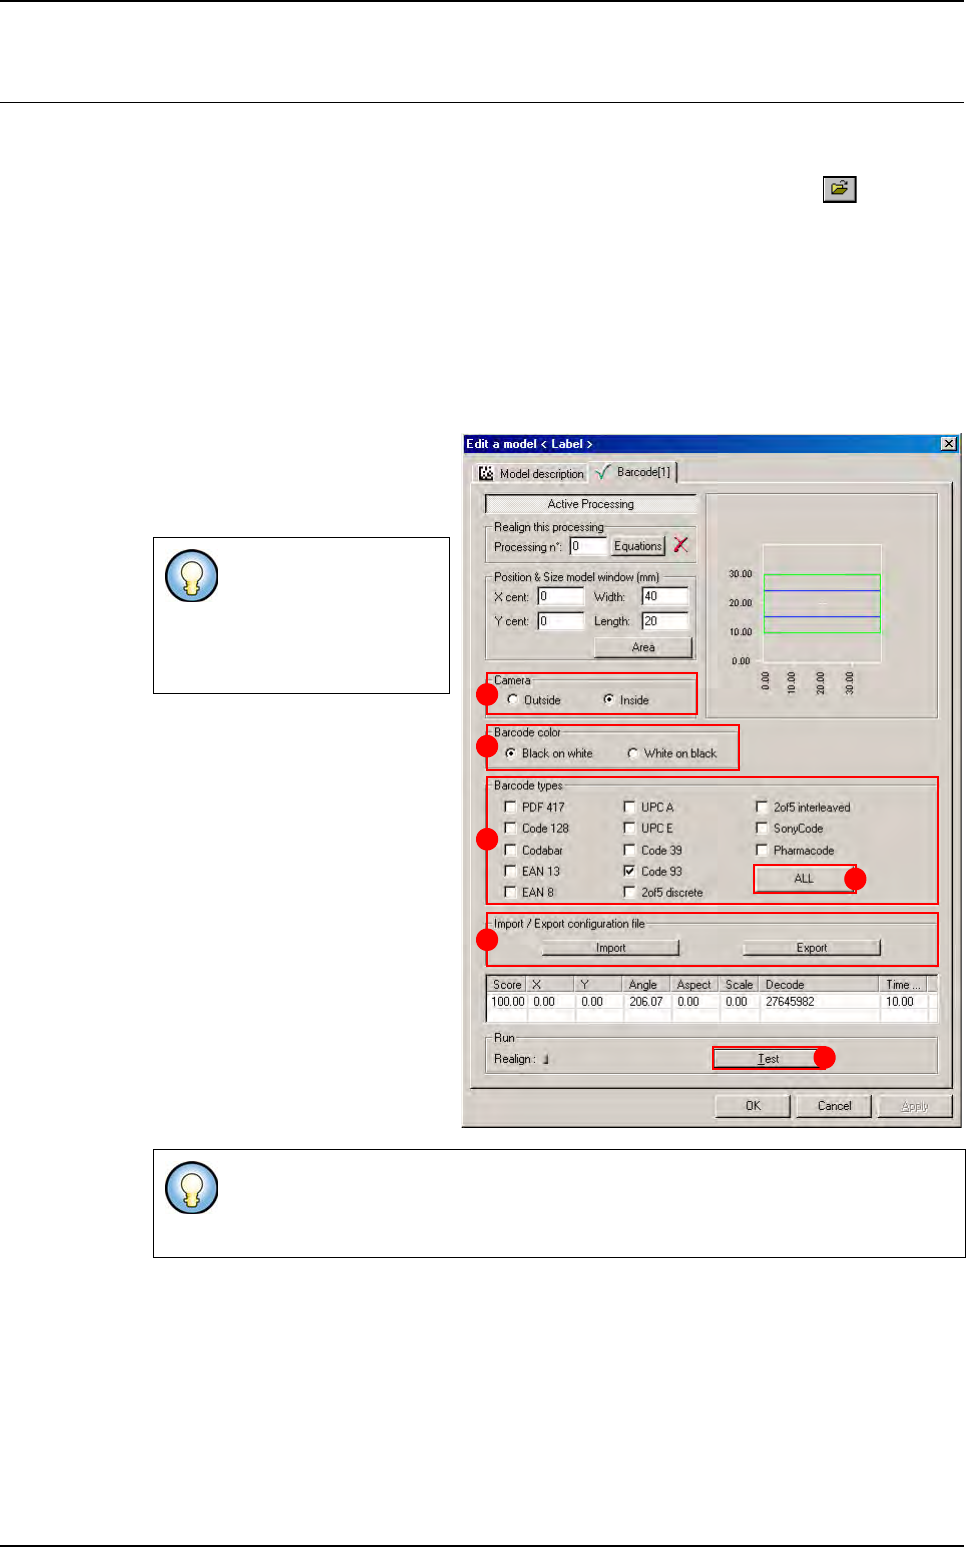
1. In Camera (A) section, select
the camera used to read the bar
code. The external camera take
picture during the board loading.
2. In Bar code color (B) section,
select the bar code type among
the 2 available:
Black code on a white back-
ground,
White code on a black back-
ground.
3. In Bar code types (C) section,
select the bar code coding type to
read.
The
All (D) button is used to se-
lect or deselect all coding type.
If you have chosen an ex-
ternal camera, the search
area is not use, the
software take care of the
entire image.
The CVB bar code reader is able to read several different bar code coding type. If
you do not know the coding type select all the type but it is time consuming. It is
better to select only the one you use.
A
B
C
D
E
F