VI User Manual.pdf - 第265页
Optical Character Verification Vision 2007 4.10 User Manua l Rev 01 8 - 3 8.2.2 Edit and configure a text object 1. Select the edit from the tool bar and click on the text object to disp lay the edition window. 2. Define…
Optical Character Verification
8 - 2 Vision 2007 4.10 User Manual Rev 01
8.2 Creation procedure
8.2.1 Add a new text object in a test file
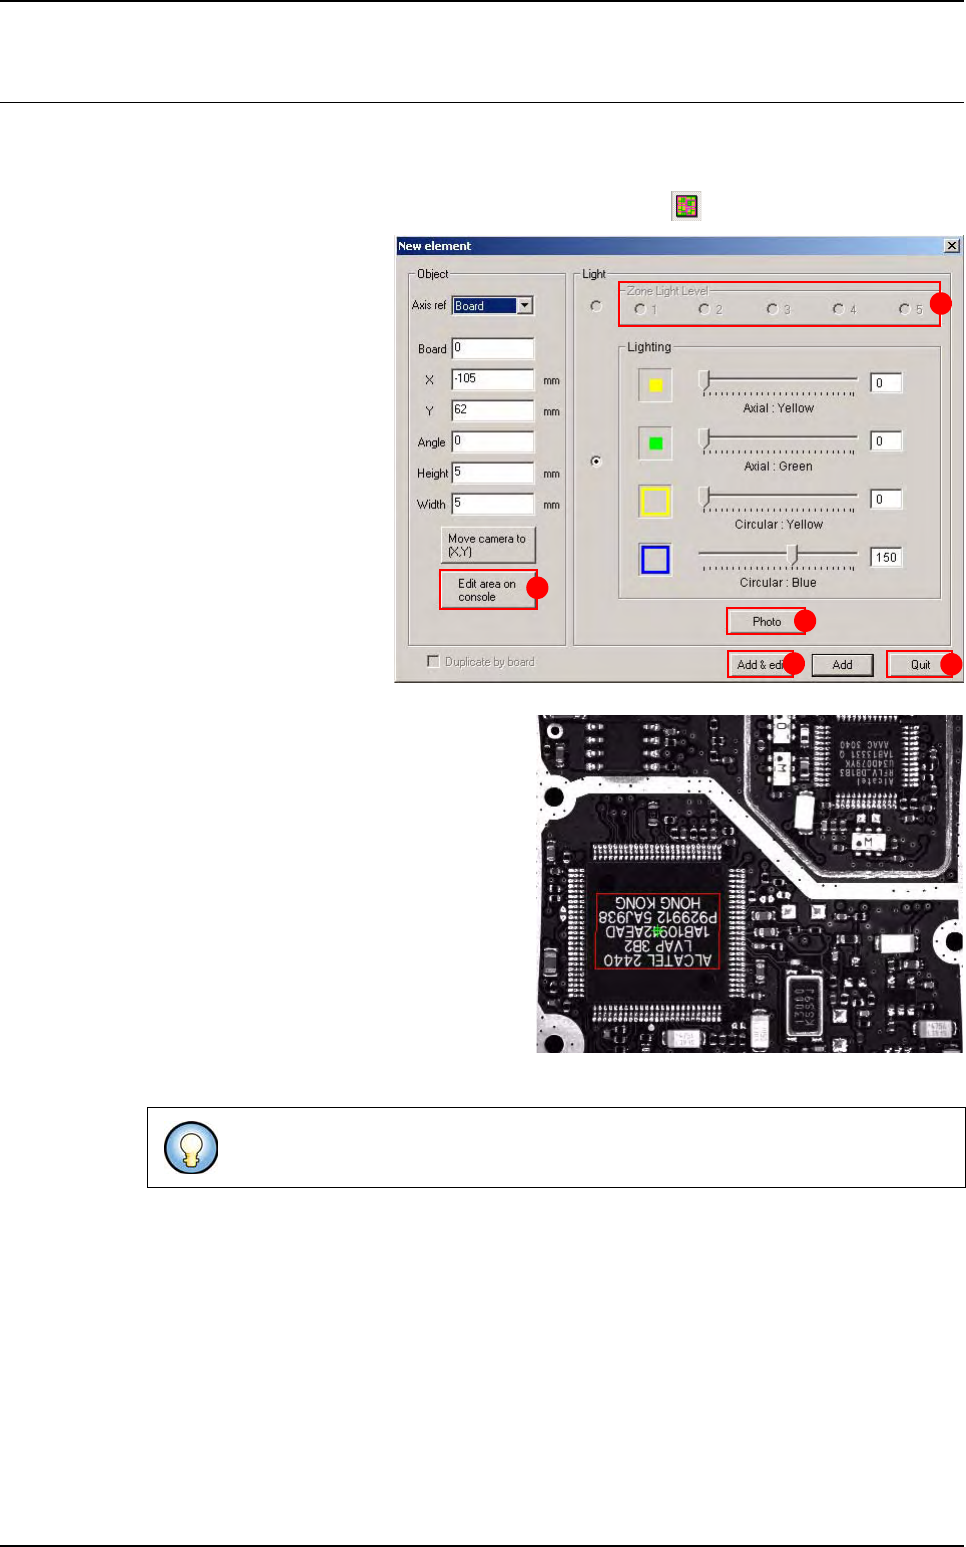
1. Display the acquisition zones using the corresponding icon
2. Select the menu: Edit\
Text\Add a text object to
open the creation window:
3. Click on the .tst file to refresh the video con-
sole.
4. Select the light level (A).
5. Adjust the text location and area (B).
6. Take a Photo (C) of the string.
7. Click Add & edit button (D) to add the text
object in the .tst file at the defined location
and to edit the text object. The Edit text
window appears (see next page).
8. Click on OK from the Edit text window to
validate the settings.
9. Then close the creation window with the
Quit button (E).
You can add the text on all boards with the option Duplicate by board.
A
B
C
D
E
Optical Character Verification
Vision 2007 4.10 User Manual Rev 01 8 - 3
8.2.2 Edit and configure a text object
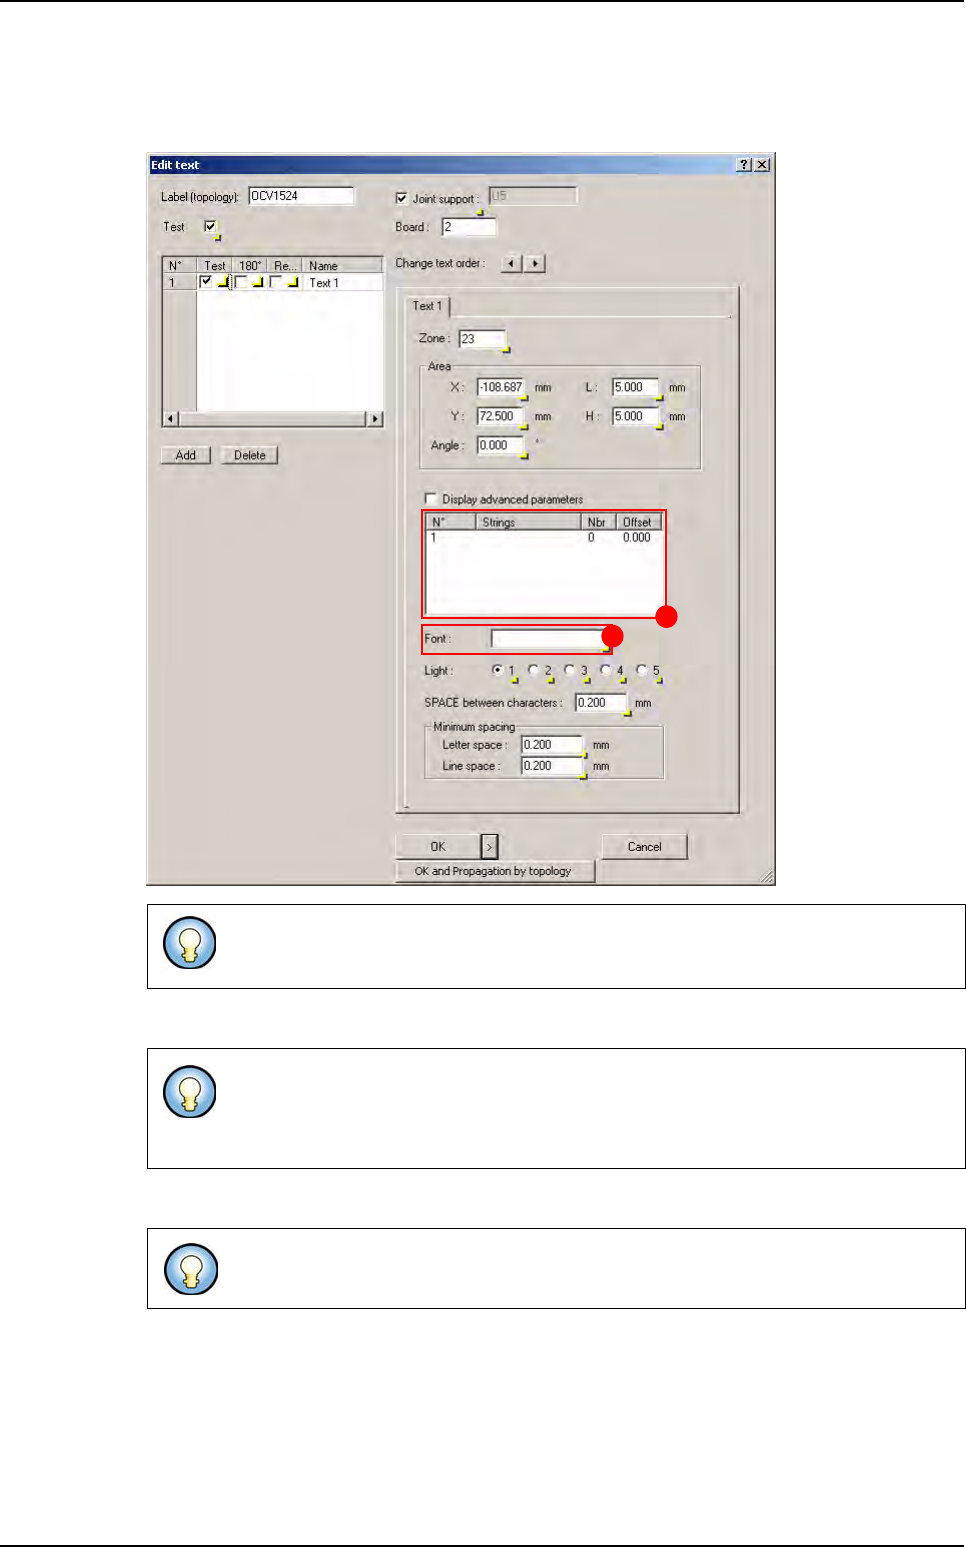
1. Select the edit from the tool bar and click on the text object to display the edition window.
2. Define the string (A) to verify (edit the box and add the lines to look for).
3. Enter the Font name (B) to be used in the library.
You can also use the find function (Ctrl + F) if you remember the label of the text you
want to edit.
The column Nbr corresponds to the minimum number of characters that needs to be
found to consider the string OK.
The column Offset corresponds to the shift of the line.
Each supplier can have a different font.
A
B
Creation procedure
Optical Character Verification
8 - 4 Vision 2007 4.10 User Manual Rev 01
4. Check all parameters:
Zone number in which the text will be inspected.
Light level to use for the picture acquisition.
Search Area position and size.
Space width character: defines the size of the space character.
Letter space is the minimum spacing between 2 characters.
Line space is the minimum space between 2 lines of text.
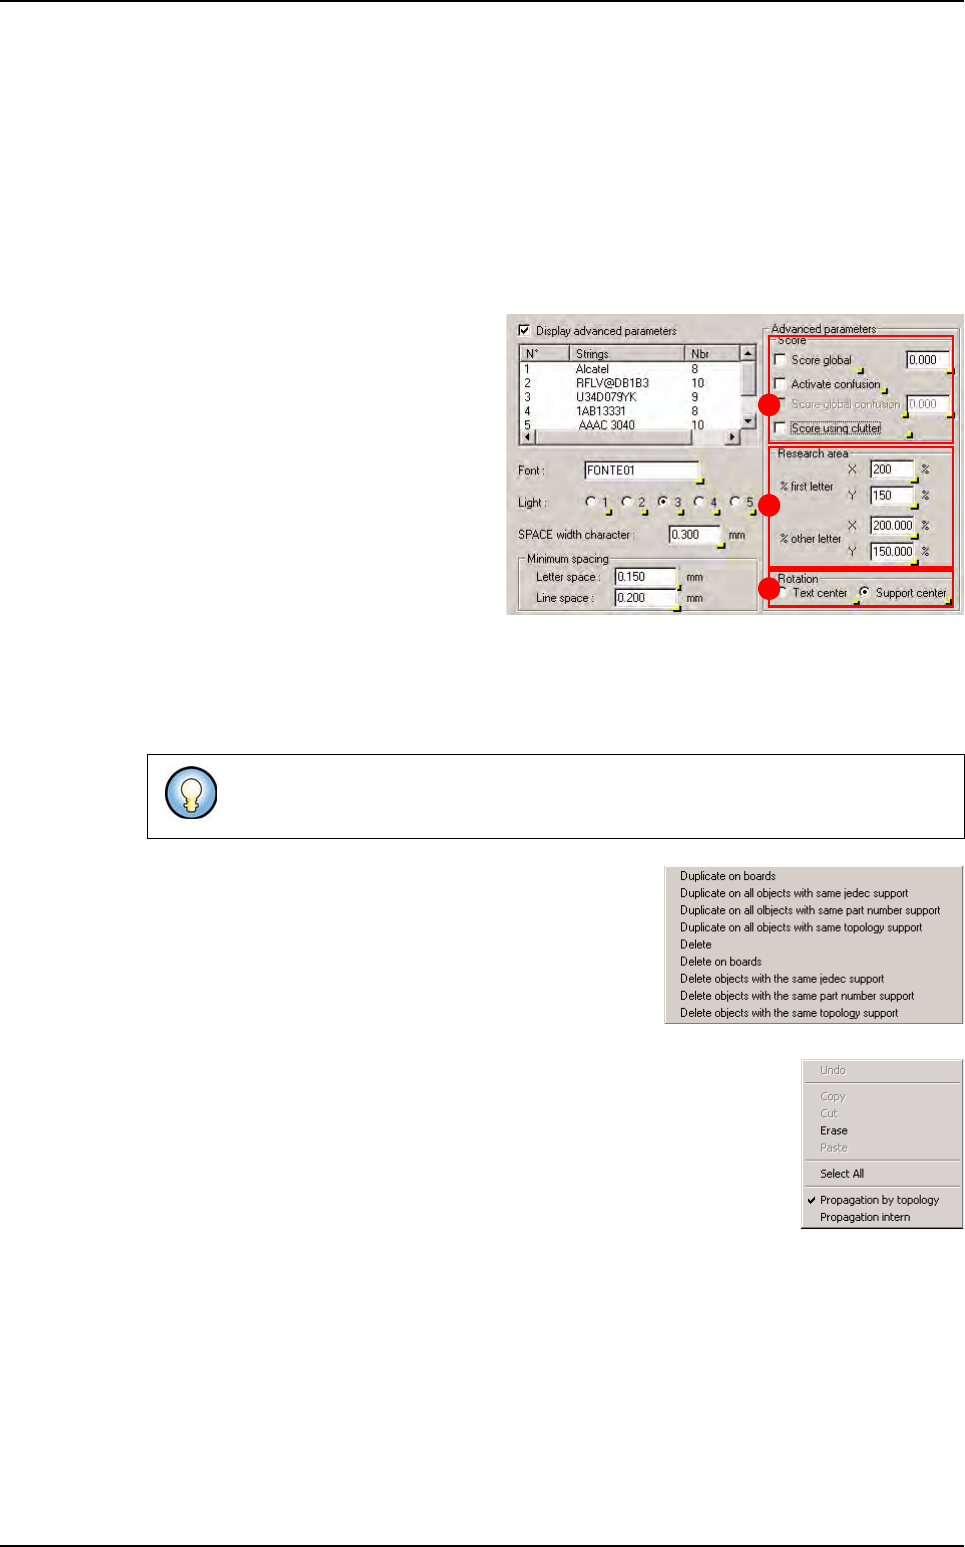
5. Tick Display advanced parameters to
check other settings:
In Score (A), define to use global pa-
rameters for all letters or individual
settings for each letter as defined in
the library.
Define the Research area (B) in % of
the train area, for the 1
st
letter of the
string and for the others letters
(These are the recommended val-
ues).
Define the Rotation origin (C) for the
test at 0° and 180°.
6. Click on Add to duplicate the selected object and create a link with different settings. The ex-
ecution will be in the defined order; as long as the text fails it will try with the next one. You
can change the order of execution with the change texts order button.
7. Right mouse click on the left side of the edition window to
see the following menu and be able to duplicate or delete
this label according to your selection.
Right mouse click in the edit box to select the propagation type (by topol-
ogy or intern) in order to propagate the value by the menu.
8. Tick Joint support to join the text to the component.
9. You can test or not each supplier, test each of them at 180° and realign each of them with the
component.
10. You can propagate this setting on all object with same topology. Click on > button (next to
OK control) and click on OK and propagation by topology.
This is useful if you have different suppliers for the same component. You can link
the different strings marked on all components.
A
B
C
Creation procedure