VI User Manual.pdf - 第267页
Optical Character Verification Vision 2007 4.10 User Manua l Rev 01 8 - 5 8.2.3 T rain a font in the library 1. Open the library and display the fonts 2. Create a new model (make sure you use the same name as defin ed in…
Optical Character Verification
8 - 4 Vision 2007 4.10 User Manual Rev 01
4. Check all parameters:
Zone number in which the text will be inspected.
Light level to use for the picture acquisition.
Search Area position and size.
Space width character: defines the size of the space character.
Letter space is the minimum spacing between 2 characters.
Line space is the minimum space between 2 lines of text.
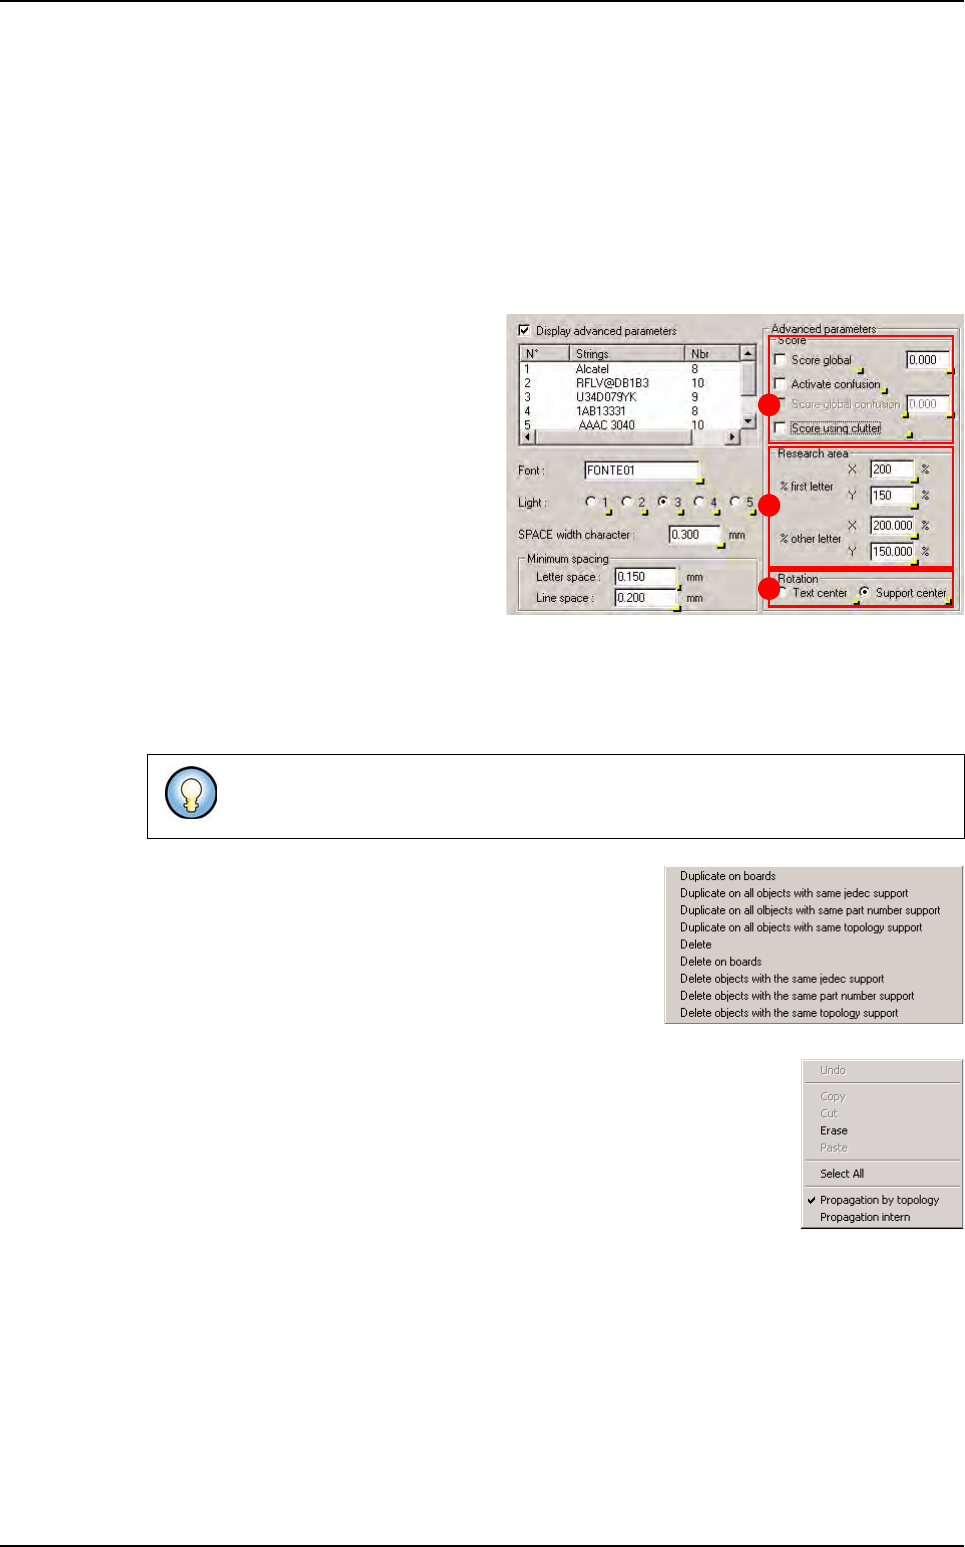
5. Tick Display advanced parameters to
check other settings:
In Score (A), define to use global pa-
rameters for all letters or individual
settings for each letter as defined in
the library.
Define the Research area (B) in % of
the train area, for the 1
st
letter of the
string and for the others letters
(These are the recommended val-
ues).
Define the Rotation origin (C) for the
test at 0° and 180°.
6. Click on Add to duplicate the selected object and create a link with different settings. The ex-
ecution will be in the defined order; as long as the text fails it will try with the next one. You
can change the order of execution with the change texts order button.
7. Right mouse click on the left side of the edition window to
see the following menu and be able to duplicate or delete
this label according to your selection.
Right mouse click in the edit box to select the propagation type (by topol-
ogy or intern) in order to propagate the value by the menu.
8. Tick Joint support to join the text to the component.
9. You can test or not each supplier, test each of them at 180° and realign each of them with the
component.
10. You can propagate this setting on all object with same topology. Click on > button (next to
OK control) and click on OK and propagation by topology.
This is useful if you have different suppliers for the same component. You can link
the different strings marked on all components.
A
B
C
Creation procedure
Optical Character Verification
Vision 2007 4.10 User Manual Rev 01 8 - 5
8.2.3 Train a font in the library
1. Open the library and
display the fonts
2. Create a new model
(make sure you use the
same name as defined
in the text object).
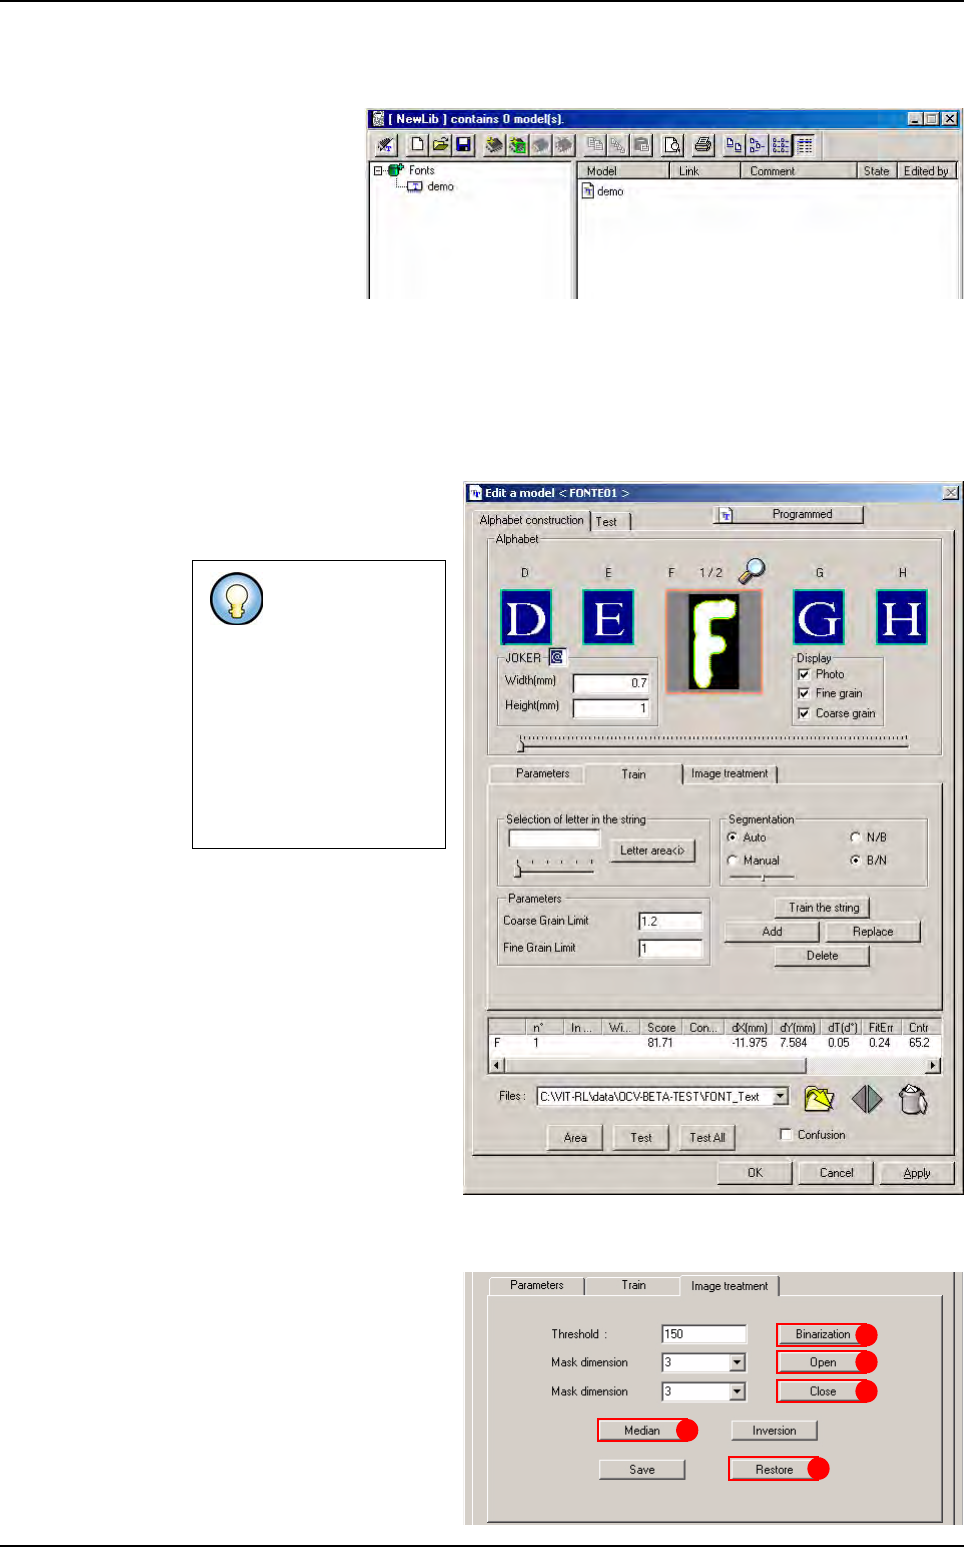
3. Edit the font model. The Edit a model window is composed of 2 tabs:
Alphabet construction: to train the characters and record the parameters.
Test: to test the settings on a real image.
8.2.3.1 Alphabet construction tab
Alphabet construction tab
permit to train the characters
and record the parameters
.
Before beginning the training,
select the picture of the string
that you have previously tak-
en.
You can open several pic-
tures and use the arrows
icons to swap from a picture
to another one. The dustbin
icon will remove pictures
from your list.
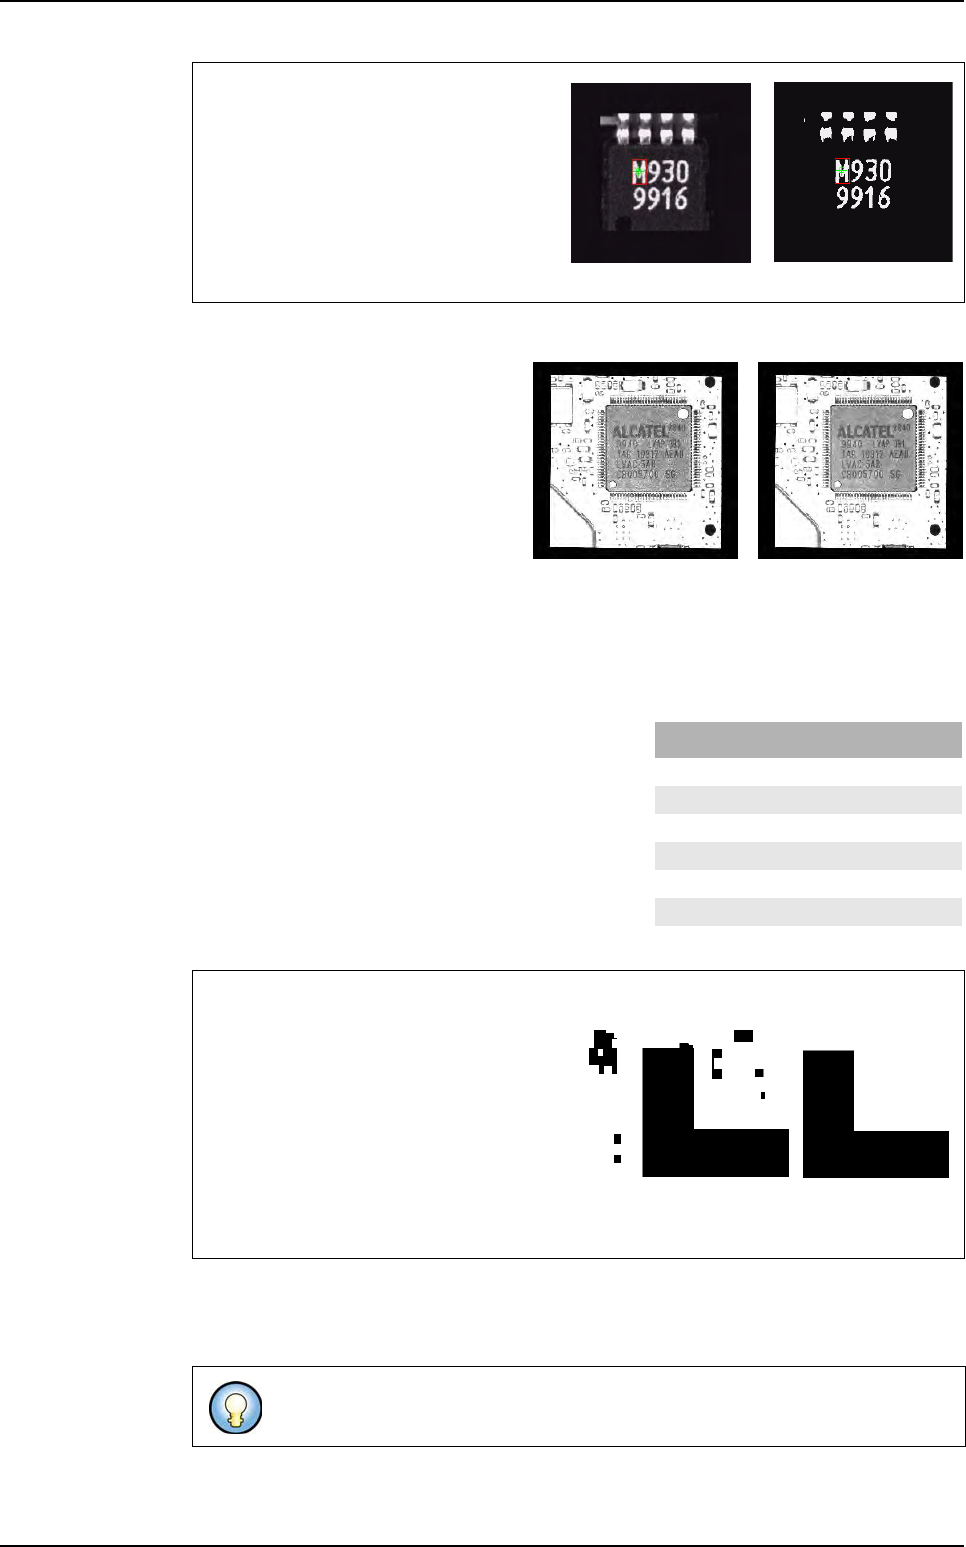
Image treatment tab
Go to the Image treatment
tab.
Use Binarization (A) to con-
vert the image into the binary
mode and create a synthetic
image.
It is recommended
to use a black and
white picture, wi-
thout noise, to
train the charac-
ters.
Use the Image
treatment tab to
get a correct bina-
ry picture.
A
B
C
D
E
Creation procedure
Optical Character Verification
8 - 6 Vision 2007 4.10 User Manual Rev 01
The Median, Open and Close functions can also be used to clean the images.
Median analyses the image pixel by
pixel. Press Median button (B) to an-
alyze each pixel by looking at the val-
ues of the 8 pixels around the current
pixel. They are first sorted by gray
level. Whatever the value of the me-
dian pixel, the surrounding pixels
takes that level.
The Open function (C) enables
cleaning the image of its white noise (white pixels whose gray level is above the transition
average) and Close function (D) to clean the black noise (black pixels whose values are
lower than the average).
Seven values can be used for the Open and
Close functions. Each of the values masks,
cleans and restores the given number of pixels.
Save the new image if required. After saving, you can always modify the image. If you
are not satisfied with the image, you can return to the original image by clicking Restore
button (E).
Binarization uses the threshold value to
determine whether a pixel is black or white.
The threshold, in that case is set at 150.
Any pixel with a gray level lower than
150 will be black and any pixel with a
gray level above 150 will be white. Ad-
just the threshold so that the image is
containing relevant information.
Example: the goal is to eliminate noise to only get an L in the picture
Clean the black noise by setting the mask
dimension to 3 and selecting the Close
button.
All the objects within the image will be
trimmed by 1 pixel (CLEAR). The noise is
eliminated.
All that belongs to the image will be enlarged by 1 pixel at each edge. The only remain-
ing object is the L without any noise around.
If the image is useable for treatment, train the letters with the Train tab.
Image converted
into the binary
Original image
Before Median
After Median
Creation procedure
Mask dimensions
Value Cleaned and restored pixels
31
5 3
75
9 7
11 9
13 11
15 13