VI User Manual.pdf - 第329页
Optimization Vision 2007 4.10 User Manua l Rev 01 12 - 11 12.2.2 Creating dbg archives Once the production debug tool is active, it w ill create an ar chive for eac h fault on compo- nents or paste (e xcept multizone com…
Optimization
12 - 10 Vision 2007 4.10 User Manual Rev 01
12.2 Production debug tool
Fine tuning a library may be a laborious task when the false calls rate is quite low, because it be-
comes difficult to reproduce the same thing in the Debug mode that happened in Production mode,
when 99.99 % of the results are OK, and you can not place the tools at the same position on images
from the repair station. And also fine tuning the models requires a machine to run the boards in debug
mode.
Using the production debug tool, you can use images and data from the production mode to optimize
your models afterwards.
When the production debug tool is active during production mode, it captures all the necessary data
(clipped images, machine calibration data, and models data), each time a model returns an error. It
saves them into archives (*.dbg files) that you can open and analyze in debug mode. One of the key
features of this tool is that the archives are not machine dependant, because they contain the cali-
bration data of the machine that created them. So you can use the archives on any machine (of the
same type) or stand alone station and obtain exactly the same results.
The production debug tool can be used to debug solder paste objects and all kinds of models, (Vi-
Pro, SO, QFP, Custom tools) except multi zone ones.
12.2.1 Production debug tool configuration
In the DefaultValue.ini file, you will find the necessary keys to set the production debug tool
active:
Open the DefaultValue.ini file with Notepad or any text editor, and find the [Production] sec-
tion. In this section, set the TraceFaults key to 1 to enable the debug tool, or 0 to disable it.
Set the Folder of dbg files key to the full path where you need to save the dbg files.
You can also set the maximum number of archives per panel you wish to save with the num-
ber of dbg file value.
Reload the INI parameters before starting production mode (close and restart Vision 2007 or
in Process menu, select Load ini file).
The TraceFaults value turns the Production debug tool on or off (1 = ON, 0 = OFF). This val-
ue is read each time you start a production session. This means you have to exit and re-enter
the Production mode if you need to turn on or off the production debug tool.
Please make sure that there is enough free space on the drive you specify.
The .dbg files are quite small archives, but a production session can create many
of them.
The TraceFaults function can be activated on production screen by clicking on Ctrl + D.
Optimization
Vision 2007 4.10 User Manual Rev 01 12 - 11
12.2.2 Creating dbg archives
Once the production debug tool is active, it will create an archive for each fault on compo-
nents or paste (except multizone components) during production. The dbg directory will con-
tain archives of both real faults and false calls.
The production debug tool will not modify the production mode behavior. It may slow down
the cycle time if you have many faults.
12.2.2.1 Using dbg archives
The dbg directory contains the dbg archives obtained in production mode. The dbg
archives name format is:
ReferenceDesignator_FirstLightLevel_YearMonthDayTime.dbg
To open a dbg archive, go on Process menu and select Open a debug file (*.dbg)
(Ctrl+D).
In the Open window select the .dbg file you wish to open. This will open the produc-
tion debug tool's dialog box and the Cognex console.
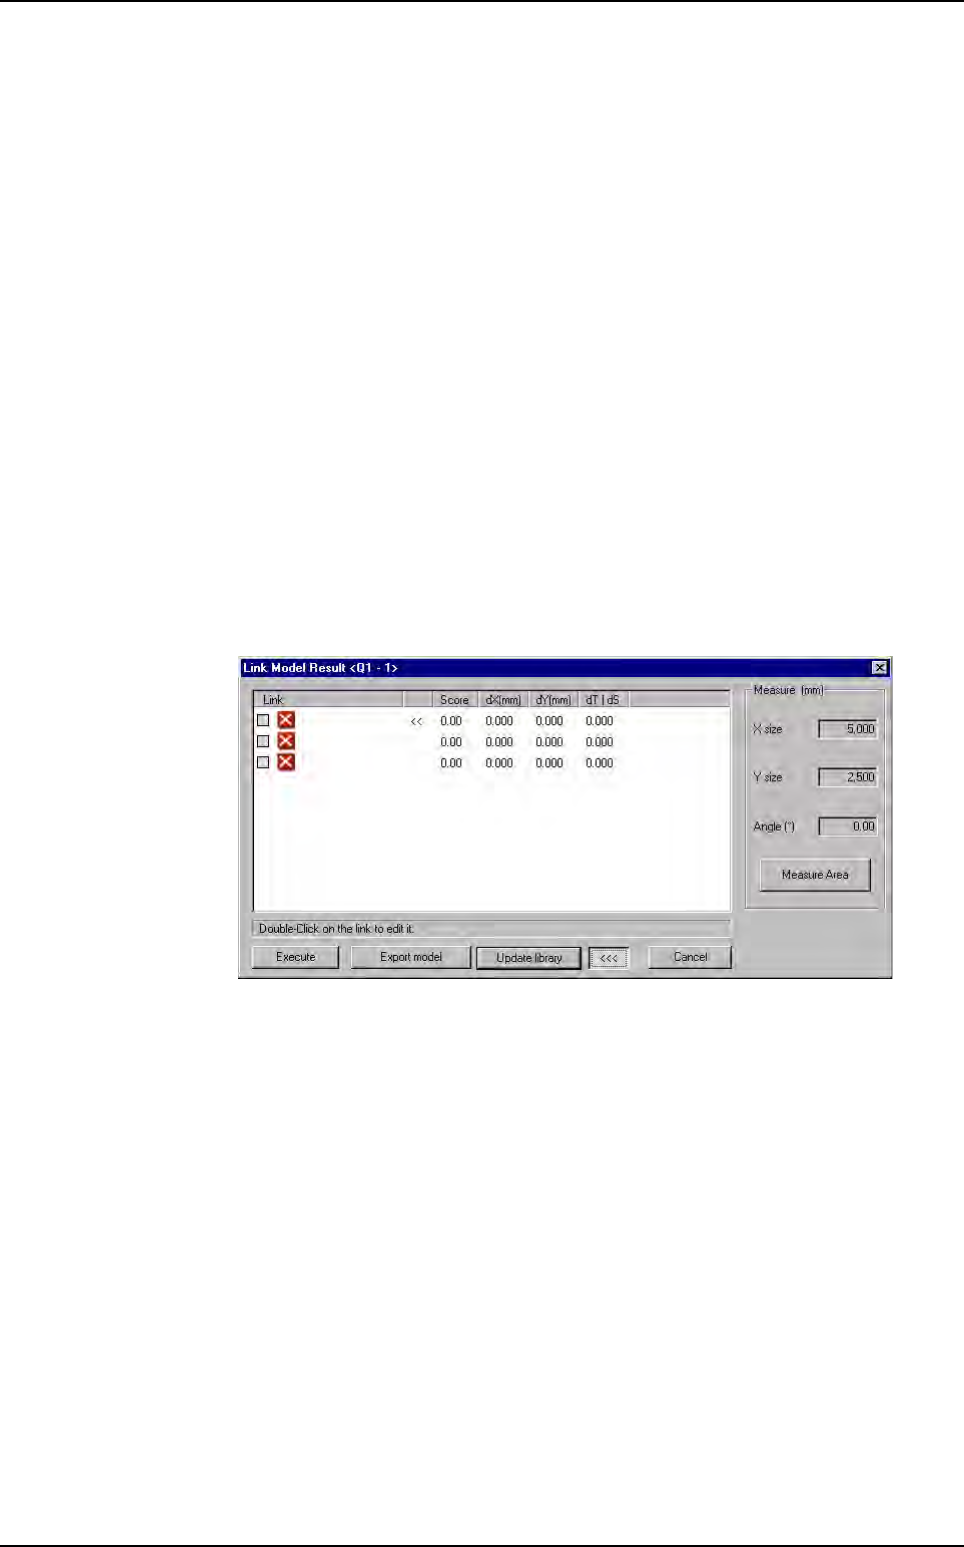
12.2.2.2 Components
The dialog box contains the results of all the model's links. The tools are placed and
executed at the same position as they were in production mode.
To edit the models, double click on a link result in the dialog box. This opens the
model's library page. You can then modify parameters and fine tune the model. If
you modify the model and click OK, the checkbox in the link result appears ticked.
Re-executes all the links to check the global result. If you modified a model, press
this button to update the dialog.
Exports the models as a .mdl file. Only the modified links are included in the .mdl
file.
Copies all the links to a library. This opens a browser dialog to choose the destina-
tion library.
Opens / closes a Ruler tool at the right part of the dialog. Useful to measure objects
directly in the image.
1. Adjust the area around the object you wish to measure.
2. Gives the dimensions and angle of the area.
Production debug tool
Optimization
12 - 12 Vision 2007 4.10 User Manual Rev 01
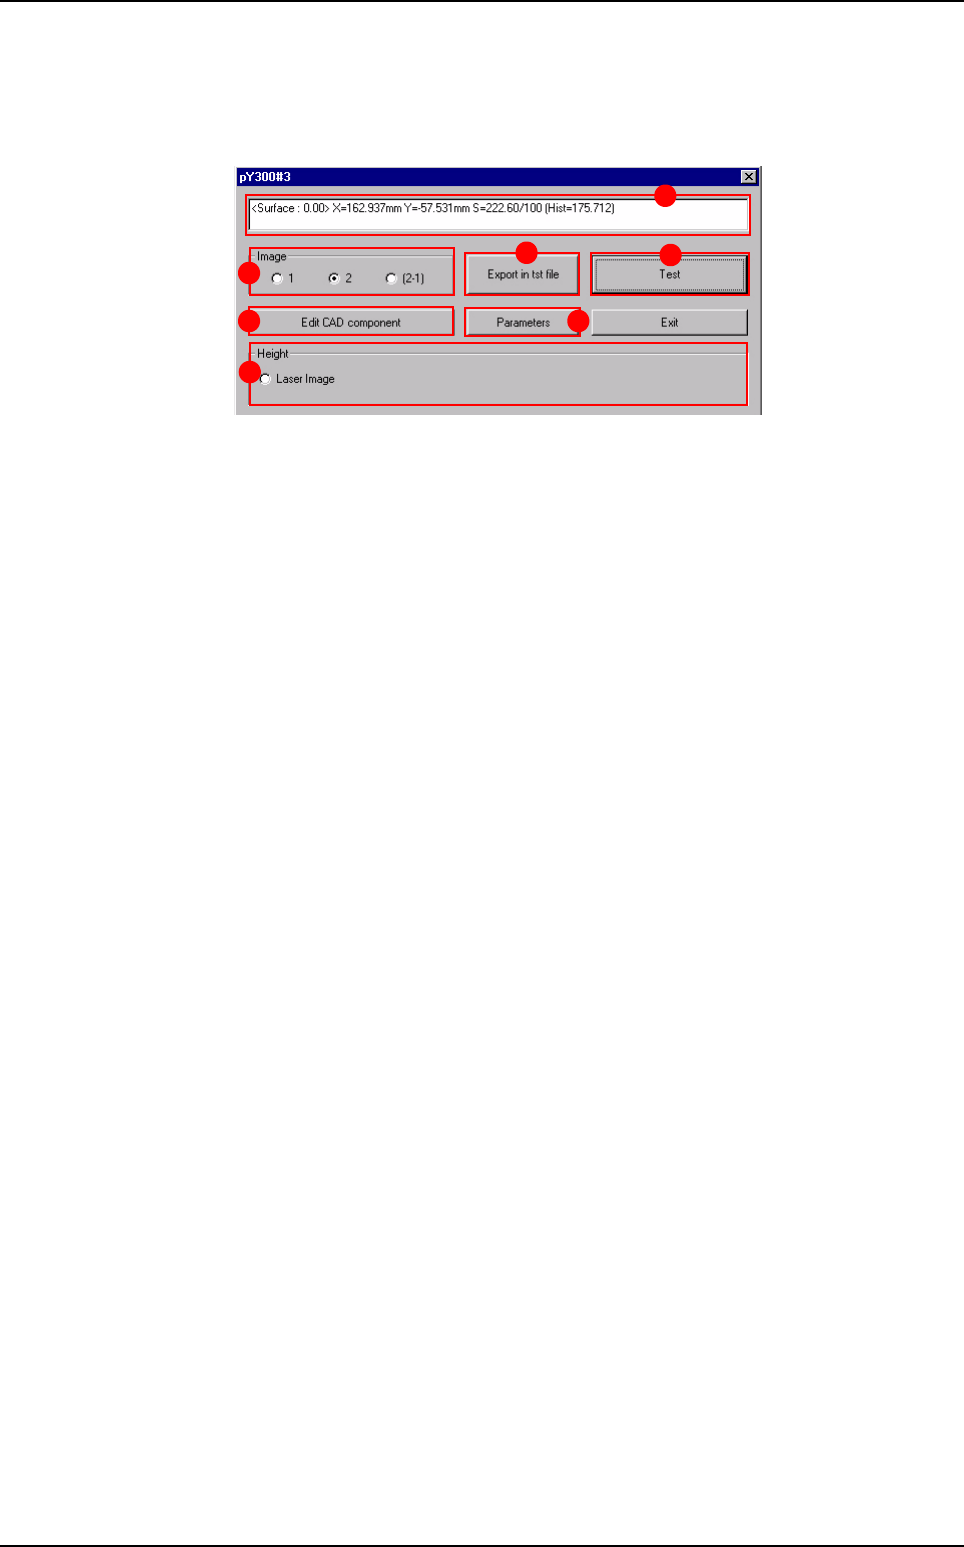
12.2.2.3 Paste
The dialog contains the results of the paste detection. The tools are placed and ex-
ecuted at the same position as they were in Production mode.
In the upper field (A) are displayed the paste detection results.
In Image (B) section, select the image type displayed in the console.
Press
Edit CAD component
(
C
) button to edit the pad's paste detection parameters.
Press
Parameters
(
D
) button to edit the global .tst file's paste detection parameters.
Press Test (E) button to re-execute the paste detection. If you modified detection
parameters, press this button to update the results.
Press Export in tst file (F) button to export the results to a .tst file. This opens a
browser dialog to choose the destination .tst file.
The Height (G) section is unused.
A
B
F
E
C D
G
Production debug tool