VI User Manual.pdf - 第333页
Optimization Vision 2007 4.10 User Manua l Rev 01 12 - 15 12.3.4 Configuration To access the ADC parameters window, go to the productio n screen and click Ctrl+Shift+A . You can display this window at any time durin g pr…
Optimization
12 - 14 Vision 2007 4.10 User Manual Rev 01
12.3.2.2 2nd step (sampling on full boards)
12.3.3 Limit
The standard name of the customer model must exist in the standard library.
This field is editable by double clicking on the string
Model name from the model description window of
the library.
In the customer library, you can not have duplicate
standard names. The software rename them auto-
matically.
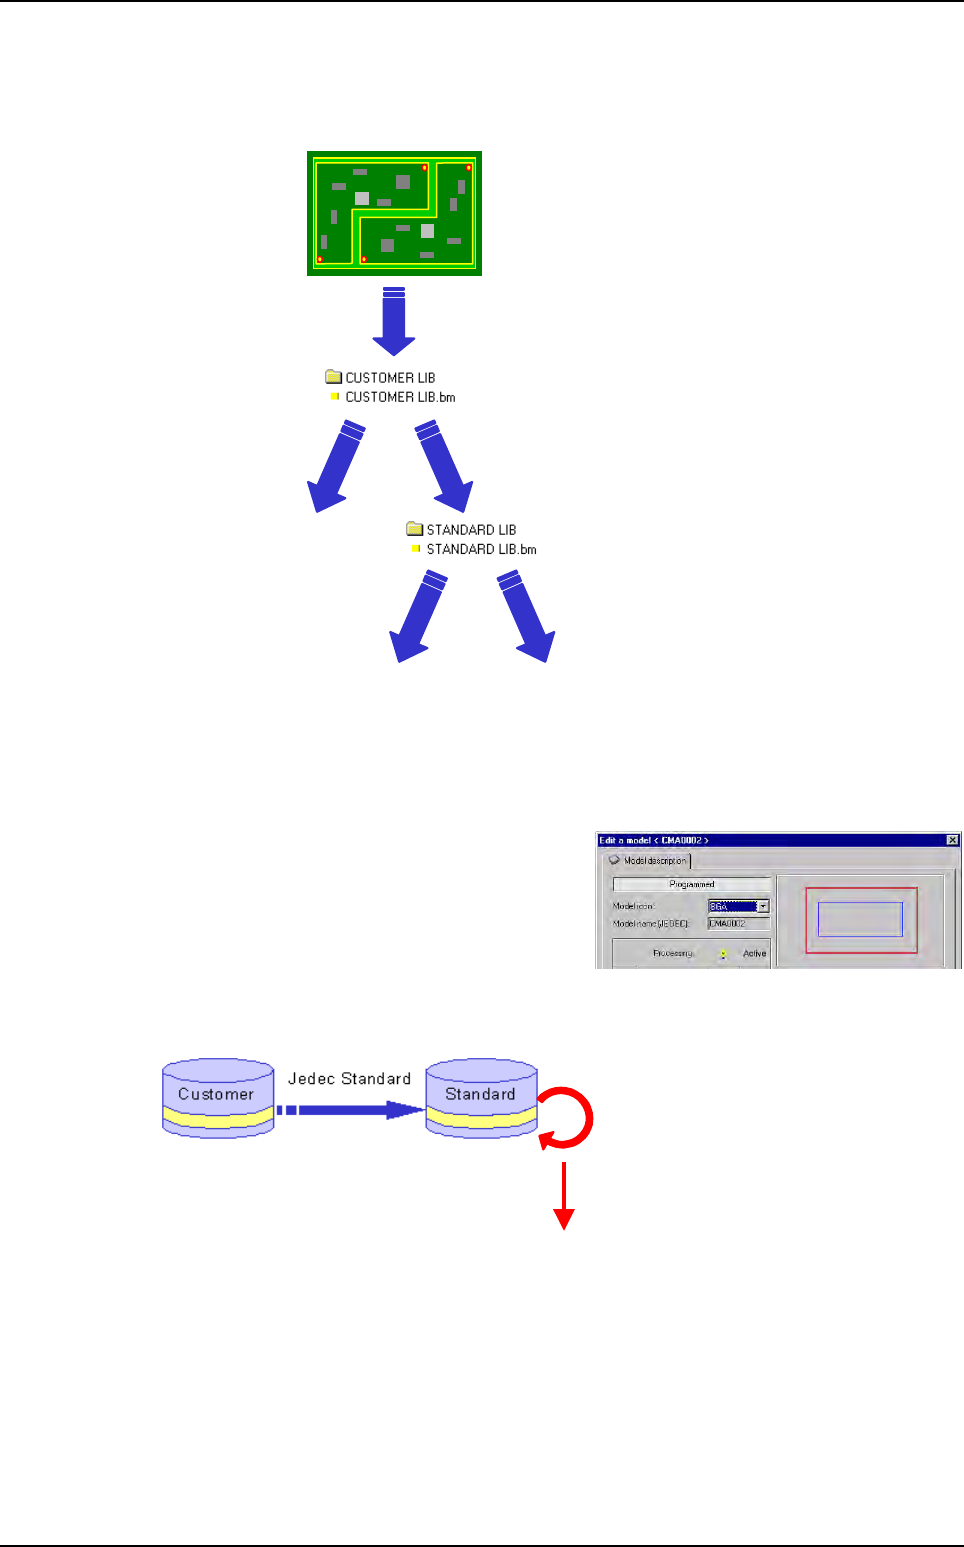
Research for the corresponding standard name:
To run ADC, the software analyses if the standard name of the customer model exists in the
standard library. Then it looks for the head link and executes all the links from the model family.
• Save image
PRODUCTION
Missing
error
Component
OK
Component
found
Missing
error
Search the head link
Execute all the links
Auto Defect Correction (ADC)
Optimization
Vision 2007 4.10 User Manual Rev 01 12 - 15
12.3.4 Configuration
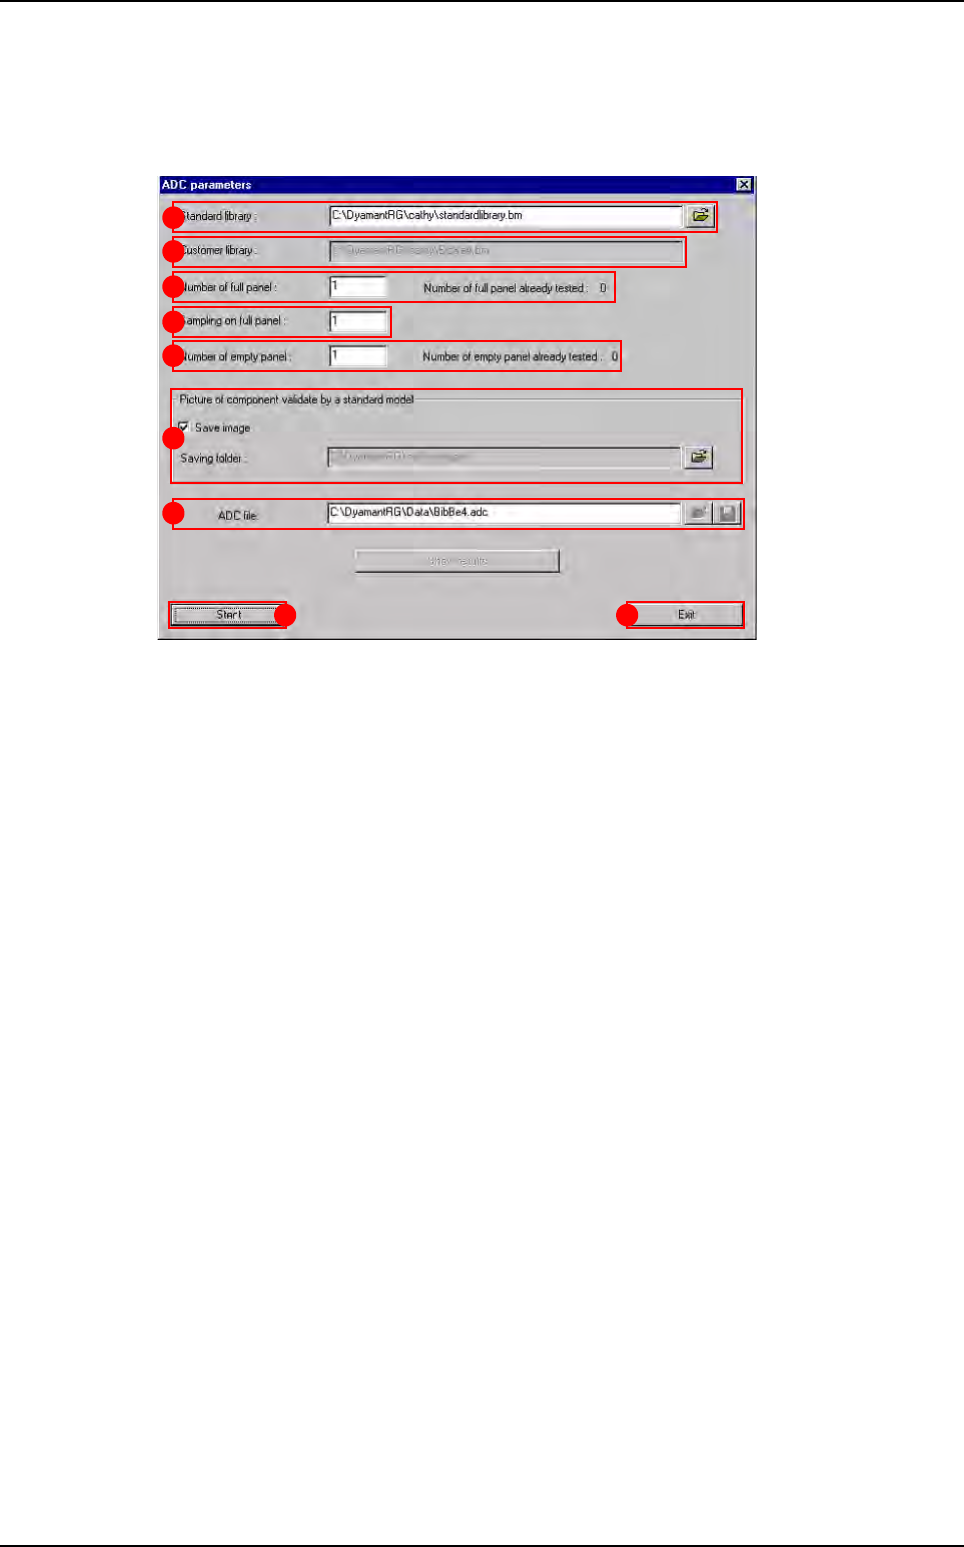
To access the ADC parameters window, go to the production screen and click Ctrl+Shift+A.
You can display this window at any time during production.
In
Standard library (A), select the standard library to use.
The
Customer library (B) comes automatically from the .tst file.
In
Number of full panel (C), enter the total number of full panels to use for ADC calculation.
In
Sampling on full panel (D), enter the sampling on production boards for full panels.
Ex: 1 board on 10 will be used for ADC data collection.
In
Number of empty panel (E), enter the total number of empty panels needed to run ADC
(to check false acceptances).
In
Picture of component validate by a standard model (F) section tick Save image if a
model from the standard library validates a component, to check if it is a good acceptance or
not. Same for empty boards to check false acceptance. In
Saving folder, select the folder
to save images.
In
ADC file (G), load an existing ADC file and complete it with new data. You can save the
ADC file with a new name.
After setting all the needed information, press
Start (H) button to launch the ADC mode.
If you select
Exit ( I ), you will discard the changes.
A
B
C
D
E
F
H I
G
Auto Defect Correction (ADC)
Optimization
12 - 16 Vision 2007 4.10 User Manual Rev 01
12.3.5 ADC in production
When you start the ADC mode, some messages tell you which step is running:
Load empty panel,
Load full panel,
ADC finished.
If you want to check how many boards you still need to run, do a Ctrl+Shift+A to see the ADC
parameters window.
12.3.6 Results
After recording boards, press Show results button to access to the calculated values.
You have the list and the status of each model used from the customer and the standard library.
Seeing the results, you can:
Remove some models from the customer library.
Or add some from the standard library.
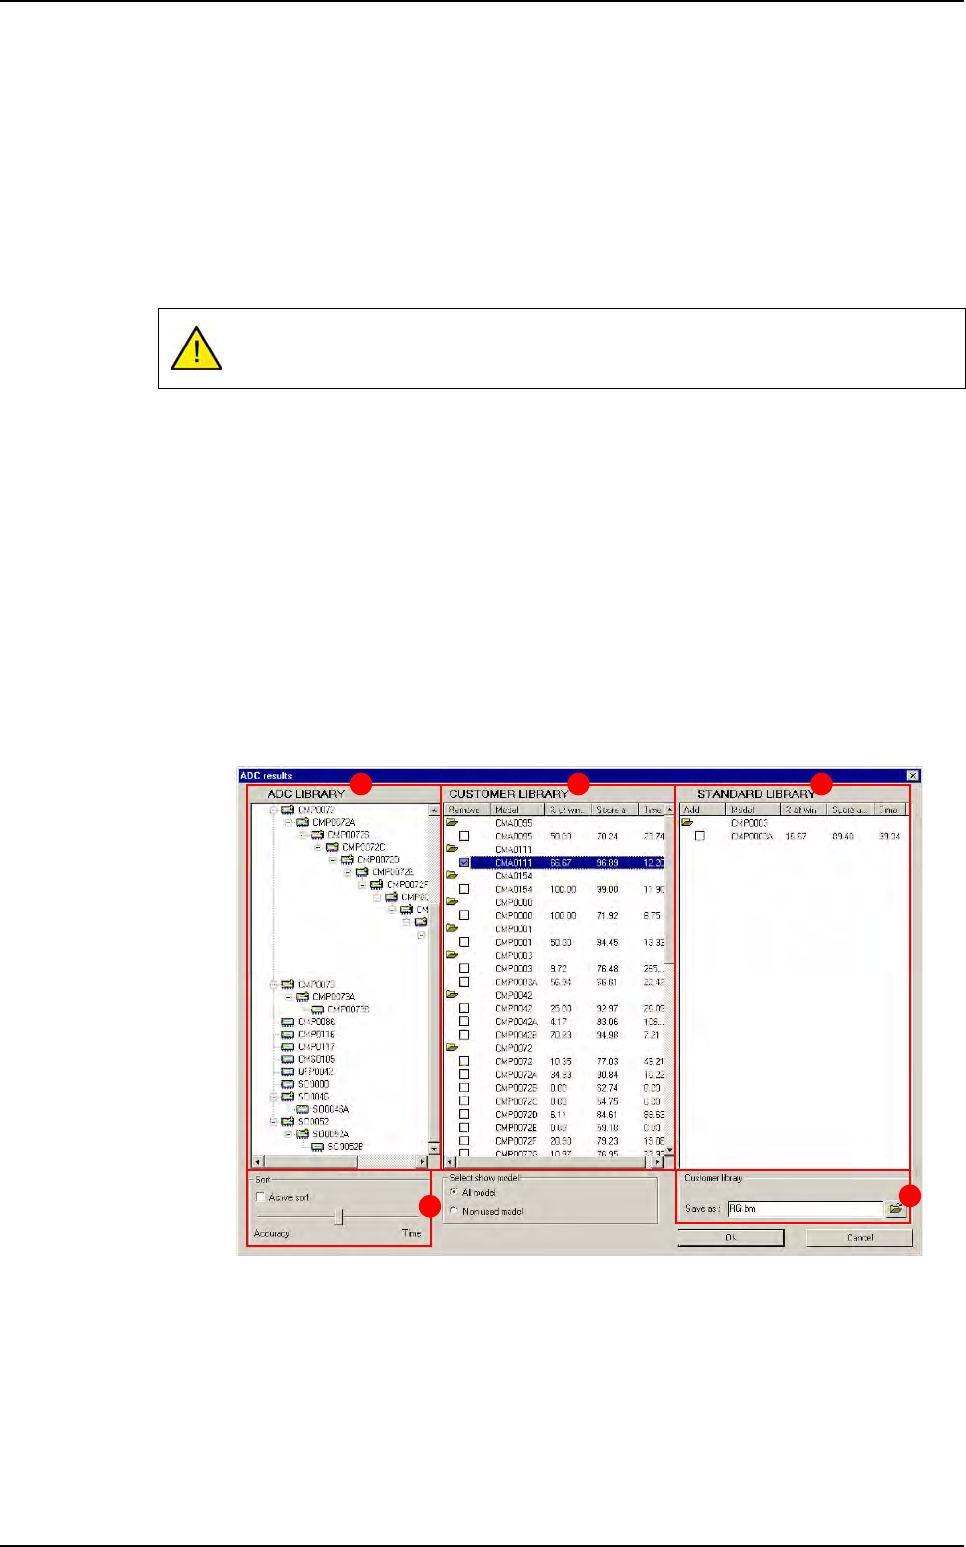
12.3.6.1 Display
The results are displayed in 3 columns:
ADC library (A) is the list of the models of the final library. (The base of the ADC
library is the customer library and you can add or remove some models inside.)
Customer library (B) is the list of the customer models and the results from ADC.
Standard library (C) is the list of the standard models which have validated any
components and the results.
In
Sort (D) section tick Active sort to change the links arrangement on the ADC
library according to the accuracy or the execution time.
In
Customer library (E) section, you can save the ADC library and rename it.
When ADC is running, we execute every link, so, it can increase your cycle time.
A B C
D
E
Auto Defect Correction (ADC)