VI User Manual.pdf - 第357页
Reparation Vision 2007 4.10 User Manua l Rev 01 14 - 5 Two lines buttons option You can add one row of buttons on the repair details screen. 1. Configuration To configure this option, you have to change the following ke …
Reparation
14 - 4 Vision 2007 4.10 User Manual Rev 01
.
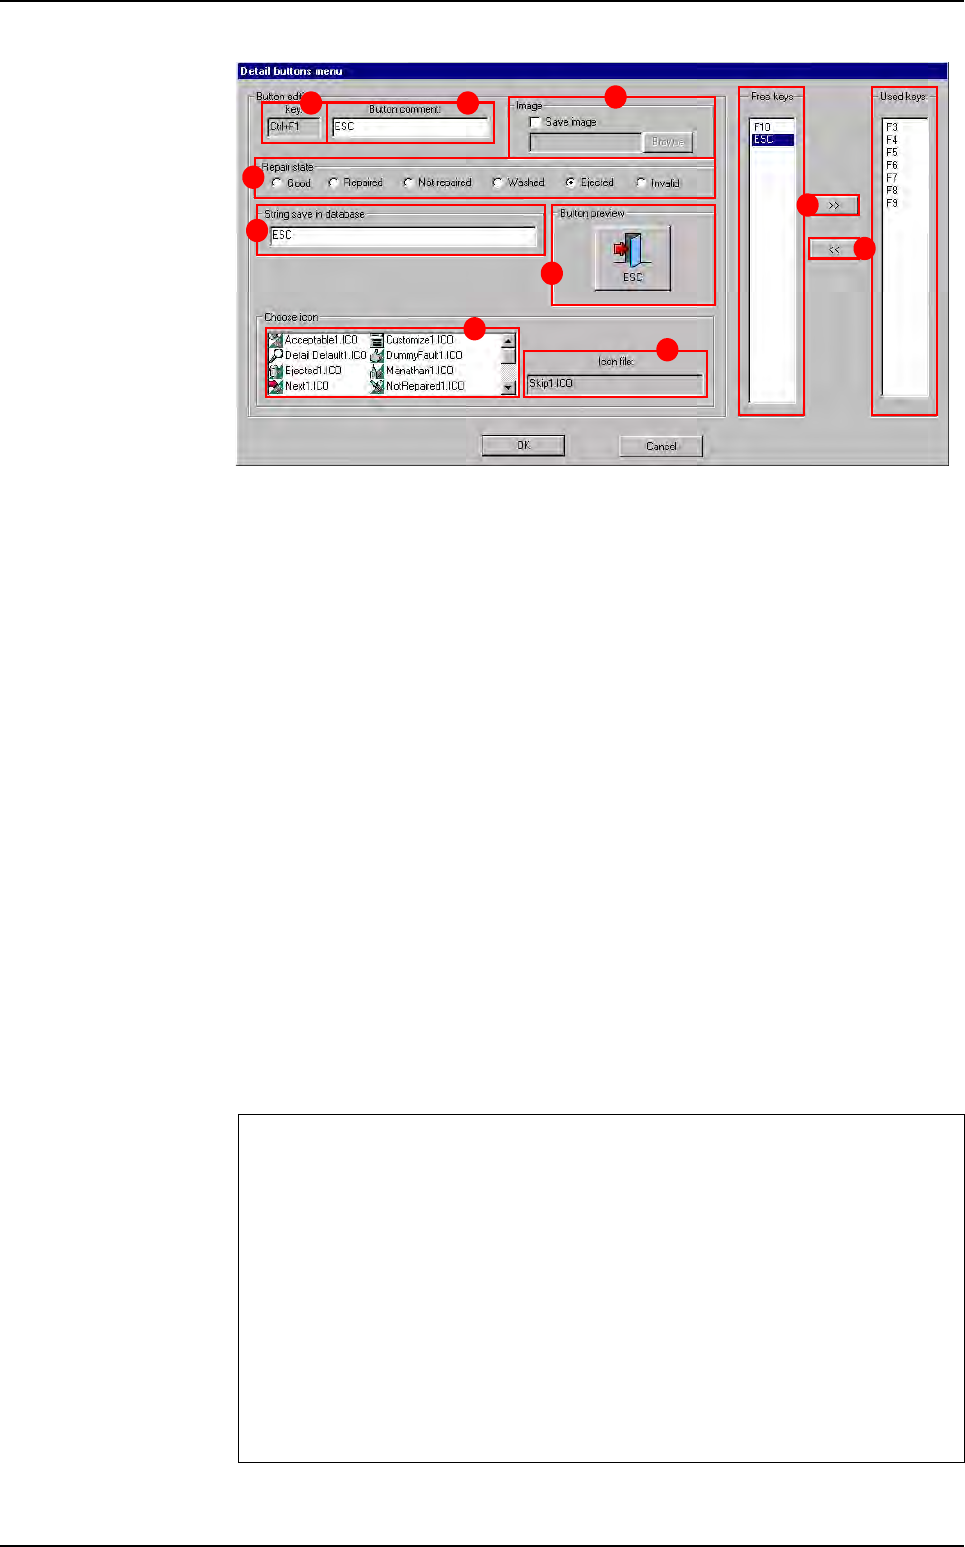
In the Free keys (A) list, select one key and click on the button >> to add it to the
used keys list.
In the Used keys (B) list, select one key and click on the button << to remove it and
let it free. All the used keys have defaults values and they also can be configured.
Click on one key from the Used keys list and set it as you want.
Selected key identification (C) of the keyboard.
In Button comment (D) field is displayed the button caption.
In Repair state (E) section, select the defect status associated to the button. It will
be saved into the database:
Not repaired: allow you to review the defect with the repair offline,
Invalid: all defects of the same board will have the Invalid status.
In String save in database (F) section, enter the comment associated to the but-
ton. It will be saved into the database.
In the list of predifined (G) icons, select the icon to associate to the selected key.
This list is in directory Icon and you can add you own files.
Preview (H) of the selected button.
File name ( I ) of the selected button.
In Image (J) section, you can associate the Save image function with some keys.
Select the folder in which you want the picture to be saved when the operator press
this button.
Main and Detail buttons windows differences
Even if the interfaces are the same, the keys list is different according to the se-
lected menu.
In the Main buttons menu the F4 key can not be removed from the used key list.
This button will always display the detail window. However, you can configure it
differently.
In the Detail buttons menu the F3 and F4 keys can not be removed from the
used key list. These buttons will always go to the next and the previous defect.
However, you can configure it differently.
To retrieve these windows, go in Configuration menu and select Main buttons
menu or Detail buttons menu.
A
B
C D
E
F
G
H
I
J
Reparation launching
Reparation
Vision 2007 4.10 User Manual Rev 01 14 - 5
Two lines buttons option
You can add one row of buttons on the repair details screen.
1. Configuration
To configure this option, you have to change the following key on the Confi-
gReparation.ini file. Put 1 if you want two rows of buttons.
[Interface parameters]
Two lines of button=1
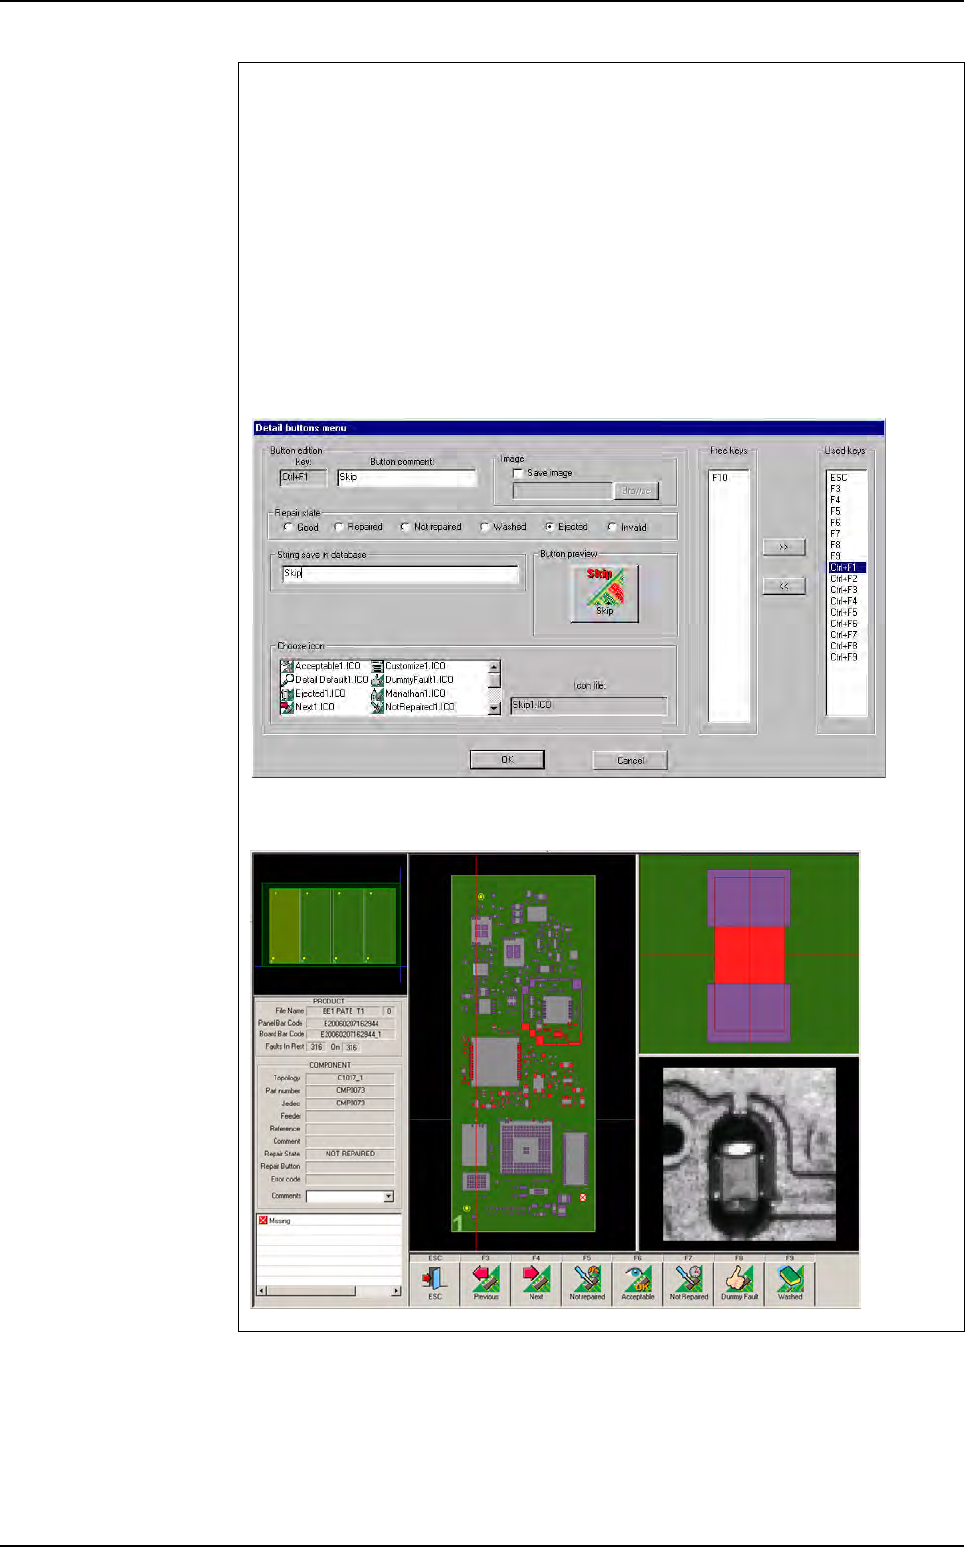
2. Details buttons menu
On the details buttons menu, you can now configure 18 buttons.You can con-
figure these like the buttons of the first line.
3. Repair details screen
Reparation launching
Reparation
14 - 6 Vision 2007 4.10 User Manual Rev 01
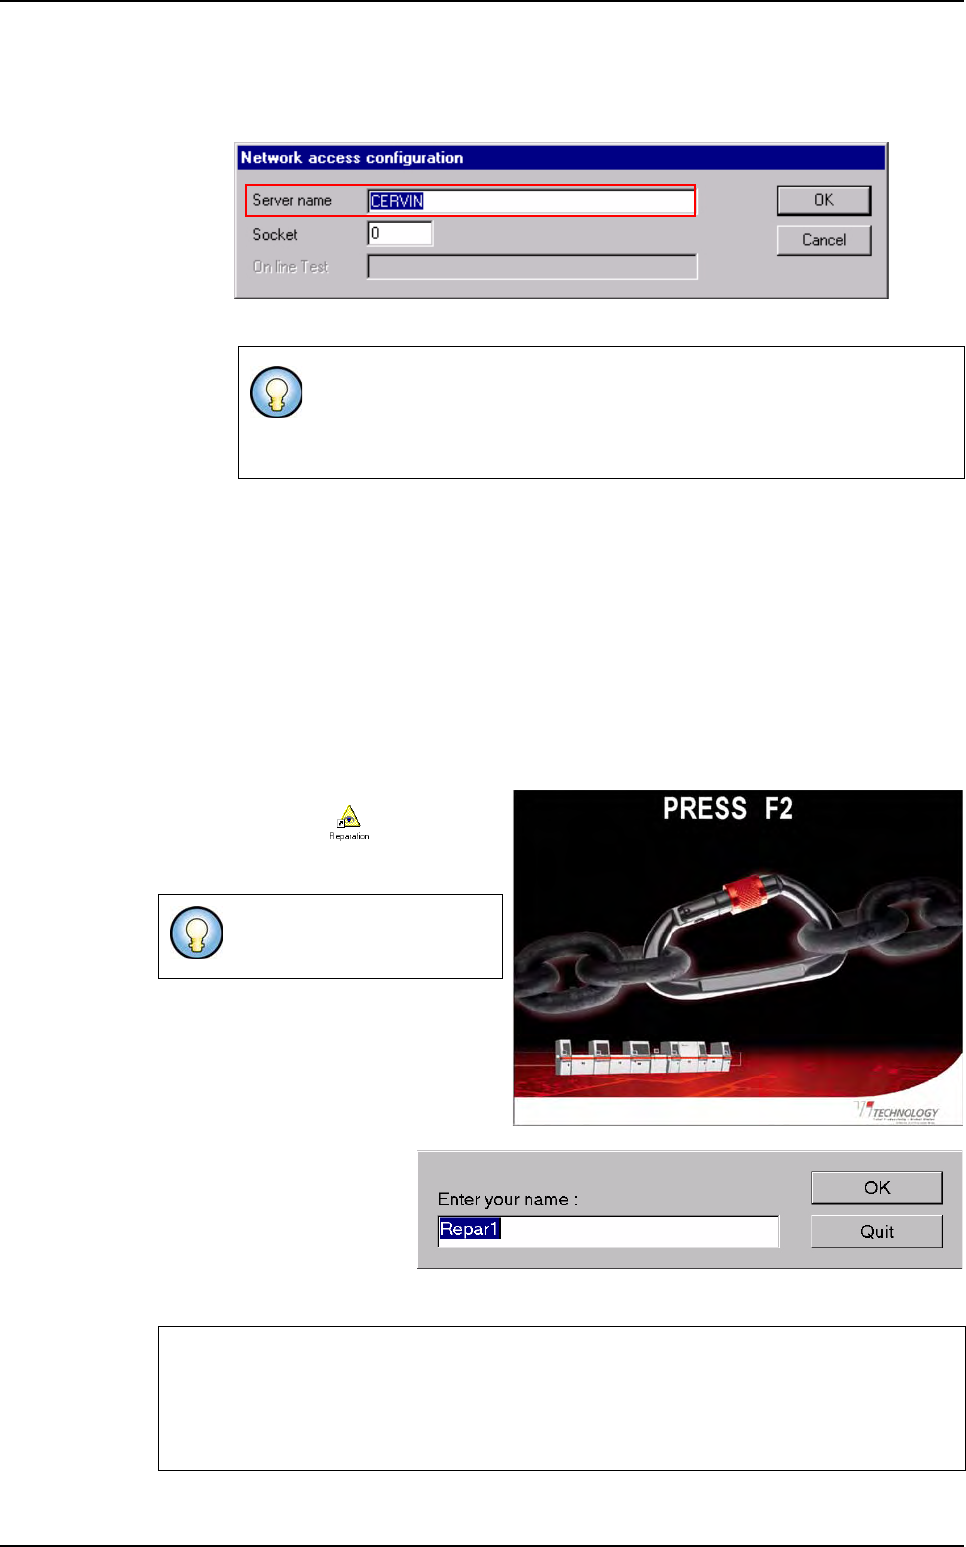
14.2.1.3 Network window
The
Server name
is the computer name where the database is stored.
14.2.2 Launching on-line
If you repair boards on-line, Vision 2007 is managing the software automatically. When you
start the production mode, Vision 2007 starts the supervisor software and the repair soft-
ware. It also copies the .tst file in the right directory, to make the repair station ready to dis-
play defects.
14.2.3 Launching off-line
If you repair boards off-line, make sure the supervisor is started.
To launch the repair station, double click
on
Reparation.exe
shortcut, avail-
able on the desktop, the screen below
appears.
Press F2 to proceed and the
opposite window appears:
Enter the name of the oper-
ator using the repair station.
If you click OK, this name
will be saved into the database.
It is only useful for off-line mode.
For on-line mode, Vision 2007 manages the communication.
To retrieve this window, go in Configuration menu and select Network.
To quit the repair system,
press Alt + F4.
Operator name modification in on-line mode
When the vision machine is in Production mode. You can change the repair operator
name by clicking on the key N on the keyboard of the repair station, when the repair is
waiting for a board to repair.
Reparation launching