00198705-01_AI_Portalmodularität_SX12_V3_DE_EN.pdf - 第91页
3 Fitting the Gantry 3.1 Requirements Assembly Instructions / Montageanleitung SIPLACE SX1/SX2 V3 Gantry Modularity Portalmodularität 05/2020 91 3 Fitting the Gantry NOTICE This manual describes the upgrading of gantry 2…

2 Brief Description
2.3 Tools and Equipment Required
90 Assembly Instructions / Montageanleitung SIPLACE SX1/SX2 V3 Gantry Modularity Portalmodularität 05/2020
3 Fitting the Gantry
3.1 Requirements
Assembly Instructions / Montageanleitung SIPLACE SX1/SX2 V3 Gantry Modularity Portalmodularität 05/2020 91
3 Fitting the Gantry
NOTICE
This manual describes the upgrading of gantry 2 at location 2. The assembly of gantry 1 is
identical.
NOTICE
When upgrading gantry 1 (master gantry) at location 1, board and component mapping
must be performed after the assembly.
3.1 Requirements
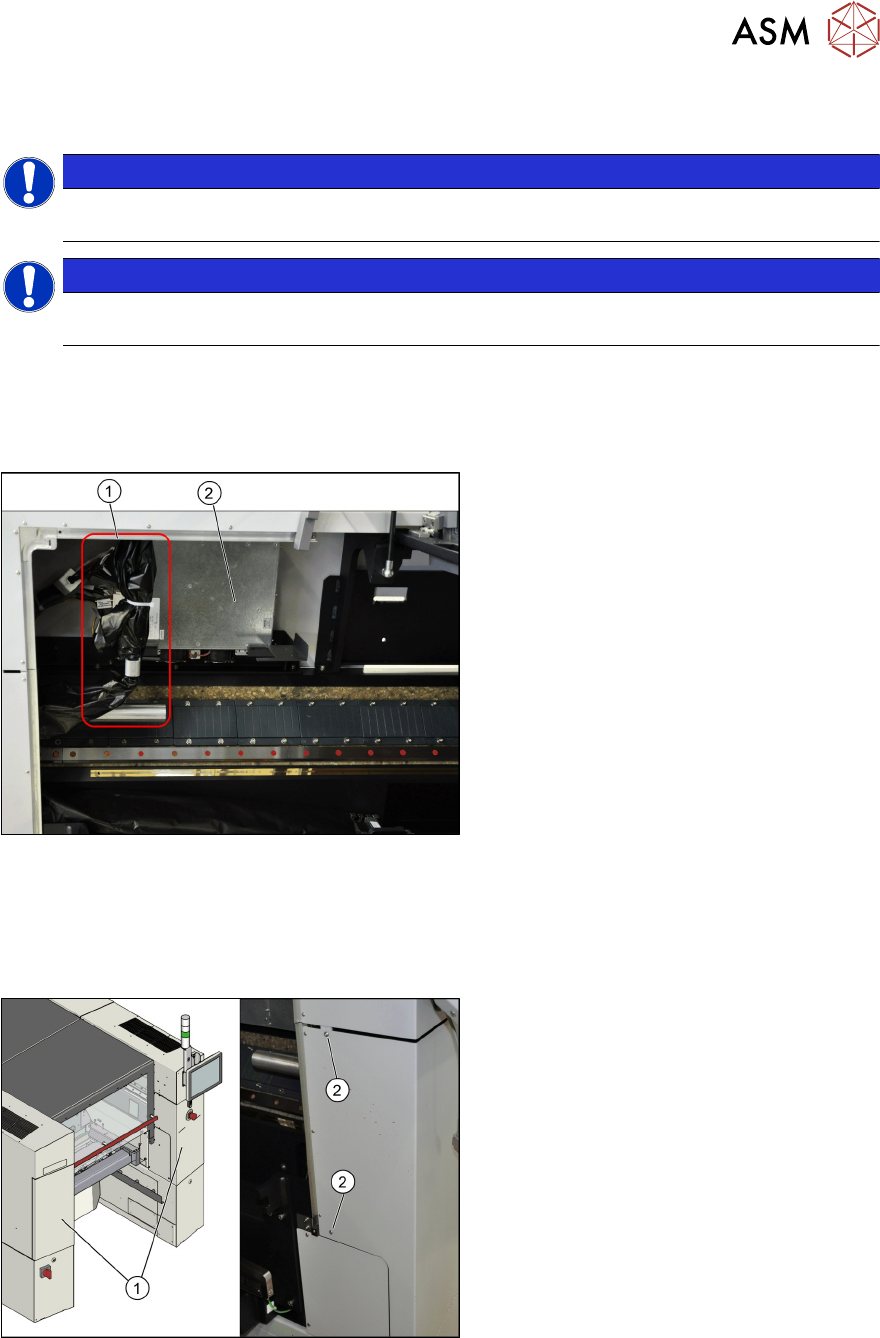
3.1.1 SIPLACE SX "Prepared"
Fig.11: Trailing cable and main axes
The SIPLACE SX must be in the delivery
state "Prepared".
This can be recognized by the presence of a
trailing cable (1) and the control unit for the
main axes (Gantry Control Unit (2)). This ap-
plies for the SIPLACE SX+ machine, in or-
der to retrofit gantry 1 at location 1 or for the
SIPLACE SX1 "Prepared", in order to retrofit
gantry 2 at location 2.
The trailing cable is packed in a black plastic
case and is fixed at the side (1).
If this is not the case, your machine will
need to be retrofitted accordingly. Contact
your SIPLACE Service team for details.
3.2 Preparations at the Machine
Overview
Fig.12: Overview of protective cover
► Open the protective cover at location 2
and move the component trolley out of
the machine.
► Loosen the two screws (2) fastening
the side covers (1) on the right and left.
► Open the two covers (1).
3 Fitting the Gantry
3.2 Preparations at the Machine
92 Assembly Instructions / Montageanleitung SIPLACE SX1/SX2 V3 Gantry Modularity Portalmodularität 05/2020
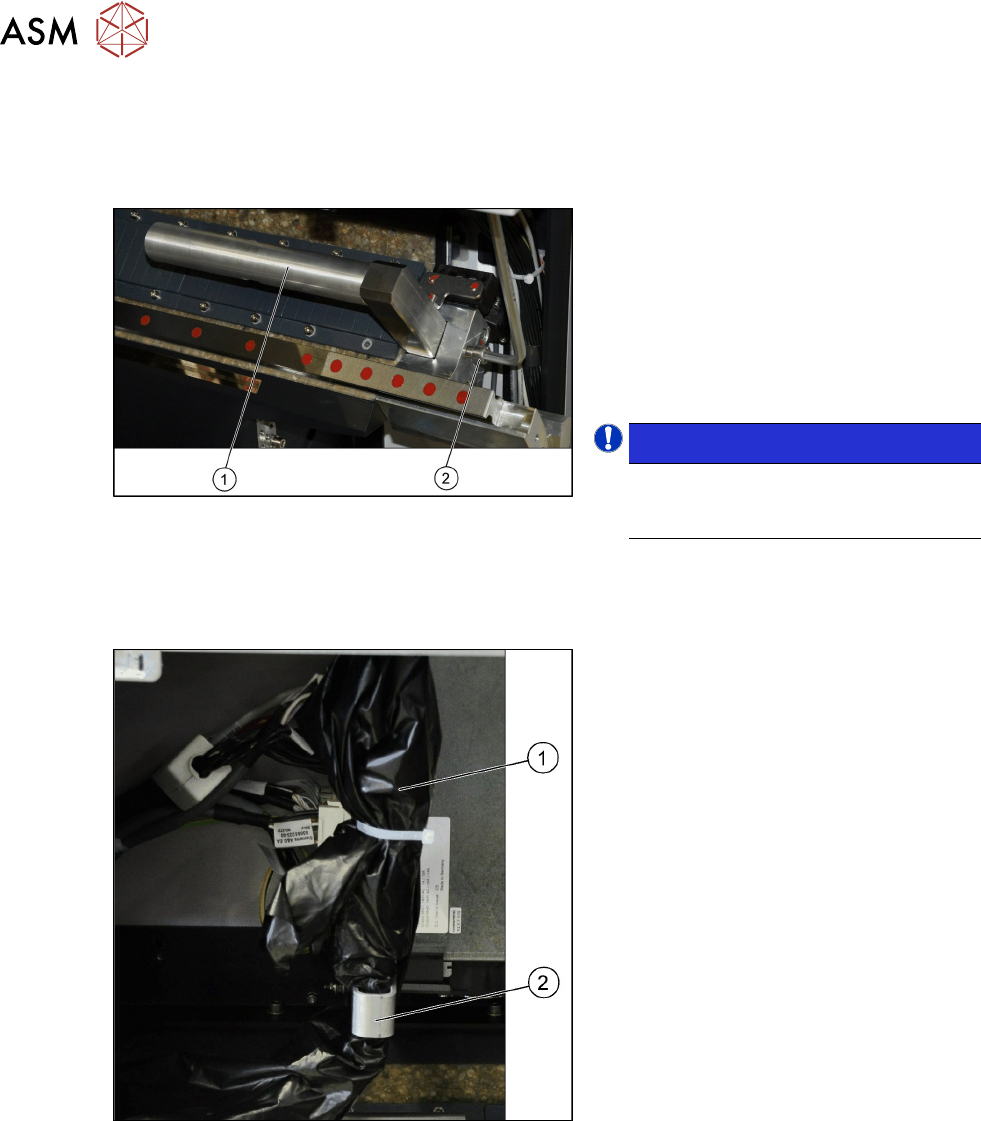
3.2.1 Removing the End Position Buffer
The long end position buffers must be fitted in SIPLACE SX1 machines with one gantry. These buf-
fers need to be removed and replaced with the short end position buffers in SIPLACE SX2
machines with two gantries.
Fig.13: End position buffer
Remove the two long end position buffers.
After fitting the second gantry, fit the two
short end position buffers in place of the
long ones.
► Loosen the fastening screw (2) on the
long end position buffer (1).
► Remove the two end position buffers
from the right and left sides.
NOTICE!
Keep the two long end position buffers
in the "Prepared" case for fitting back
into place later on.
.
3.2.2 Preparing the Trailing Cable
Overview
Fig.14: Trailing cable
The trailing cable (1) is packed in black
plastic foil and fixed to a holder(2).