00198705-01_AI_Portalmodularität_SX12_V3_DE_EN.pdf - 第96页
3 Fitting the Gantry 3.3 Gantry Preparations 96 Assembly Instructions / Montageanleitung SIPLACE SX1/SX2 V3 Gantry Modularity Portalmodularität 05/2020 Assembly Fig.18: Gantry carrier plate Fitting the gantry carrier pl…
3 Fitting the Gantry
3.3 Gantry Preparations
Assembly Instructions / Montageanleitung SIPLACE SX1/SX2 V3 Gantry Modularity Portalmodularität 05/2020 95
WARNING
Fixtures
► Never loosen the fastening of loads, if these are still in use. Always ensure a safe
standing of the load before release it.
WARNING
Ergonomics
► Always make sure that the platform and the surface on which the load is putted down
and/or be taken up are on the same height (varies in case of individual preparations).
The load must be pulled of the platform and/or pushed onto it (not elevated/carried) in
order to work in an ideal ergonomic position!
WARNING
Risk of injury
► When using mobile (tiltable, swiveling, inclinable) load pickup devices always make
sure that no own or different parts of the body and also no other obstacles are to be
located in the entire movement range of load and load pickup devices.
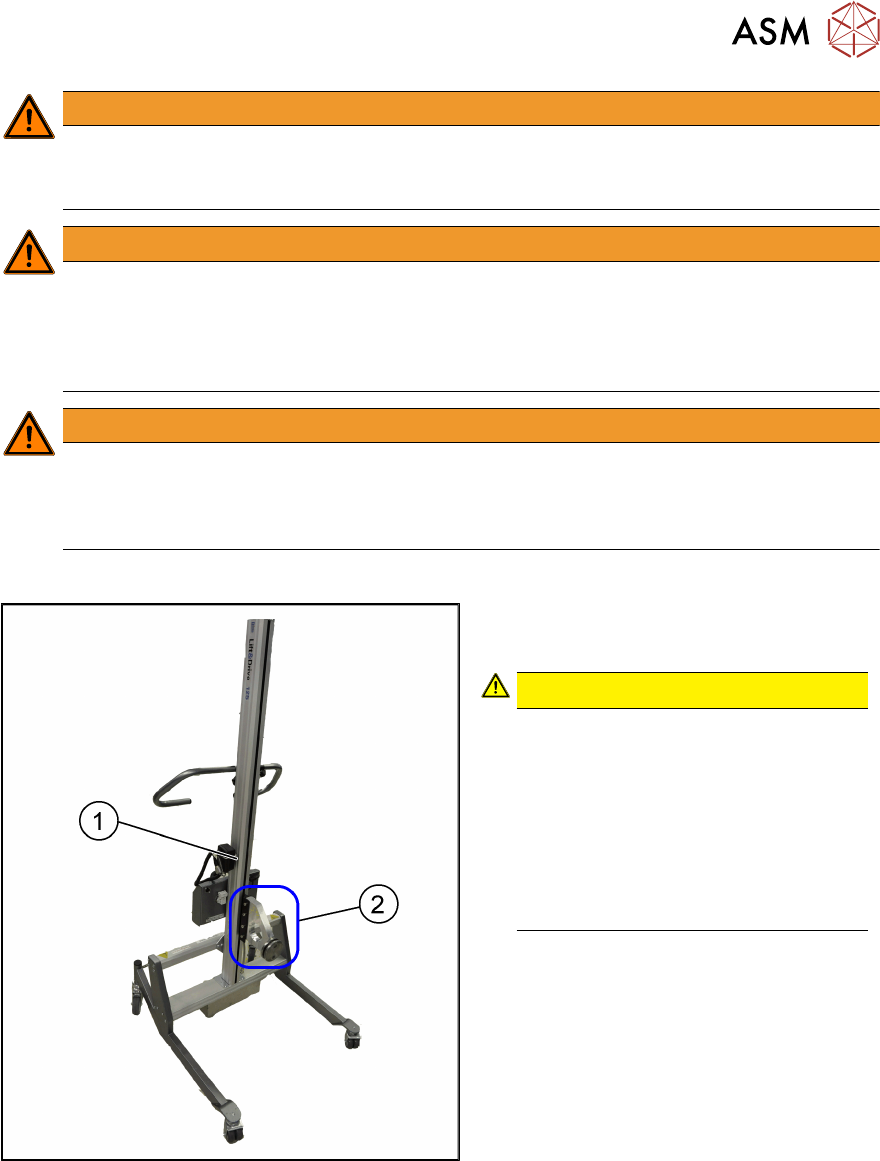
Overview
Fig.17: Example of a gantry lift
1. Gantry lift (example)
2. Gantry carrier plate [03012160-xx]
CAUTION!
Safety instructions
Pay attention to the weight of approx-
imately 64 kg when unpacking the
transport wrapper!
Use appropriate tools or call further
qualified persons.
The gantry lift has to be locked suffi-
ciently when transporting it again in or-
der to eliminate any danger.
.
3 Fitting the Gantry
3.3 Gantry Preparations
96 Assembly Instructions / Montageanleitung SIPLACE SX1/SX2 V3 Gantry Modularity Portalmodularität 05/2020
Assembly
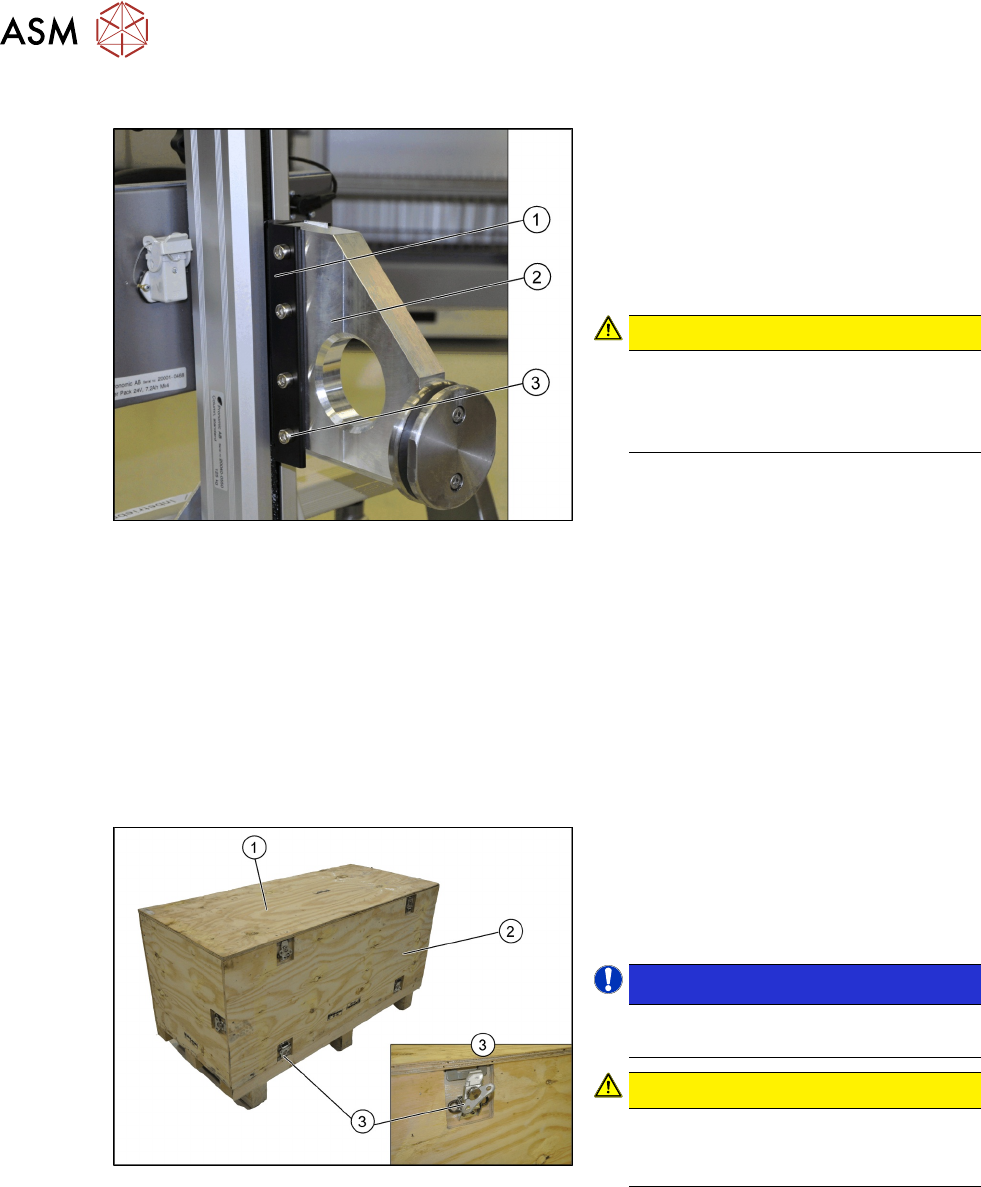
Fig.18: Gantry carrier plate
Fitting the gantry carrier plate
To enable the gantry lift to accommodate the
gantry, the gantry carrier plate (2) must be
fitted to the slide (1) of the gantry lift.
► Use the four fastening screws (3) to fix
the gantry carrier plate(2) to the slide
(1) of the gantry lift.
CAUTION!
Information on safety
Mount all eight screws with the associ-
ated washers and tighten them with
18Nm.
.
See also
2 3.3.2 "Unpacking the Gantry" [}96]
3.3.2 Unpacking the Gantry
Transportation crate
The gantry is packed in a transportation crate. Move the transportation crate near to the SIPLACE
SX machine on which the gantry is to be assembled. Do not move the gantry over long distances
with the gantry lift.
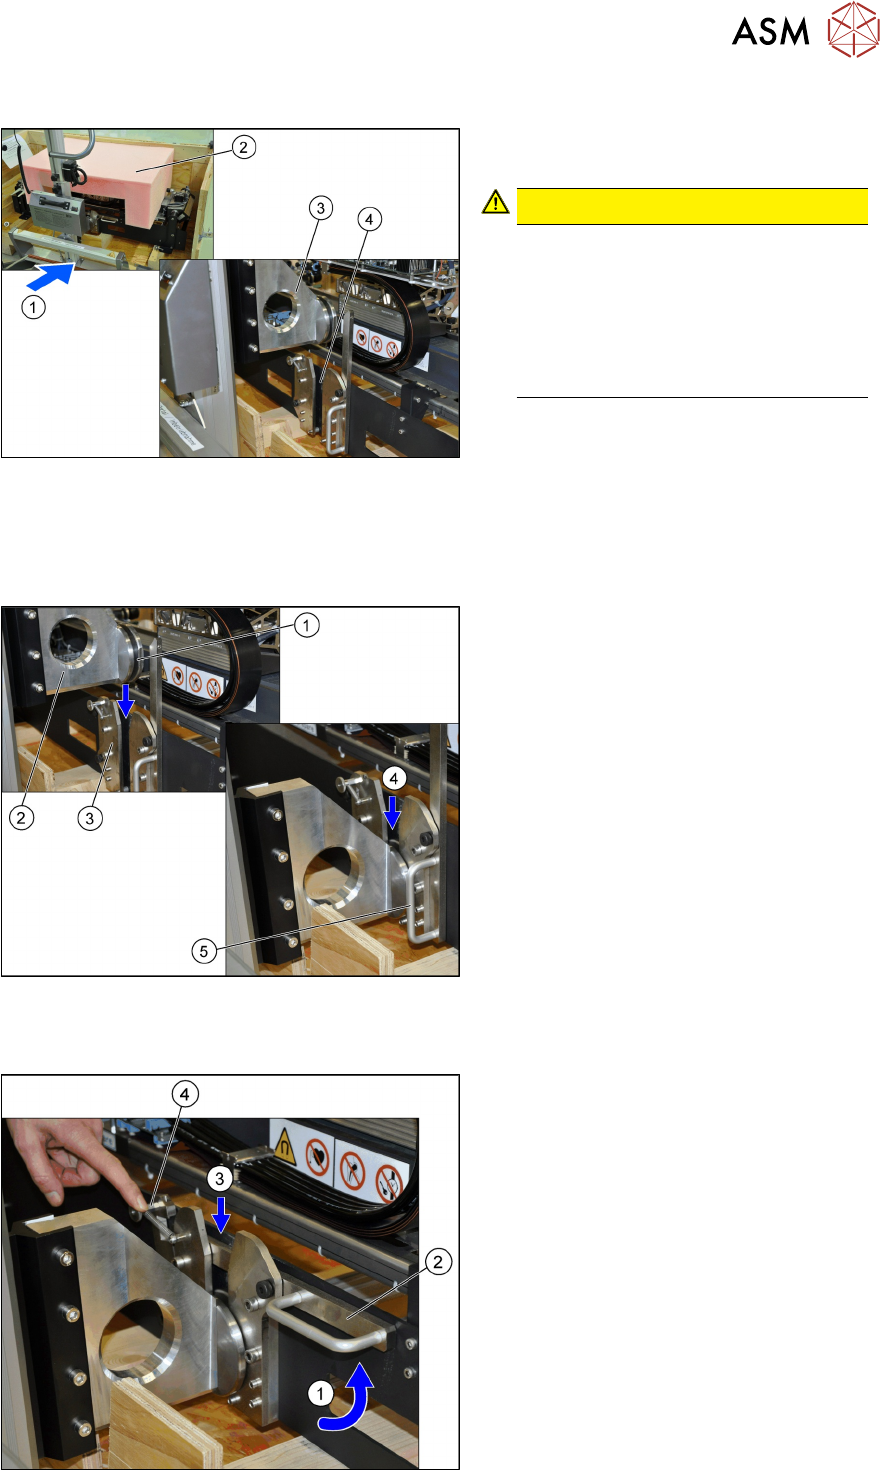
Fig.19: Transportation crate
► Open the turn-lock fasteners (3) on the
top (1) and front (2) of the transporta-
tion crate.
► Remove the two wooden panels at (1)
and (2).
NOTICE!
The gantry is fixed with four screws in
the transportation crate.
.
CAUTION!
Carrier
When putting back the carrier it must
be screwed again.
.
3 Fitting the Gantry
3.3 Gantry Preparations
Assembly Instructions / Montageanleitung SIPLACE SX1/SX2 V3 Gantry Modularity Portalmodularität 05/2020 97
Move the gantry lift into position
Fig.20: Gantry lift in position
► Carefully move the gantry lift (1) up to
the gantry.
CAUTION!
Take care not to damage the gantry
when moving it with the gantry lift.
Do not hit the gantry or locks with the
gantry carrier plate(3).
Make sure that the gantry carrier plate
(3) protrudes above the gantry carrier
locks(4).
.
► Remove the foam cover (2).
3.3.3 Locking and Transporting the Gantry Carrier
Move the gantry lift to the gantry
Fig.21: Lowering the gantry carrier
► Move the gantry carrier plate (2) for the
gantry lift over the gantry carrier locks
(3). The groove (1) must be able to en-
gage with the two locking plates (3).
► Lower the gantry lift so that the gantry
carrier plate can slide into the locks (4).
► Move the lift only so far down that the
locking lever (5) can be closed.
Locking the gantry carrier
Fig.22: Locking the gantry carrier
► Press the lock (4) back and pull (1) the
handle (2) of the lock upwards.
ð The lever (3) will engage. The
spring on the lock (4) secures the
locking mechanism.