DECAN_S1_Maintenance(Eng_Ver1.1)_Print.pdf - 第31页
chapt er 2 Inspe ction It ems fo r Main t e nanc e Nex t Generation, Multi- Functi onal Placer DE CAN S1 M ain ten anc e Ha nd boo k 2-8 Monthly Inspections (2/2) Inspection It ems for Maint enanc e
chapter 2
Inspection Items for Maintenance
Next Generation, Multi-Functional Placer
DECAN S1 Maintenance Handbook
2-7
Monthly Inspections (2/2)
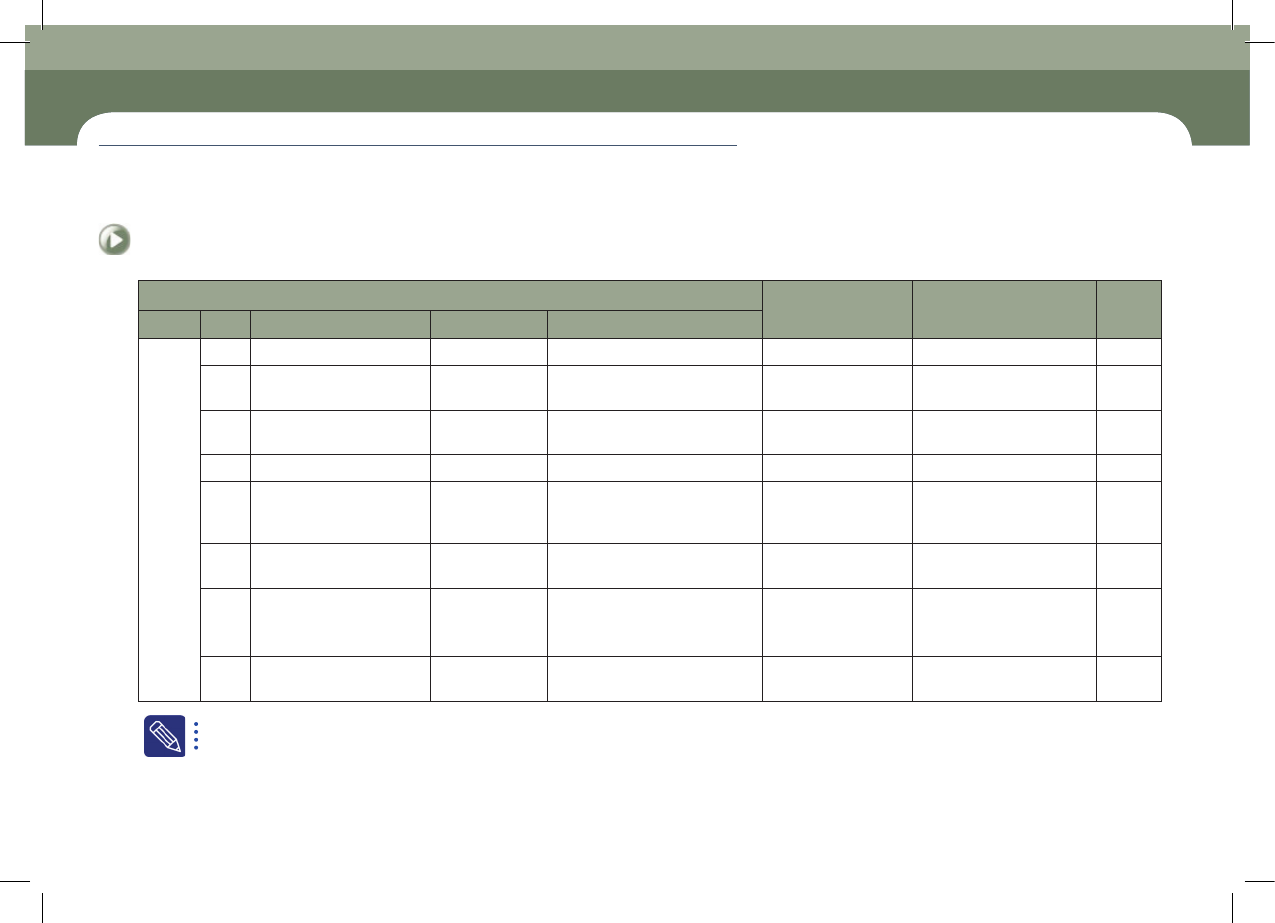
Check-up List
Replacement Time Grease
Time
required
Period No Inspection Item Measures Tools
Monthly
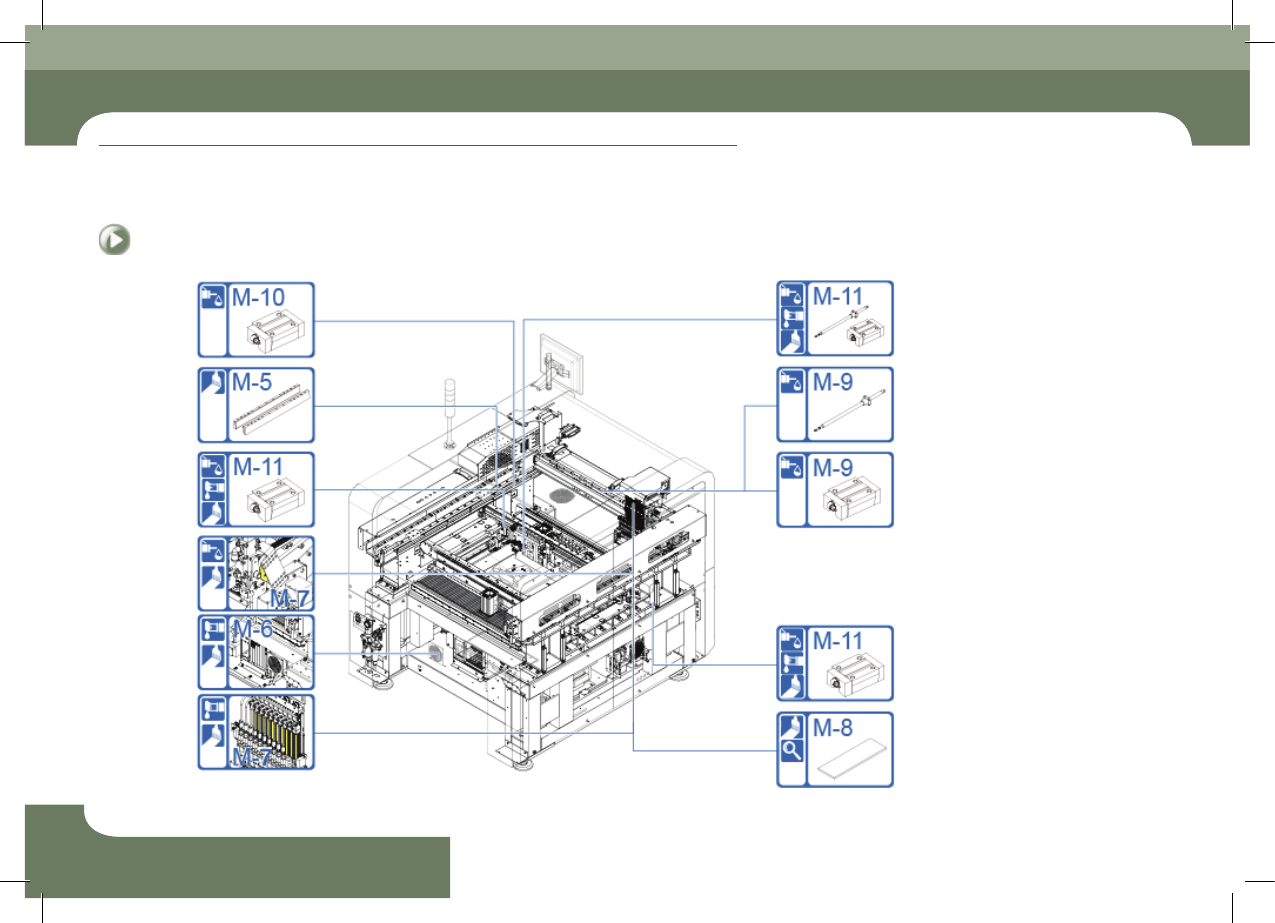
M-5 Y Axis Linear Motor, Magnet Inspect and clean cloth 15 Min
M-6 Control Rack Cooling Fan Inspect and clean
Flathead Screw driver, Vacuum
cleaner
10 Min
M-7 Head Spindle, Mirror CAM
Cleaning and
apply grease
Brush, cloth, Syringe
Inspection period:
3months
GREASE-GADUS_S2 V220 2 30 Min
M-8 Beam Splitter Inspect and clean Air spray, (+) driver 20 Min
M-9
X Frame LM Guide, Ball
Screw
Cleaning, apply
grease,inject
grease
Lubricator, cloth, wrench(M3, M4)
Industrial use paper wipe, Steel
plate with thickness of 2.0mm
Lubrication period: 4
months
GREASE-GREASE_AFE-CA 60 Min
M-10 Y Frame LM Guide
Clean and inject
grease
Lubricator, cloth
Lubrication period: 2
months
GREASE-GREASE_AFE-CA 60 Min
M-11
Conveyor LM Guide, Lead
Screw
Cleaning, apply
grease,inject
grease
Lubricator, Brush, cloth
Lubrication period: 6
months
Grease period: 2months
GREASE GADUS S2 V220-2 30 Min
M-12 Cover Cleaning
Ultra-fine fiber cloth, Alcohol,
Heavy Duty Staticide #2005, #2001
Inspection period: 1
months
30 Min
Setting the replacement period for parts
ㆍ Based on the regulated use environment.
ㆍ If the use environment is poor, the intervals for part inspection and replacement can be shortened.
ㆍ In the above table, C/S means our designated C/S company (STS) or our overseas local agents.
Monthly Inspections (2/2)
chapter 2
Inspection Items for Maintenance
Next Generation, Multi-Functional Placer
DECAN S1 Maintenance Handbook
2-8
Monthly Inspections (2/2)
Inspection Items for Maintenance
DECAN S1 Maintenance Handbook
3-1
chapter 3
Daily Inspection
Next Generation, Multi-Functional Placer
Checking and cleaning the nozzle
chapter 3
Daily Inspection
Prevent PCB defect due to nozzle clogging and breaking
Tool for Maintenance
Recommended cleaning liquid(Ethyl Alcohol), air gun, lubricant for nozzle, spray
straw, bore through-pin, air sprayer, ultrasonic cleaner
Measures
Step 1.
Move the X Frame by referring to "Forward movement of
the X-frame" on page 1-3.
Step 2.
Press the 'STOP' and 'RESET' buttons in order after
pressing the 'EMG' button on the OP panel to stop
operation.
For more details, refer to "How to perform emergency stop" on page
1-2.
Step 3.
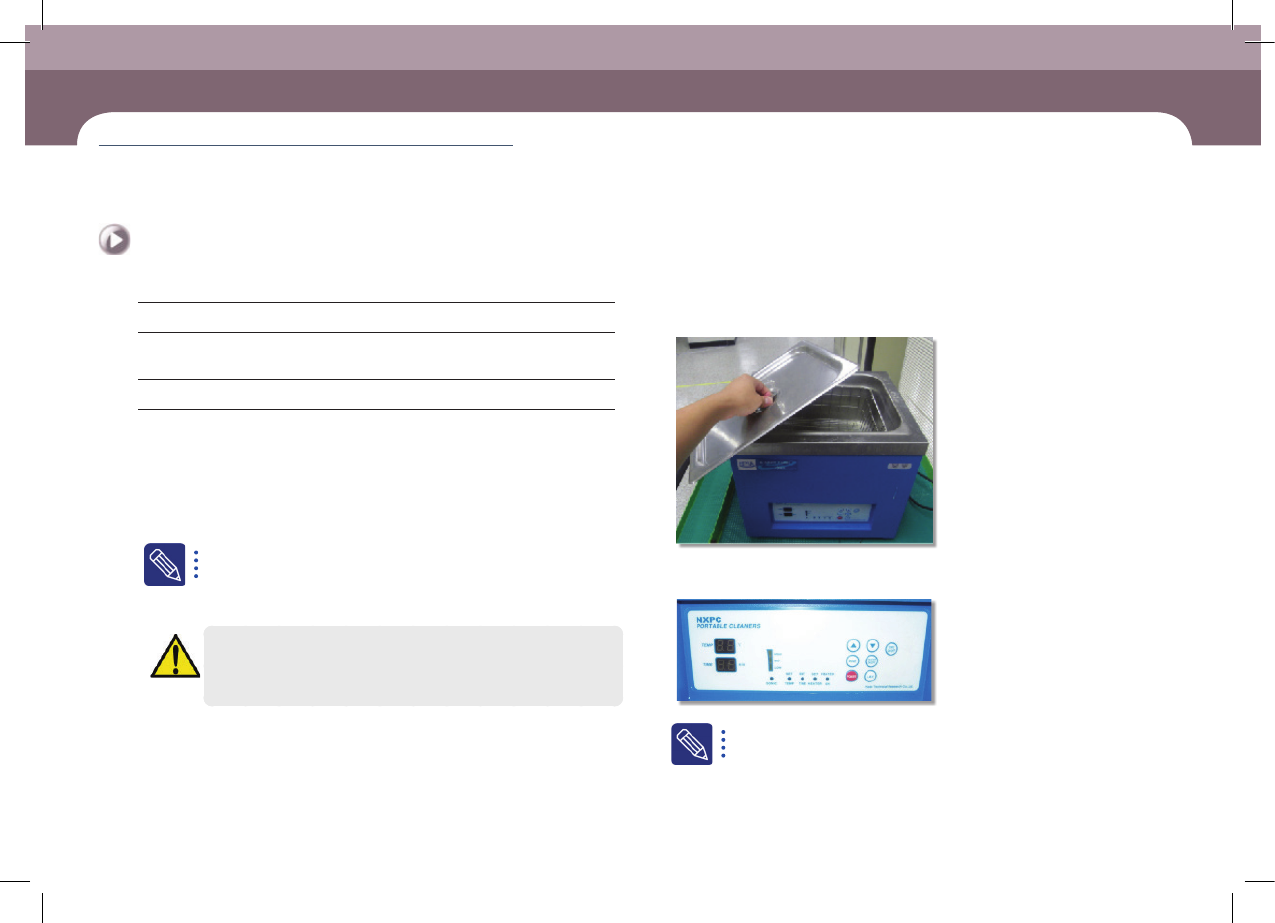
Remove the head assembly and ANC nozzles manually
Caution
Remember the ANC nozzle arrangement before removing them
manually. After cleaning, arrange the nozzles on the ANC as they
were before cleaning and lubricating.
Step 4.
Open the cover of the ultrasonic cleaner.
Step 5.
Set the time of the ultrasonic cleaner. (For normal usage,
clean for 3~5minutes)
The type of ultrasonic cleaner and its setting method may be different
from those shown in the picture.
Checking and cleaning the nozzle
(Time required: 10min / No. D-1)