DECAN_S1_Maintenance(Eng_Ver1.1)_Print.pdf - 第67页
Mon thly Inspe ction chapt er 5 Nex t Generation, Multi- Functi onal Placer DE CAN S1 M ain ten anc e Ha nd boo k 5-1 2 Cleaning and Lubricating X Frame LM Guide, Ball Screw Monthly Inspe ction T ool for M aintenanc e In…
Monthly Inspection
chapter 5
Next Generation, Multi-Functional Placer
DECAN S1 Maintenance Handbook
5-11
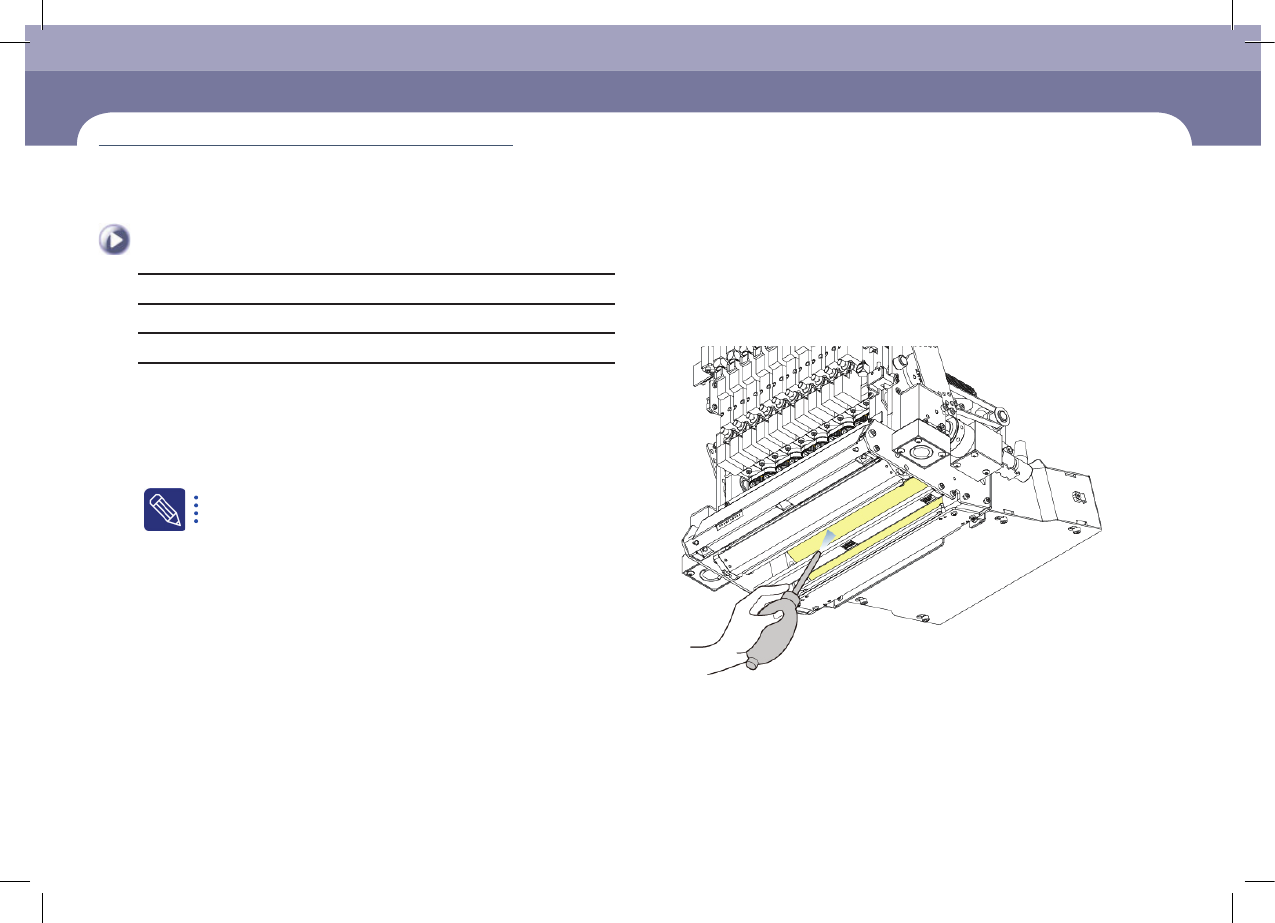
Checking and Cleaning Head Beam Splitter
Tool for Maintenance
Air Spry, (+) driver
Measures
Step 1.
Move the X Frame to front by referring to "Forward
movement of the X-frame" on page 1-3.
Step 2.
Press the 'STOP' and 'RESET' buttons in order after
pressing the 'EMG' button on the OP panel to stop
operation.
For more details, refer to "How to perform emergency stop" on page
1-2.
Step 3.
Clean the beam splitter below the head using an air spray.
Step 4.
Release the emergency stop as described in "Releasing
'Emergency Stop' mode" on page 1-6 and perform the
operation again.
Checking and Cleaning Head Beam Splitter
(Time required: 20min / No. M-8)

Monthly Inspection
chapter 5
Next Generation, Multi-Functional Placer
DECAN S1 Maintenance Handbook
5-12
Cleaning and Lubricating X Frame LM Guide, Ball Screw
Monthly Inspection
Tool for Maintenance
Industrial use paper wipe, Lubricator, GREASE-GREASE_AFE-CA, Wrench(M3, M4),
Steel plate with thickness of 2.0mm
Measures
Step 1.
Move the X Frame to front by referring to "Forward
movement of the X-frame" on page 1-3.
Step 2.
Press the 'STOP' and 'RESET' buttons in order after
pressing the 'EMG' button on the OP panel to stop
operation.
For more details, refer to "How to perform emergency stop" on page
1-2.
Cleaning and Lubricating X Frame LM Guide, Ball
Screw
Step 3.
After removing the tension adjustment bolts of the
cover that prevents grease from scattering using a
hex wrench (M4), replace the fixing block if the space
between the cover fixing block and spacer is not 0.5mm.
Caution
Only the personnel specializing in maintenance must disassemble/
assemble the grease scatter prevention cover.
(Time required: 60min / No. M-9)
Monthly Inspection
chapter 5
Next Generation, Multi-Functional Placer
DECAN S1 Maintenance Handbook
5-13
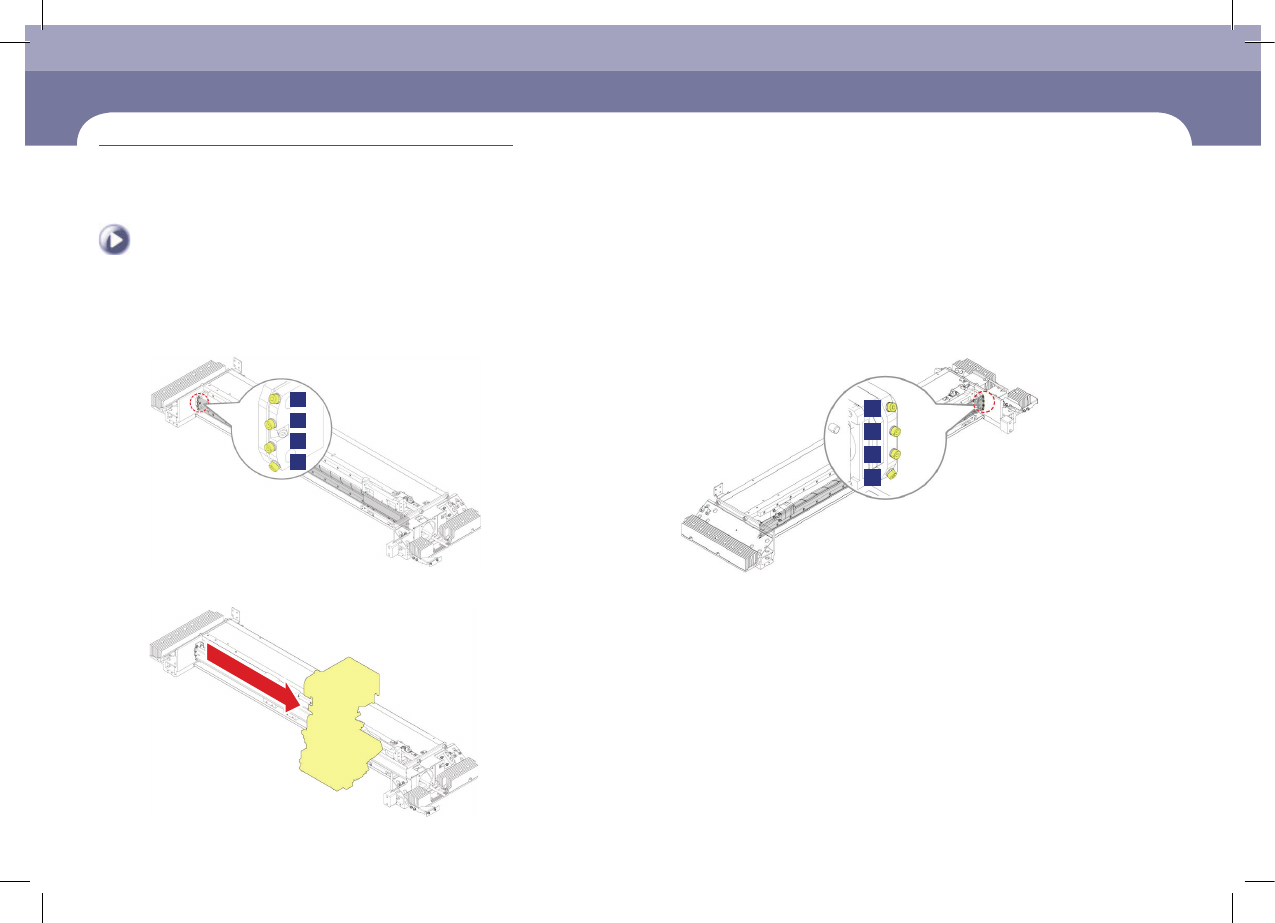
Cleaning and Lubricating X Frame LM Guide, Ball Screw
Step 4.
Remove the bolts fixing the cover in the order shown in
the following figure using a hex wrench (M3).
1
3
4
2
Step 5.
Move the head assembly to the right as far as it goes.
Step 6.
Remove the bolts fixing the cover in the order shown in
the following figure using a hex wrench (M3).
1
3
4
2