PSV5000_OwnersManual.pdf - 第137页
T roublesh ooting Collect all PSV 5000 System Logs PSV5000 O wner ’s M anual - 133 - R EST ARTING AFTE R T ROUBLE If the CH70 0 Software cl oses, locks up, or experi ences some tr ouble that qualifie s as a crash, th…

Maintenance ■ Troubleshooting
- 132 - Data I/O ■ 096-0465-001C
Yellow
• Tray not present
PSV5000 does not detect the tray and when
you click Run, you get error message Tray Not
Present; or the Run window shows a tray
where there is none.
• Re-install the tray.
• At the Run window, the Tray Present Sensor
should be ON.
• If the tray is still not detected, remove the
tray and place a finger over tray present
sensor.
–If sensor is working, tray outline appears.
Re-install tray.
–If sensor is not working, the tray outline
does not appear—contact Data I/O
Customer Support or a local Data I/O
approved service representative
Red
• Z MOTION ERROR
800: LIMIT
EXCEEDED ON AXIS 2
Conditions: A Red ERROR box appears in
bottom right corner of the Monitor.
Contact Data I/O Customer Support or a local
Data I/O approved service representative.
Red/Yellow
• Error Tape Out • If a device is jammed in the Tape Output
System, clear it. Acknowledge the error
message by pressing the ESC key. Then click
OK on the PSV5000 Monitor.
• If above doesn't work, call the Service
Technician.
Red
• Main Air OFF • Check that the main input air valve is in the
ON position.
• Check that the main air hose is connected.
• Check that the air pressure is within the
required range (green LED readout instead of
red.)
• Contact Data I/O Customer Support or a
local Data I/O approved service
representative.
Red
• Vacuum error • See Adjusting the Vacuum Generator Sensor
on page 105.
• Contact Data I/O Customer Support or a
local Data I/O approved service
representative.

Troubleshooting Collect all PSV5000 System Logs
PSV5000 Owner’s Manual - 133 -
RESTARTING AFTER TROUBLE
If the CH700 Software closes, locks up, or experiences some trouble that
qualifies as a crash, then the PSV5000 Machine power must be turned
OFF for 20 seconds prior to restarting the software.
Collect all PSV5000 System Logs
Collect PS Logs is a software utility on CH700 Software that collects all
log files from PSV5000. It creates a ZIP file containing all the information
that Data I/O or trained service technicians need to evaluate your
PSV5000 Machine status.
PROGRAMMER RELATED PROBLEMS
When you experience a programmer related problem:
1. Force the error to re-appear by running a job, or performing the
same steps that led to the trouble.
2. (Note any dialogs with the Collect Logs button) and close CH700 the
usual way as follows:
a. Click Finish to stop a job.
b. Exit the Run window.
c. Exit the System window.
d. Exit the Setup window.
3. Start Collect PS Logs. See heading Starting ‘Collect PS Logs’ below.
OTHER PROBLEMS
For problems that are NOT programmer related, run the Collect PS Logs
application any time after the problem has been seen.
STARTING ‘COLLECT PS LOGS’
There are three methods to start the Collect PS Logs application.
AUTO METHOD (THE APP ISN’T VISIBLE)
AUTO Method uses default settings— The Auto Method itself has two
ways to collect logs. The Collect Logs Application does not open with
these auto methods.
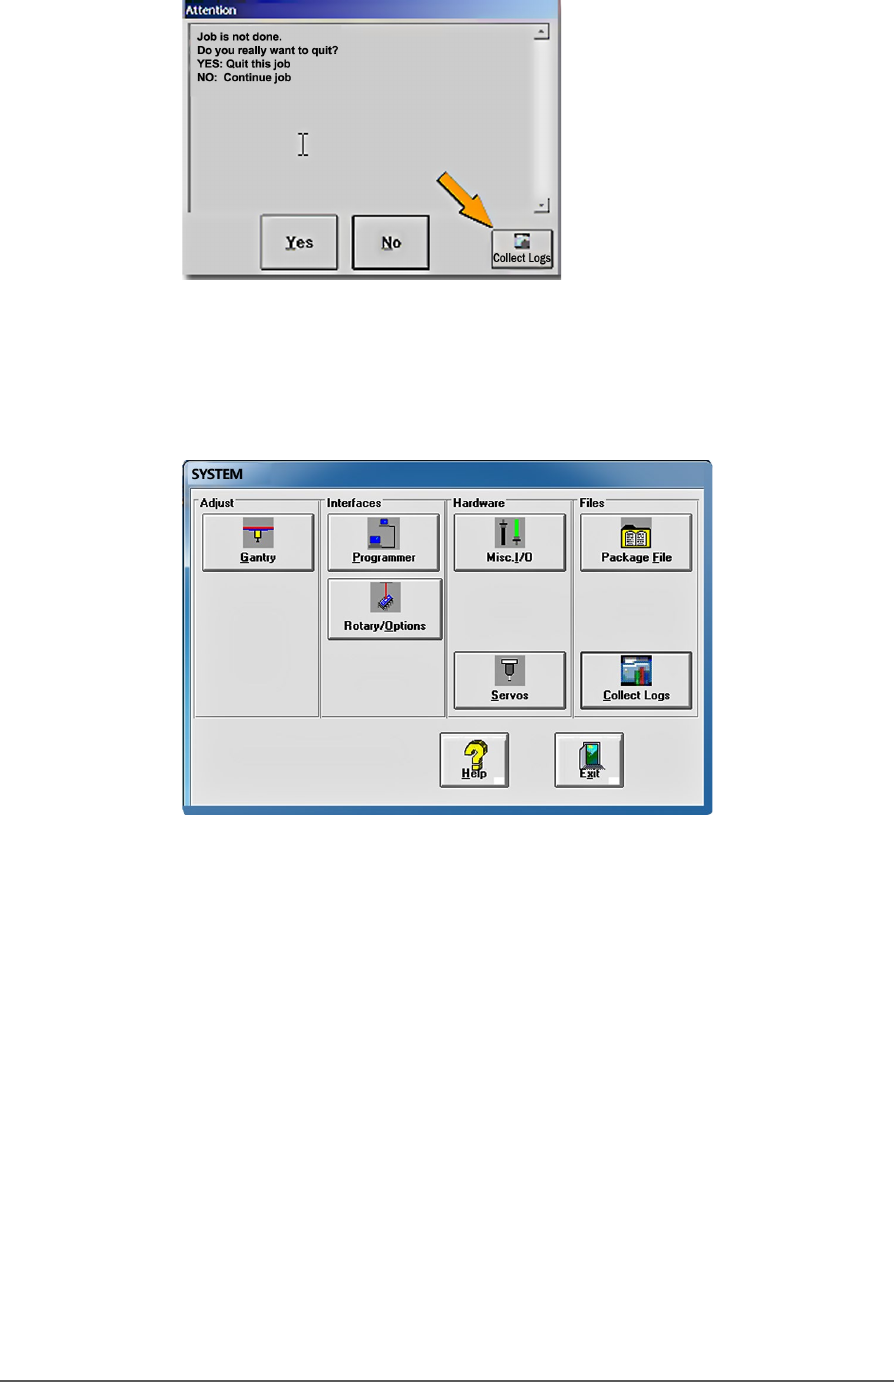
• FIRST AUTO METHOD: The CH700 Software displays a button in
each message box that allows you to start the Collect PS Logs
application in AUTO Mode.
Maintenance ■ Troubleshooting
- 134 - Data I/O ■ 096-0465-001C
• SECOND AUTO METHOD: The CH700 Software also displays a
button in the System window.
When starting Collect PS Logs in AUTO Mode, only a progress screen is
shown on the lower left corner of the screen. All defaults are used and no
user action is required. A log zip file named with the current date and
time is saved in the Documents folder (C:\Documents, or
C:\Libraries\Documents.)
START APP METHOD IN WINDOWS OS
The Start App (non-auto) method is the Windows method using the
Windows Start menu; it offers some options. Click Window Start > All
Programs > Data IO > Collect PS Logs.
After starting Collect PS Logs from the Start menu, the main window
appears where you can select which items you need to collected.
1. Select or clear check boxes for files as desired.