PSV5000_OwnersManual.pdf - 第42页
Setup ■ Applying Po wer f or the First Time - 38 - Data I/O ■ 096 - 0465 - 00 1C Shut ting Down th e PSV 5 000 System 1. Finish and Exit any job that is running. 2. ( Optional) Rem ove all devices f rom the system. 3. E …

■ Applying Power for the First Time □ (Optional) Connecting an Ethernet Cable
PSV5000 Owner’s Manual - 37 -
Applying Power for the First Time
Before the PSV5000 System is turned on for the first time, ensure the
following:
The external air line is connected, and the main air valve is open.
All E-Stop buttons are in the released (operating) positions (refer to
Emergency Stop (E-Stop) Buttons on page 1-4 for location).
All safety doors and access doors are closed.
The programmer power toggle switch on the Power Panel is ON (UP)
position.
The power switch on the Handler Computer is set to the ON position
(although it will not have power
yet). The rocker switch is ON when
tipped to the down position.
(Optional) The Socket Adapters
required for the job have been
installed on all necessary programmer sites. See Installing Socket
Adapters in the Operator’s Manual for more information. Note that
Socket Adapters can also be installed after power is on.
Note: To tighten socket adapters/boards, the recommended torque
range for FlashCORE programmer screws is 1.4 – 1.5 Newton Metre
(Nm)/12.4 – 13.3 pound force inch (lbf-in).
When satisfied, rotate the main power switch on the Power Panel to the
ON position (clockwise).
After power is applied, verify that no obvious failures or electrical
anomalies occur. Verify that the Handler Computer starts properly and
displays a network log-on dialog.
Note: If electrical or mechanical problems are noted, turn OFF the
PSV5000 System and notify Data I/O Customer Support.
At the Microsoft Log-on window, click the user profile (usually labeled
MFG) to complete the startup procedure.

Setup ■ Applying Power for the First Time
- 38 - Data I/O ■ 096-0465-001C
Shutting Down the PSV5000 System
1. Finish and Exit any job that is running.
2. (Optional) Remove all devices from the system.
3. Exit CH700 and TaskLink and any other software that you have
running.
4. Shut down the Handler Computer PC with the Windows Start
menu.
5. (Optional) Save and exit the Laser Marker software.
6. (Laser Option) Turn OFF (0) the key-switch (counterclockwise) on
the laser PC.
7. WAIT UNTIL WINDOWS COMPLETES SHUTTING DOWN, then
rotate the main power switch (on the Power Panel)
counterclockwise to the OFF (vertical) position.
If the PSV5000 Machine will not be used for several days, the shop air
should also be removed or turned off at the Power Panel. (Optional)
Padlock the main air pressure valve so that it cannot be turned back ON
while the lock is in place
(Optional) Installing Antivirus Software
The PSV5000 System has no antivirus software installed from the factory.
It is highly recommend that customers install their own antivirus
software. The software should be set to run virus scans manually rather
than at a scheduled time unless you are sure that the PSV5000 System
will not be running jobs at that time.
Note: An antivirus program may affect performance.
The PSV5000 System runs Windows 7 Professional 32-bit operating
system. Follow instructions for your antivirus software. Contact Data I/O
Service with specific questions. See Contacting Data I/O on page - 6 - (in
Preface).
(Optional) Network Settings
After starting up the PSV5000 System and logging on, double-click
Computer > Map Network Drive (Windows 7).
■ Applying Power for the First Time □ (Optional) Network Settings
PSV5000 Owner’s Manual - 39 -
IP ADDRESS AND PORT NUMBER
If you need the IP Address for communicating with other Data I/O
software, they are available via TaskLink. The Port numbers are also
displayed. (Port numbers are the same for all programmers on a PSV5000
Machine.)
Addresses and Port numbers can be found as follows.
1. Start TaskLink on the target PSV5000 System. (Closing CH700
will return to TaskLink.)
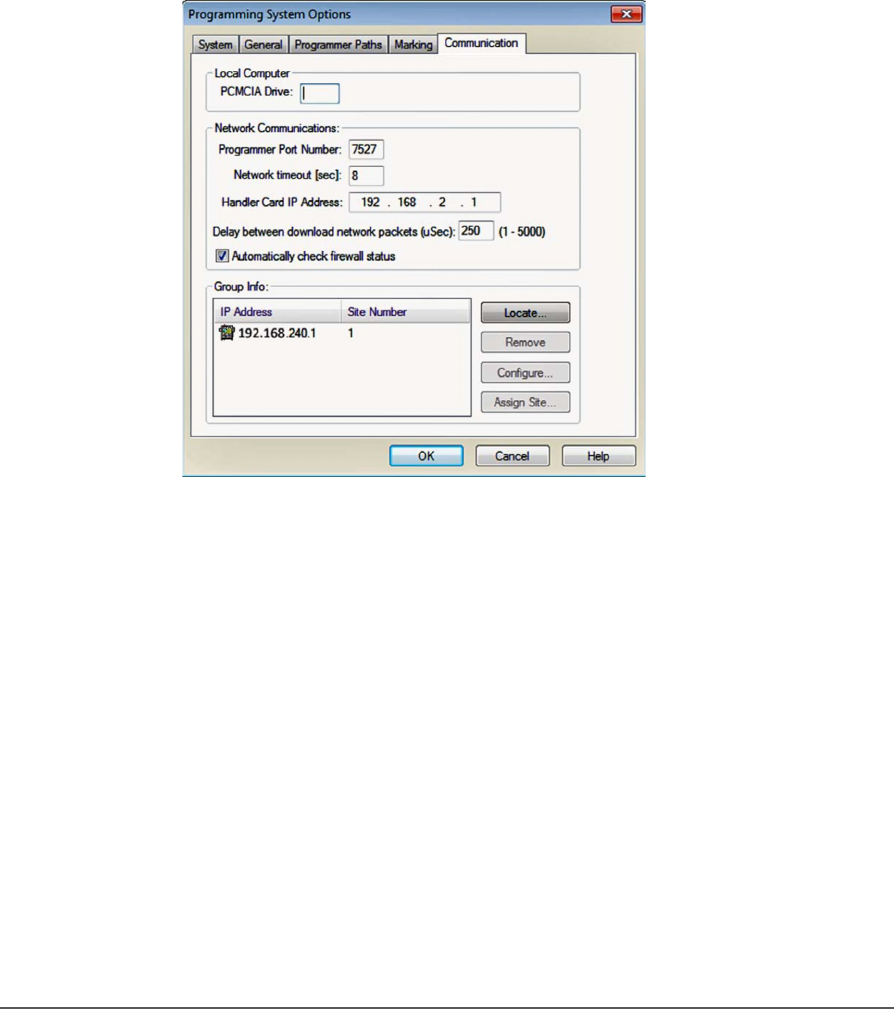
2. Click System > Options > Communication tab. The IP Address
and site numbers are listed in the lower left corner.
Figure 17: TaskLink Communication Tab displays IP Addresses and
site numbers.