PSV5000_OwnersManual.pdf - 第60页
Setup ■ Setting U p the Laser Mar king Modul e - 56 - Data I/O ■ 096 - 0465 - 00 1C Figur e 30: The Lens Correction button i n the Ma rkingMa te softw are . 7. Confirm sc ale settings ar e the same as shown in Figure 32:…

■ Setting Up the Laser Marking Module □ Preparation:
PSV5000 Owner’s Manual - 55 -
Setting Up the Laser Marking
Module
Preparation:
1. Make sure a USB dongle for the laser has been updated.
2. Upgrade CH700 to V2.3 by installer.
3. Copy CH700.exe (v2.3.2) from
\\sol\ProjDocs\PSV5000 -
1071\Software\CH700 v2.3.2 to C:\CH700 to replace exe of v2.3.
4. Update below values in the package file
5. #134 1500 MSEC, LASER SHUTTLE MOVING TIME
6. #137 0 NUM, INCREASE OR DECREASE LASER
POWER OF CUP2 BASED ON CUP1
7. #138 0 NUM, DISTANCE BETWEEN CUP1 AND
CUP2 IN X DIRECTION
8. #139 -42000 NUM, DISTANCE BETWEEN CUP1
AND CUP2 IN Y DIRECTION
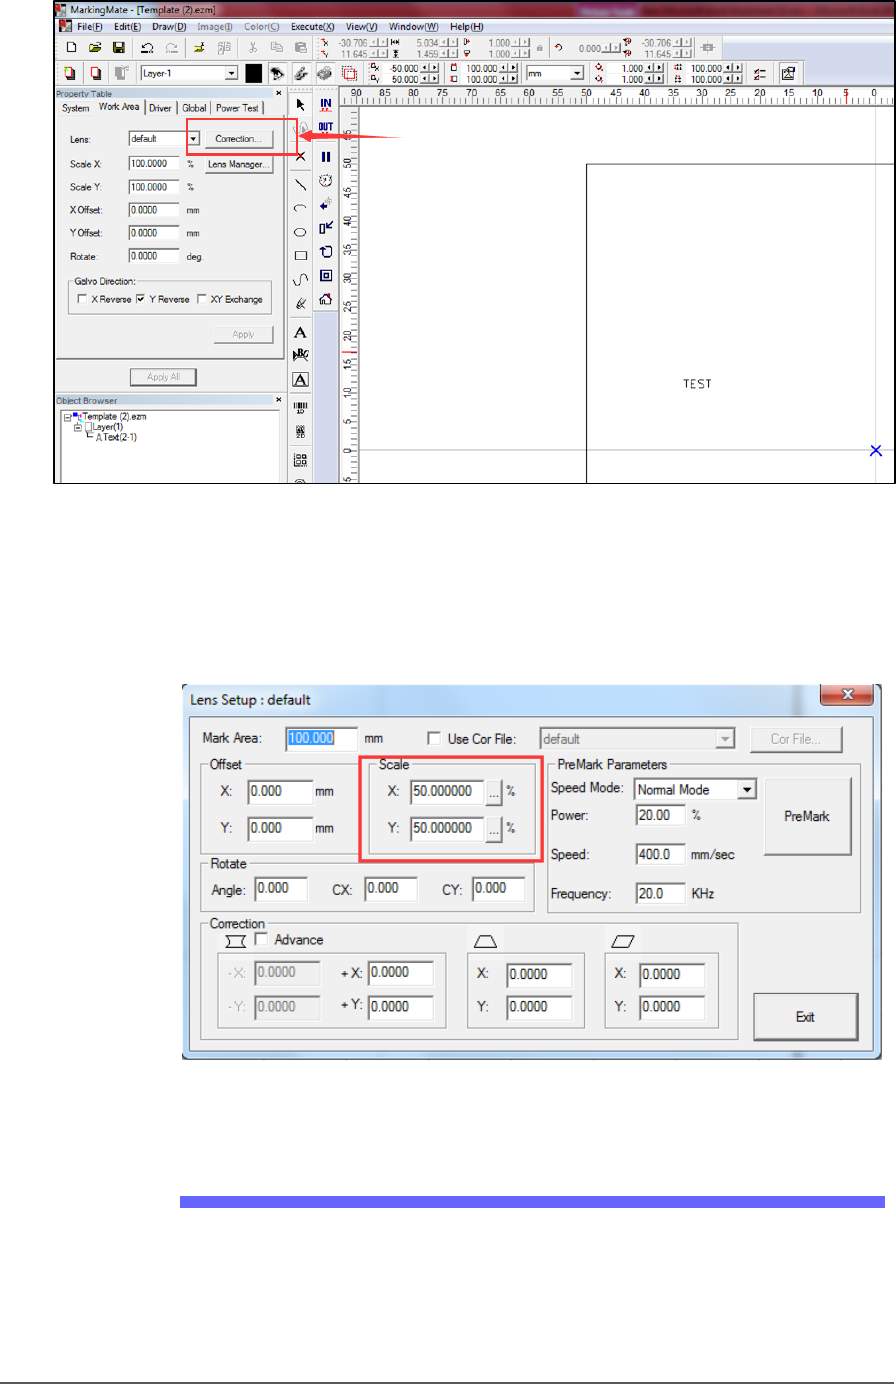
5. Start ‘MarkingMate.exe.’
6. Click a blank space on work area, and then at the Property Table,
click Work Area tab, and click Lens Correction to open the Lens
Setup dialog.
Setup ■ Setting Up the Laser Marking Module
- 56 - Data I/O ■ 096-0465-001C
Figure 30: The Lens Correction button in the MarkingMate software.
7. Confirm scale settings are the same as shown in Figure 32: below.
They are system values: confirm or calibrate initially and each time
there is a hardware change.
Figure 31: The Scale factors in the Lens Setup dialog.
Laser Software Instruction
1. Copy Template.ezm and rename it for your job, or start the
MarkingMate.exe to create a new blank file and then add a text
string into the work area for marking.

■ Setting Up the Laser Marking Module □ CH700 Configuration
PSV5000 Owner’s Manual - 57 -
Figure 32: Adding text to mark the devices.
2. Enter preview mode (see image below) to confirm the real world
marking position is set to Cup1 of shuttle. Move the red light to
cup1 position using the arrow key if they do not match.
Figure 33: The Preview button.
3. Save the file and exit the software.
CH700 Configuration
1. Make a backup of the winAH400.ini file.
2. In the winAH400.ini file make the following changes:
a) Set MarkerSystem=UPRHAND to enable the laser.