PSV5000_OwnersManual.pdf - 第97页
Ad ditional F eatures Ma inten a nce Schedule PSV5000 O wner ’s M anual - 93 - Items to ch eck Ev ery Week are be low Every week Contin ued - Every week Progra mmers To help ensure there are no problems with the prog…

Maintenance ■ Additional Features
- 92 - Data I/O ■ 096-0465-001C
Make copies of this chart
and post near your work
area.
Maintenance Schedule
This Maintenance Interval Chart below recommends intervals based on
single-shift daily usage. Information about the specified procedures and
intervals can be found on the pages referenced in the right column.
An asterisk (*) denotes optional equipment.
Date
completed
/ initials
Component
Action
(see precautions also, on page listed)
Page
Items to check Every Day
Every day Sockets
Clean with dry compressed air. Check for wear;
replace if necessary. For HIC Socket Adapters, see
more information in customer letter Cleaning HIC
Sockets (PN 983-5053) on our web site Technical
Library. This link opens the PDF which lists
cautions and suggested items, such as Cleaning
brush (PN 5655500901) and ProGold Wipes
(PN 5705500902).
page
98
Every day Input air pressure
Verify the input air pressure at the regulator is
within specifications and that it is constant, that is
the Nm3/min. [Normal Cubic Meter/min.] (SCFM )
must be stable. For specifications, see Connecting
Air on page 34.
page
34
Additional Features Maintenance Schedule
PSV5000 Owner’s Manual - 93 -
Items to check Every Week are below
Every week
Continued-
Every week
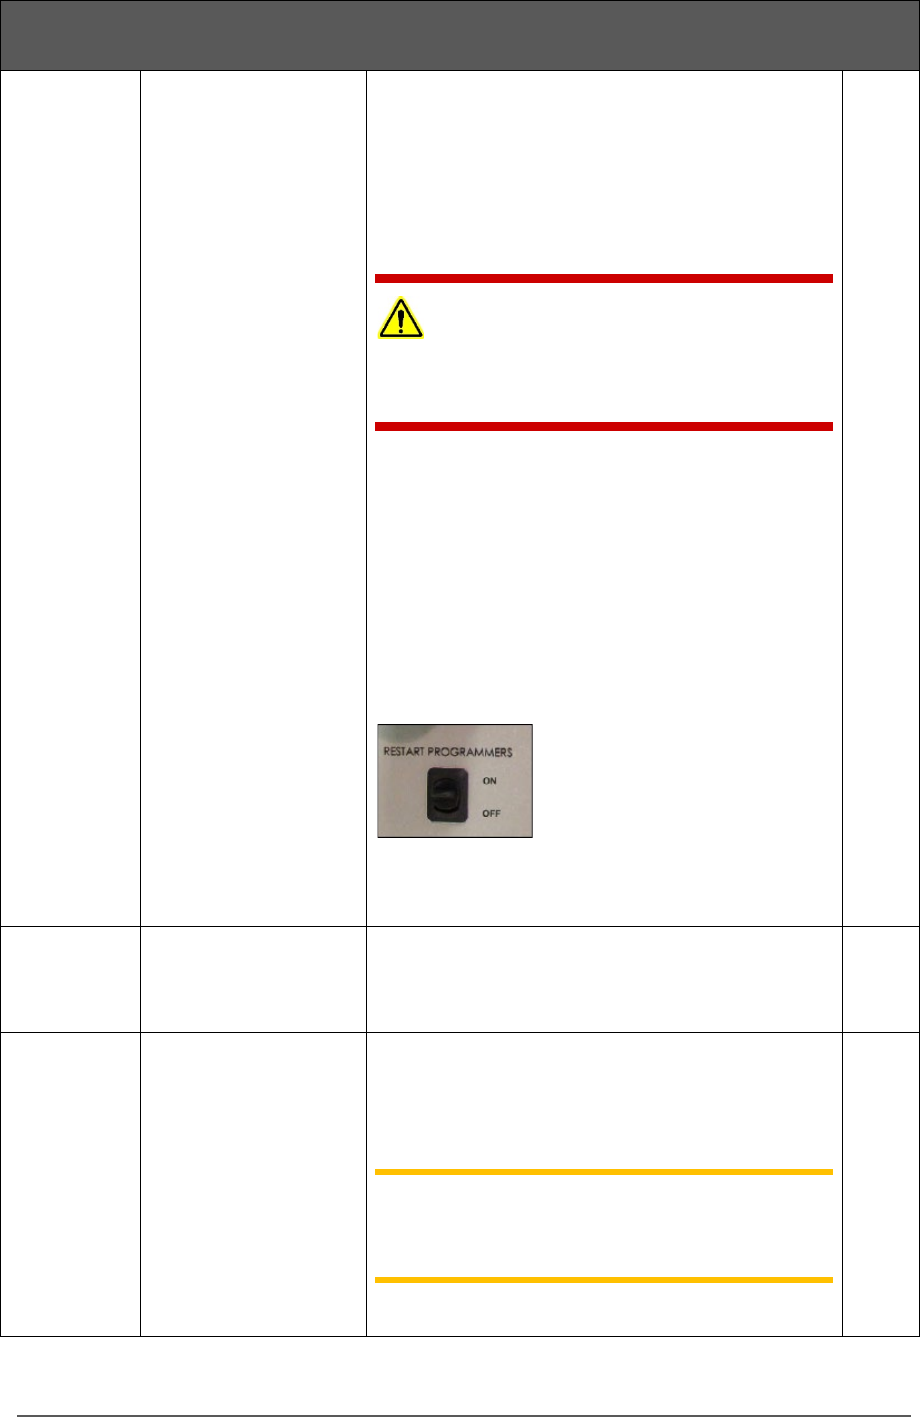
Programmers
To help ensure there are no problems with the
programmer hardware, run the programmers’
Self-test once a week at a minimum; more often is
even better. The Power-On-Self-test (POST), which
sets precision to a laser-trimmed reference, runs
when programmers are powered up. This insures
proper operation of the programmer’s voltage
sources.
CAUTION: Possible damage to programmers
and devices! DO NOT TURN AIR OR POWER OFF to
the PSV5000 Machine while a job is running.
A job must be Finished before turning OFF
compressed air or electrical power. Wait for the
gantry to park before turning OFF.
Run the Self-test by either
A) turning the PSV5000 System power OFF properly
and then ON (Shutting Down the PSV5000 System
on page 38), or
B) turning OFF only power to the programmers, and
then ON, with the Programmer Power Switch on the
Power Panel. If there is a programmer issue, a
message will display when the next job is run.
—Refer to the Operator’s Manual for switch
locations.
Every week General system
Clean surfaces of equipment and all areas in
workspace with a clean brush, cloth, or dry
compressed air.
Page
102
Every week Probe tips, on the
PNP head
• Inspect the Probe Tip to make certain it can
create a good vacuum seal on the device.
Replace if probe tip is worn, cut, or damaged.
• Clean the PNP Probe tips with alcohol wipes
(Data I/O PN 570-0410-001) or a damp cloth.
Note: Do not touch the probe tip with bare
hands. Finger oils can cause small devices to
stick.
Page
103

Maintenance ■ Additional Features
- 94 - Data I/O ■ 096-0465-001C
Every week General system
Laser Marking*
page
124
Every week Tray Feeder*
Check the Tray Feeder for damaged or broken parts.
Check the conveyor belt and the guides for dirt,
nicks, or other signs of damage. For more
information, refer to the Tray Feeder Operator
Manual.
Items to check Every Month are below
Every
month
Tray Feeder*
Clean and Inspect the Tray Feeder.
Every
month
Supply line air filter
Check the main air filter and replace if necessary.
Drain fluid.
page
107
Every
month
Vacuum Generator
filters at PNP head
Check vacuum generator filters; replace as
necessary.
page
108
Items to check Every Three Months
Every
Quarter
Camera
Clean the Camera glass cover.
page
102
Every
Quarter
LCD Display
(Quarterly or as needed)
Clean the monitor with consumer-grade ammonia
glass cleaner. Spray window cleaner onto a soft,
lint-free cloth and wipe the screen. DO NOT APPLY
liquids directly to the screen.
DO NOT USE alcohol or industrial chemical
cleaners.
Every
Quarter
Safety doors
Clean with damp cloth.
Every
Quarter
Probe stem O-Ring
Replace the O-Ring on the probe stem.
page
103