00197279-03_SM_Glue-Feeder_EN.pdf - 第31页
Replacing Spare Parts 3.11.1 Removing the Cartridge Pipe Cartridge Pipe Service Manual SIPLACE Glue Feeder 31 ► Position the tw o lugs of the special tool into the two holes in the union n ut. ► Loosen the union nut by t…
Replacing Spare Parts
Cartridge Pipe 3.11.1 Removing the Cartridge Pipe
30 Service Manual SIPLACE Glue Feeder
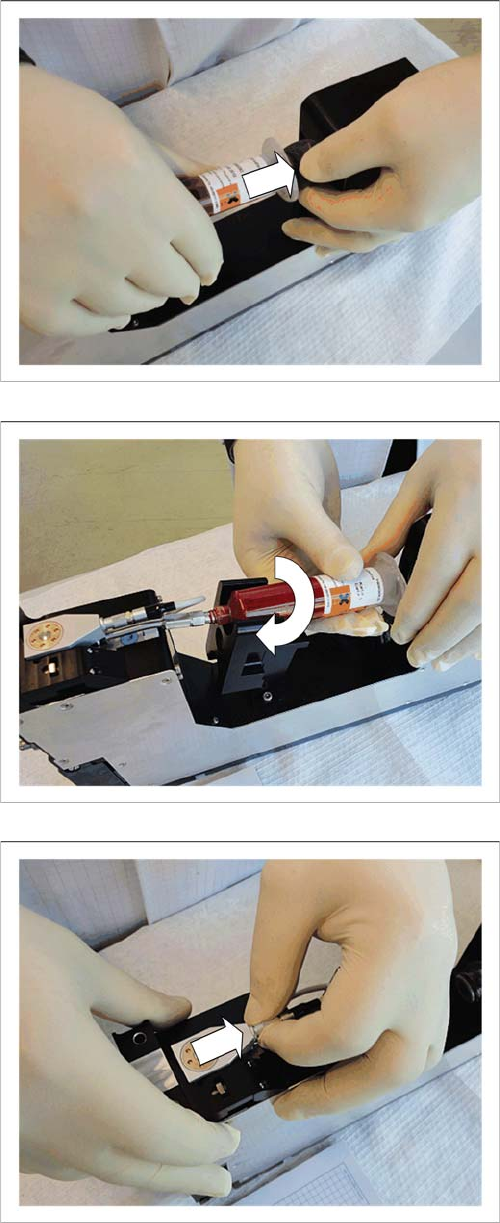
► Press the cartridge adapter towards the back and pull
it off.
► Unscrew the cartridge from the cartridge pipe thread.
► Unplug the heating connector from the nozzle heat
-
ing.
Replacing Spare Parts
3.11.1 Removing the Cartridge Pipe Cartridge Pipe
Service Manual SIPLACE Glue Feeder 31
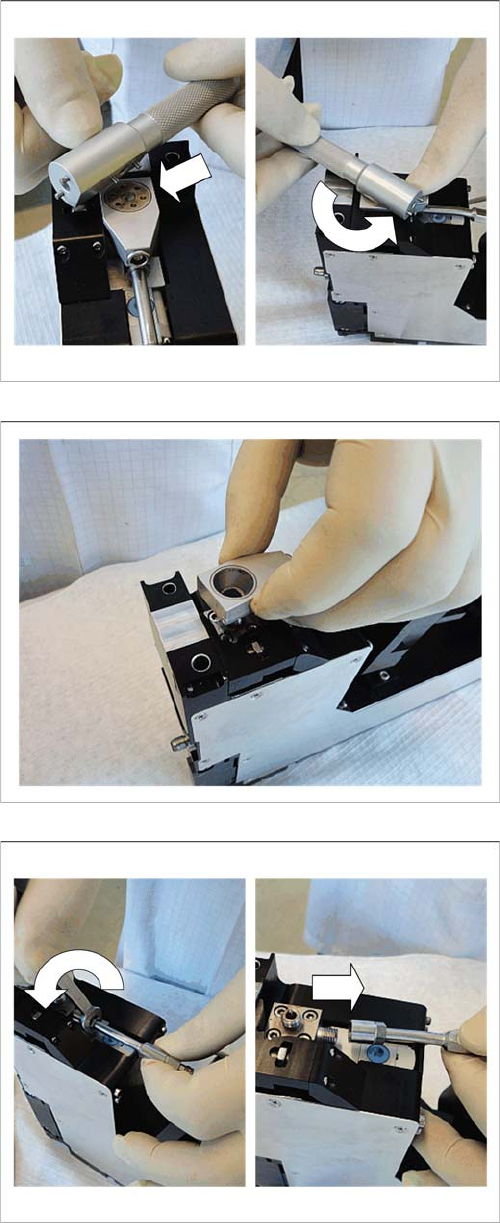
► Position the two lugs of the special tool into the two
holes in the union nut.
► Loosen the union nut by turning it anticlockwise.
► Remove the union nut.
► Remove the nozzle heating.
► Hold the cartridge pipe tight with one hand.
► Loosen the screwed connection with the help of an 8
mm open-ended wrench.
► Remove the cartridge pipe.
Replacing Spare Parts
Cartridge Pipe 3.11.2 Fitting the Cartridge Pipe
32 Service Manual SIPLACE Glue Feeder
3.11.2
3.11.2 Fitting the Cartridge Pipe
Fitting the Cartridge Pipe
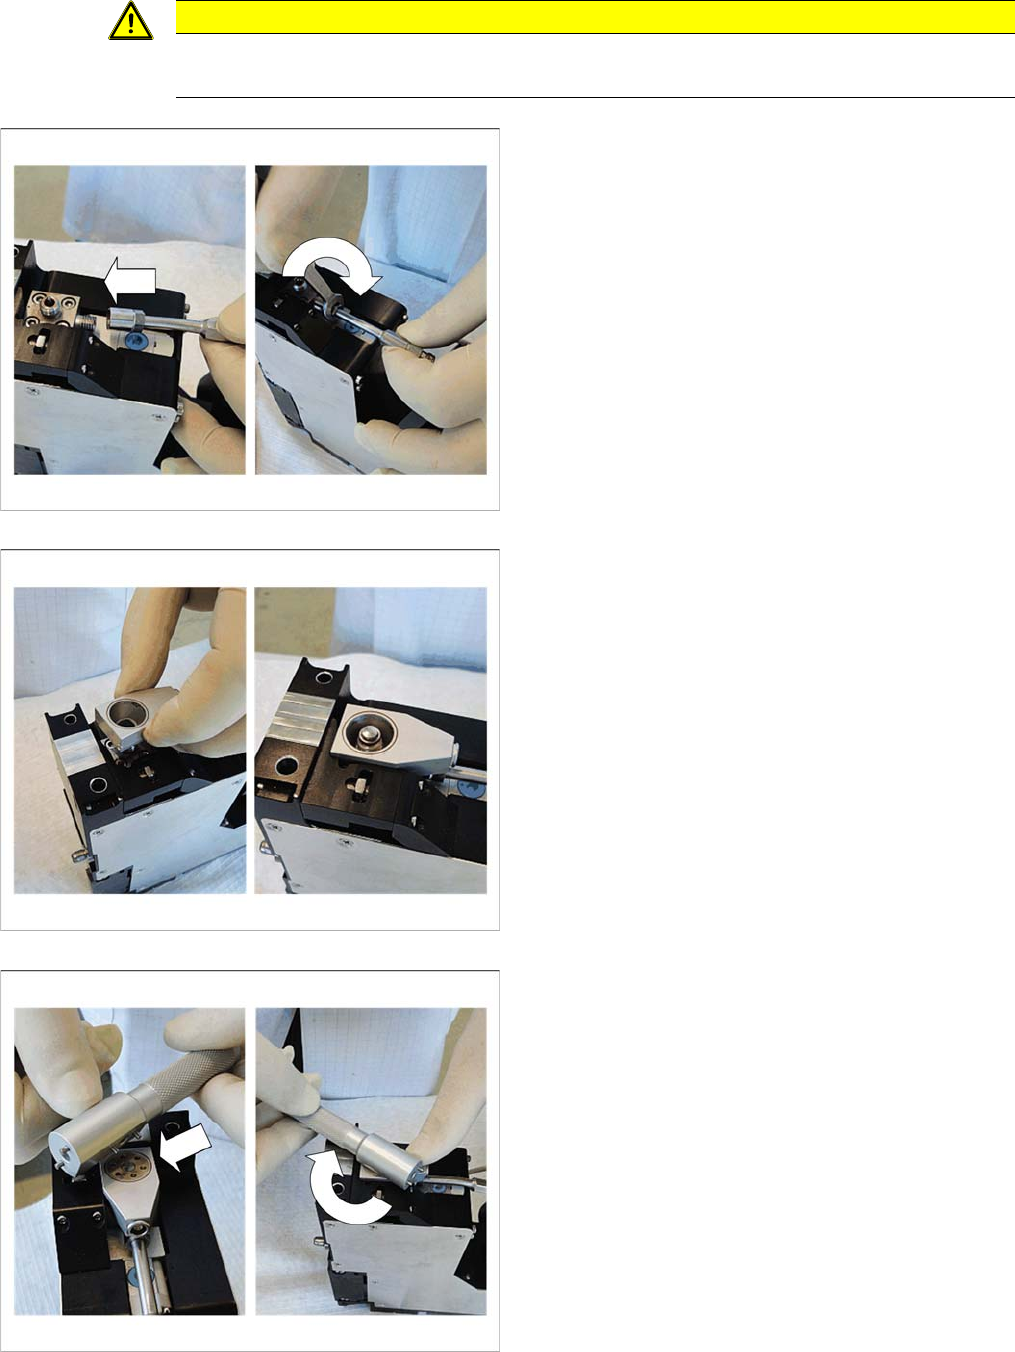
CAUTION
Poisonous and hazardous substances
To avoid direct contact with the glue, always wear protective gloves during this work.
► Place the cartridge pipe from behind onto the thread
of the jet block.
► Use a size 8 mm open-ended wrench to loosely fas
-
ten the cartridge pipe in a clockwise direction.
► Align the cartridge pipe centrally and straight in rela
-
tion to the back, so that the cartridge can be correctly
screwed into place.
► Fix the cartridge pipe with one hand in this position
and then screw the lock tight.
► Make sure that the dispenser nozzle is centered on
the jet block thread.
► Place the nozzle heating onto the jet block and align
this straight on the feed pipe.
► Fit the union nut onto the dispenser nozzle.
► Position the two lugs of the special tool into the two
holes in the union nut.
► Tighten the union nut by turning it clockwise.