00197279-03_SM_Glue-Feeder_EN.pdf - 第40页
Replacing Spare Parts Jet Block (Spare Fluidic) 3.13.2 Fitting the Jet Block 40 Service Manual SIPLACE Glue Feeder 3.13.2 3 . 1 3 . 2 F it t in g t h e J e t B lo c k Fitting the Jet Block CAUTION Poisonous and hazar dou…
Replacing Spare Parts
3.13.1 Removing the Jet Block Jet Block (Spare Fluidic)
Service Manual SIPLACE Glue Feeder 39
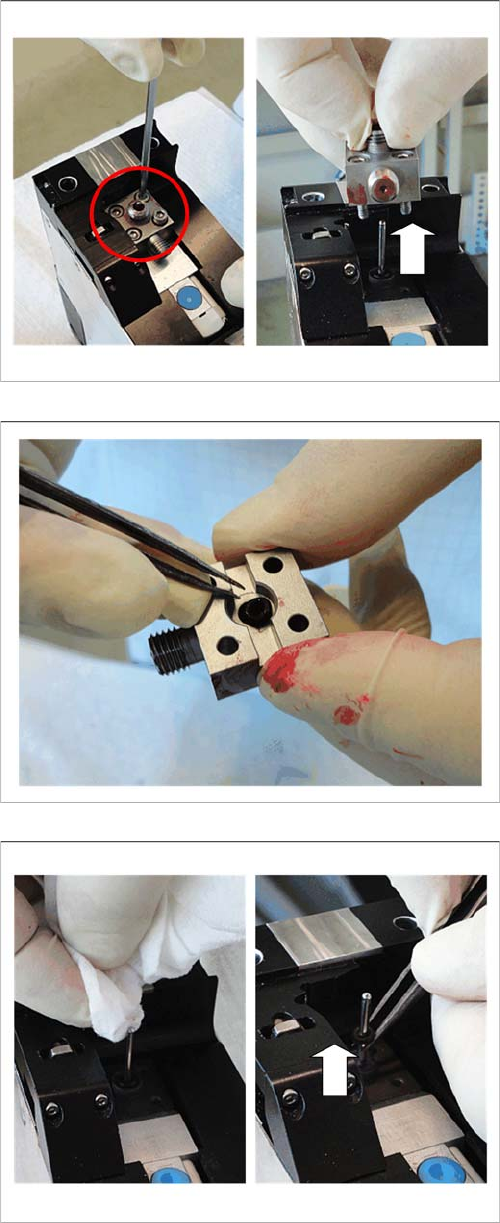
► Loosen the 4 screws which fasten the jet block.
► Carefully lever the jet block vertically up and off the jet
plunger.
► Turn the jet block so that the underside is at the top.
► Use a pair of antistatic tweezers to help you remove
the O-ring.
► Use a lint-free cloth with a little glue remover and
clean the jet plunger.
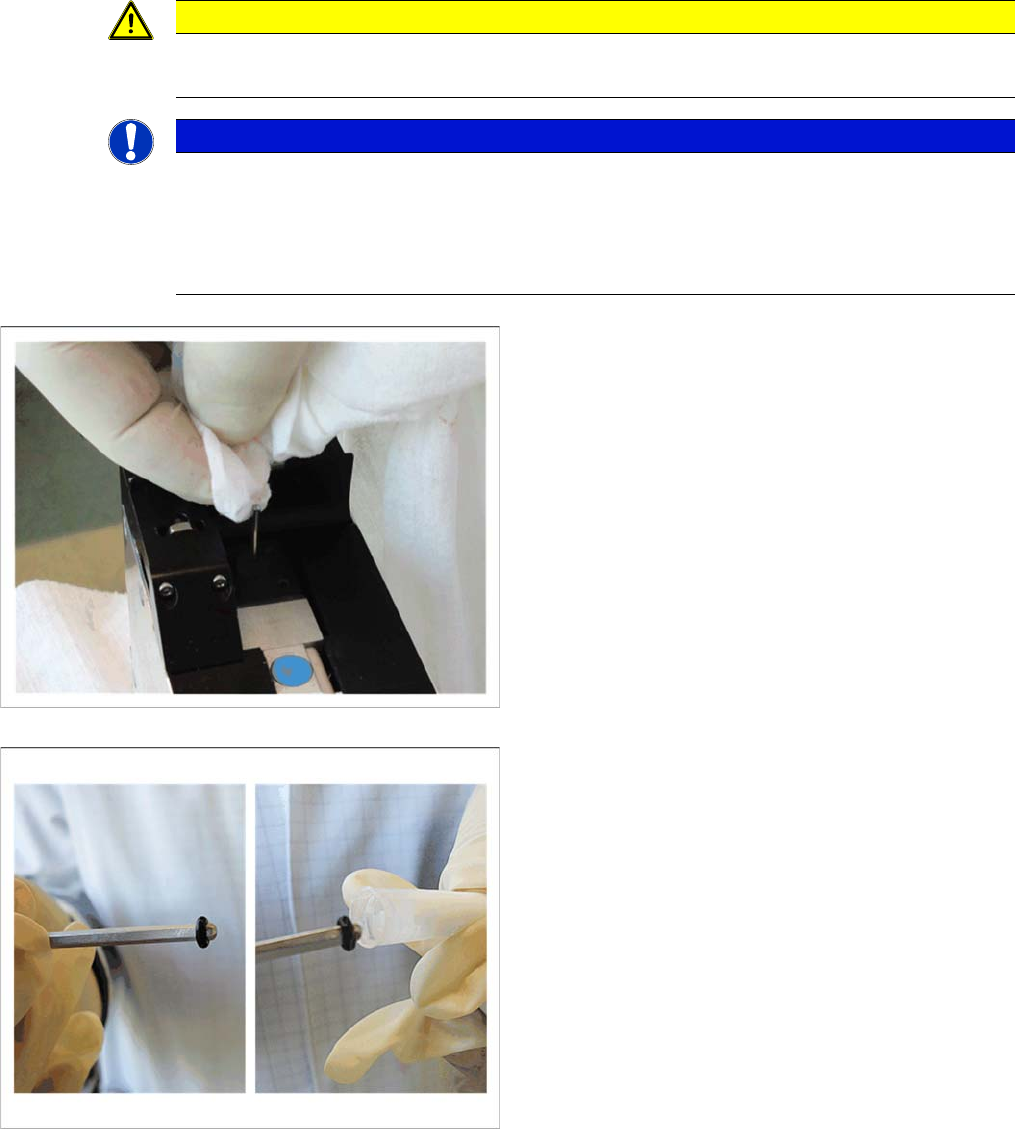
► Use a pair of antistatic tweezers to pull the O-ring up
and over the jet plunger.
Replacing Spare Parts
Jet Block (Spare Fluidic) 3.13.2 Fitting the Jet Block
40 Service Manual SIPLACE Glue Feeder
3.13.2
3.13.2 Fitting the Jet Block
Fitting the Jet Block
CAUTION
Poisonous and hazardous substances
To avoid direct contact with the glue, always wear protective gloves during this work.
NOTICE
Replacing O-rings
Damaged O-rings are no longer able to fulfil their sealing function. As a result, the pressure re
-
quired at the jet valve can not be produced to its full extent and glue may protrude, contaminat
-
ing the inside of the glue feeder.
We therefore recommend that you also replace the O-rings.
► Clean the jet plunger with a cleansing tissue and a lit
-
tle glue remover.
► Carefully push the O-ring onto the size 2.5 Allen key.
► Open the grease container.
► Slowly insert the Allen key with the O-ring into the
grease container and coat the O-ring with a little
grease.
Replacing Spare Parts
3.13.2 Fitting the Jet Block Jet Block (Spare Fluidic)
Service Manual SIPLACE Glue Feeder 41
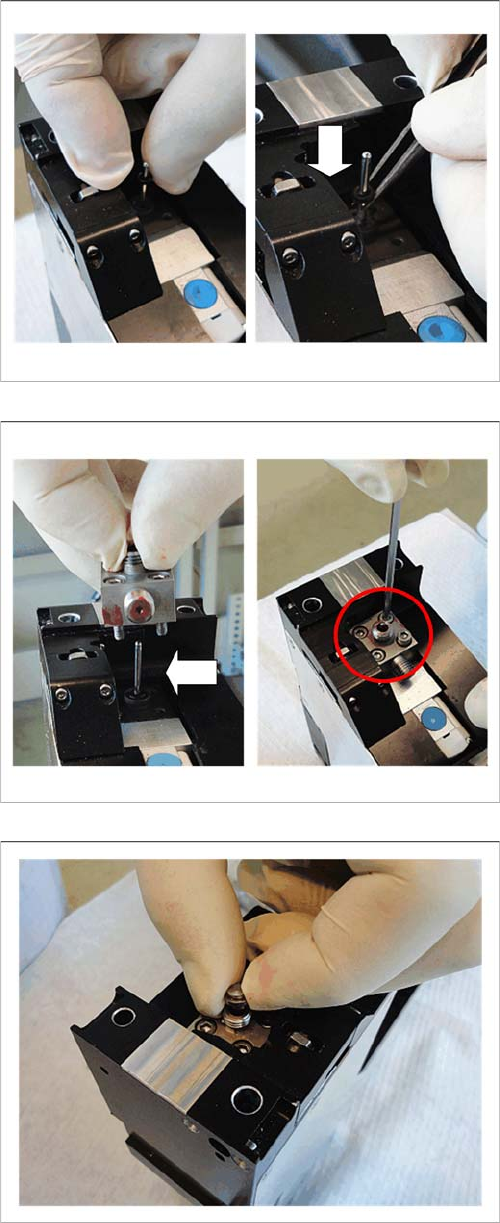
► Fit the greased O-ring over the jet plunger and use a
pair of antistatic tweezers to carefully push it as far as
the end stop.
► Repeat this procedure with the second O-ring (includ
-
ing greasing), so that both O-rings are directly over
one another.
► Carefully place the jet block vertically onto the jet
plunger from above, with the thread (connection for
the cartridge pipe) pointing towards the back.
► Press the jet block onto the top O-ring.
Attention:
Take care that the O-ring audibly engages into the jet
block.
► Align the jet block straight in relation to the back, so
that the cartridge pipe can be correctly screwed into
place.
► Fasten the jet block with the 4 screws shown.
Use a size 2.5 Allen key to help you.
► Place the dispenser nozzle centrally onto the thread
of the jet block.
► Fit the cartridge pipe, nozzle heating and cartridge
into place (see "3.11.2 Fitting the Cartridge Pipe"
[➙32])