00197279-03_SM_Glue-Feeder_EN.pdf - 第43页
Replacing Spare Parts 3.14.1 Removing the Actuator O-Ring and Guide Bushing Guide Bush ing Service Manual SIPLACE Glue Feeder 43 ► Clea n the jet plu nger again w ith a cleansin g tissue and a little glue remover. ► Fit …

Replacing Spare Parts
Guide Bushing 3.14.1 Removing the Actuator O-Ring and Guide Bushing
42 Service Manual SIPLACE Glue Feeder
3.14
3.14 Guide Bushing
Guide Bushing
Required spare parts
Guide bushing, item no. 03100695-xx
Tools and equipment required
▪ Open-ended wrench, size 8
▪ Heating key (on the glue feeder)
▪ Antistatic tweezers, item no. 00377394-01 (service kit)
▪ Allen key size 2.5
▪ Plunger service tool, item no. 03101819-01
▪ O-ring service tool, item no. 03101816-01
▪ Disposable protective gloves
▪ 2 O-rings for plunger
▪ 1 actuator O-ring (plunger seal NBR inside 2x1.7 PS83NBR70), item no. 03101821-xx
▪ Grease (Barrieta L55/3, grease for O-rings) 50ml, item no. 03095880-xx
▪ Grease for O-ring NBR inside (special grease for actuator O-ring) 50 ml, item no. 0310206801-xx
3.14.1
3.14.1 Removing the Actuator O-Ring and Guide Bushing
Removing the Actuator O-Ring and Guide Bushing
CAUTION
Poisonous and hazardous substances
To avoid direct contact with the glue, always wear protective gloves during this work.
► Remove the cartridge pipe, nozzle heating and car
-
tridge into place (see "3.11.1 Removing the Cartridge
Pipe" [ ➙ 29])
► Remove the jet block (see "3.13.1 Removing the Jet
Block" [ ➙ 38]).
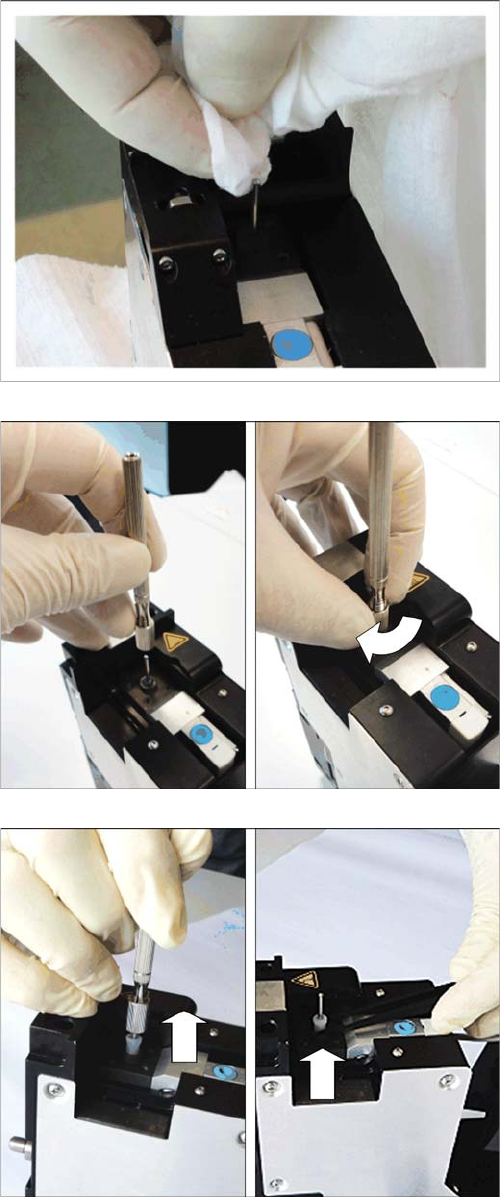
► Use a lint-free cloth with a little glue remover and
clean the jet plunger.
► Use a pair of antistatic tweezers to pull the O-ring up
and over the jet plunger.
Replacing Spare Parts
3.14.1 Removing the Actuator O-Ring and Guide Bushing Guide Bushing
Service Manual SIPLACE Glue Feeder 43
► Clean the jet plunger again with a cleansing tissue
and a little glue remover.
► Fit the plunger service tool vertically onto the jet
plunger, from above.
► Turn the plunger service tool clockwise until tight
-
ened.
► Pull the plunger service tool vertically upwards, to
-
gether with the jet plunger.
► Turn the plunger service tool anticlockwise until loos
-
ened.
► Carefully lift the guide bushing vertically up and off
the jet plunger, using the tweezers.
Replacing Spare Parts
Guide Bushing 3.14.2 Inserting the Actuator O-Ring and Guide Bushing
44 Service Manual SIPLACE Glue Feeder
3.14.2
3.14.2 Inserting the Actuator O-Ring and Guide Bushing
Inserting the Actuator O-Ring and Guide Bushing
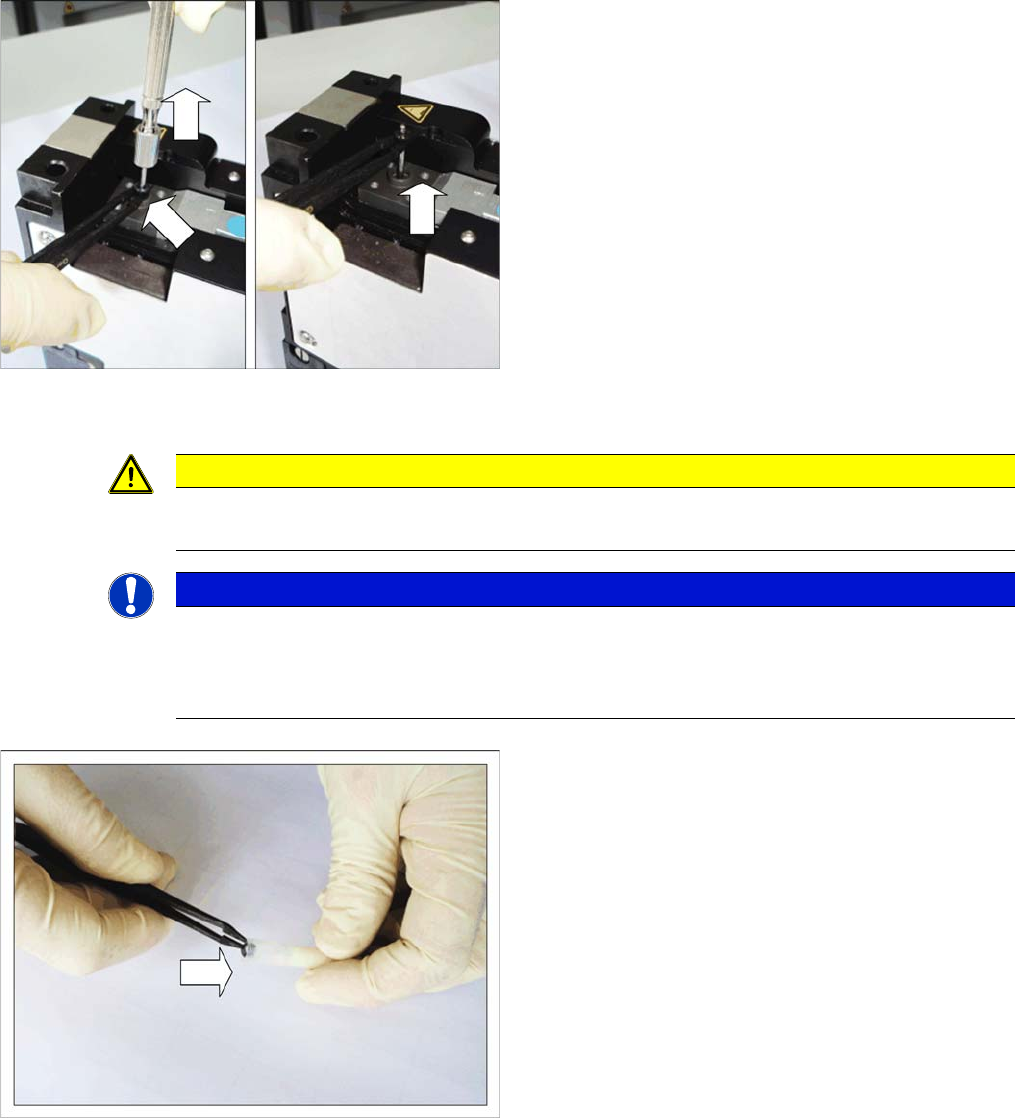
► From above, fit the plunger service tool vertically onto
the jet plunger again.
► Turn the plunger service tool clockwise until tight
-
ened.
► Pull the plunger service tool vertically upwards, to
-
gether with the jet plunger.
► Use the antistatic tweezers to hold the actuator O-
ring tight.
► Turn the plunger service tool anticlockwise until loos
-
ened.
► Use the antistatic tweezers to lift the actuator O-ring
vertically upwards and off the jet plunger.
CAUTION
Poisonous and hazardous substances
To avoid direct contact with the glue, always wear protective gloves during this work.
NOTICE
Replace the O-ring
Damaged O-rings are no longer able to fulfil their sealing function. As a result, the pressure re
-
quired at the jet valve can not be produced to its full extent. We therefore recommend that you
also replace the actuator O-ring when you replace the guide bushing.
► Coat the actuator O-ring with a little O-ring NBR in
-
side grease (special grease for actuator O-rings).