00197279-03_SM_Glue-Feeder_EN.pdf - 第76页
Replacing Spare Parts Solenoid valve 3.18.2 Fitting the Solenoid Valve 76 Service Manual SIPLACE Glue Feeder See also 3.8.2 Fit ting the R ight Side Cove r [ ➙ 21] ► Ins ert the one h ose into the top conne ction on …
Replacing Spare Parts
3.18.2 Fitting the Solenoid Valve Solenoid valve
Service Manual SIPLACE Glue Feeder 75
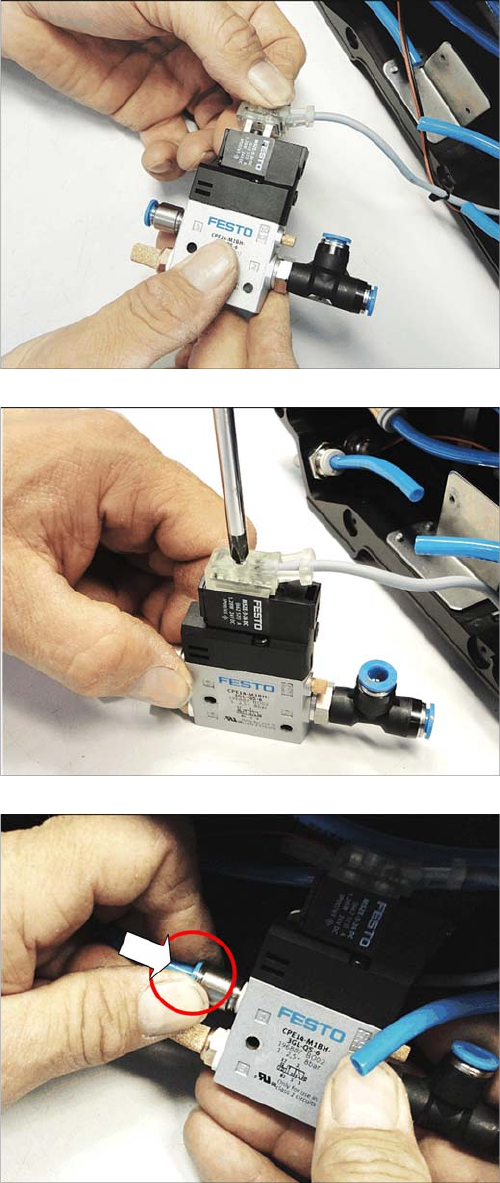
► As shown in the diagram, connect the power supply
to the solenoid valve.
► Screw the power supply connection to the solenoid
valve. Use a Phillips screwdriver for this.
► Insert the hose as far as possible into the push-on
connector on the left side of the solenoid valve.
Replacing Spare Parts
Solenoid valve 3.18.2 Fitting the Solenoid Valve
76 Service Manual SIPLACE Glue Feeder
See also
3.8.2 Fitting the Right Side Cover [ ➙ 21]
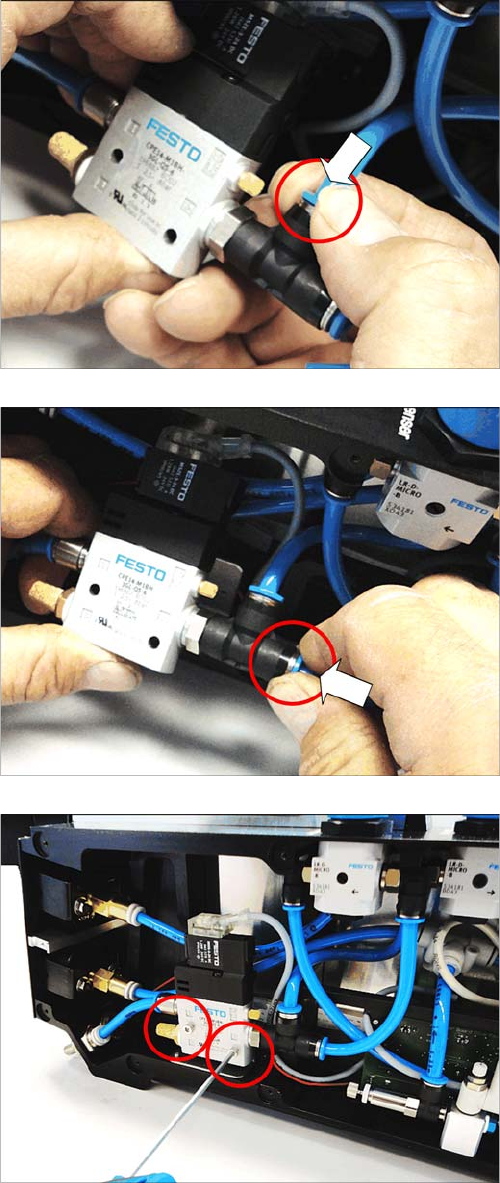
► Insert the one hose into the top connection on the T-
connector.
► Insert the other hose into the right-hand connection
on the T-connector.
► Use the two marked screws to fasten the solenoid
valve to the frame. Use a size 2.5 Allen key for this.
► Fasten the right side cover (see .
Replacing Spare Parts
3.19.1 Removing the Regulator Holder Regulator Holder Assembly
Service Manual SIPLACE Glue Feeder 77
3.19
3.19 Regulator Holder Assembly
Regulator Holder Assembly
Required spare parts
Regulator holder assembly, item no. 03097710-xx
Required tools
▪ Allen key size 2
3.19.1
3.19.1 Removing the Regulator Holder
Removing the Regulator Holder
NOTICE
Assembly instructions
The regulator holder is always replaced as a complete unit.
This regulator holder is preset at the factory and is supplied ready for use.
► Remove the right side cover (see "3.8.1 Removing
the Right Side Cover" [ ➙ 21])
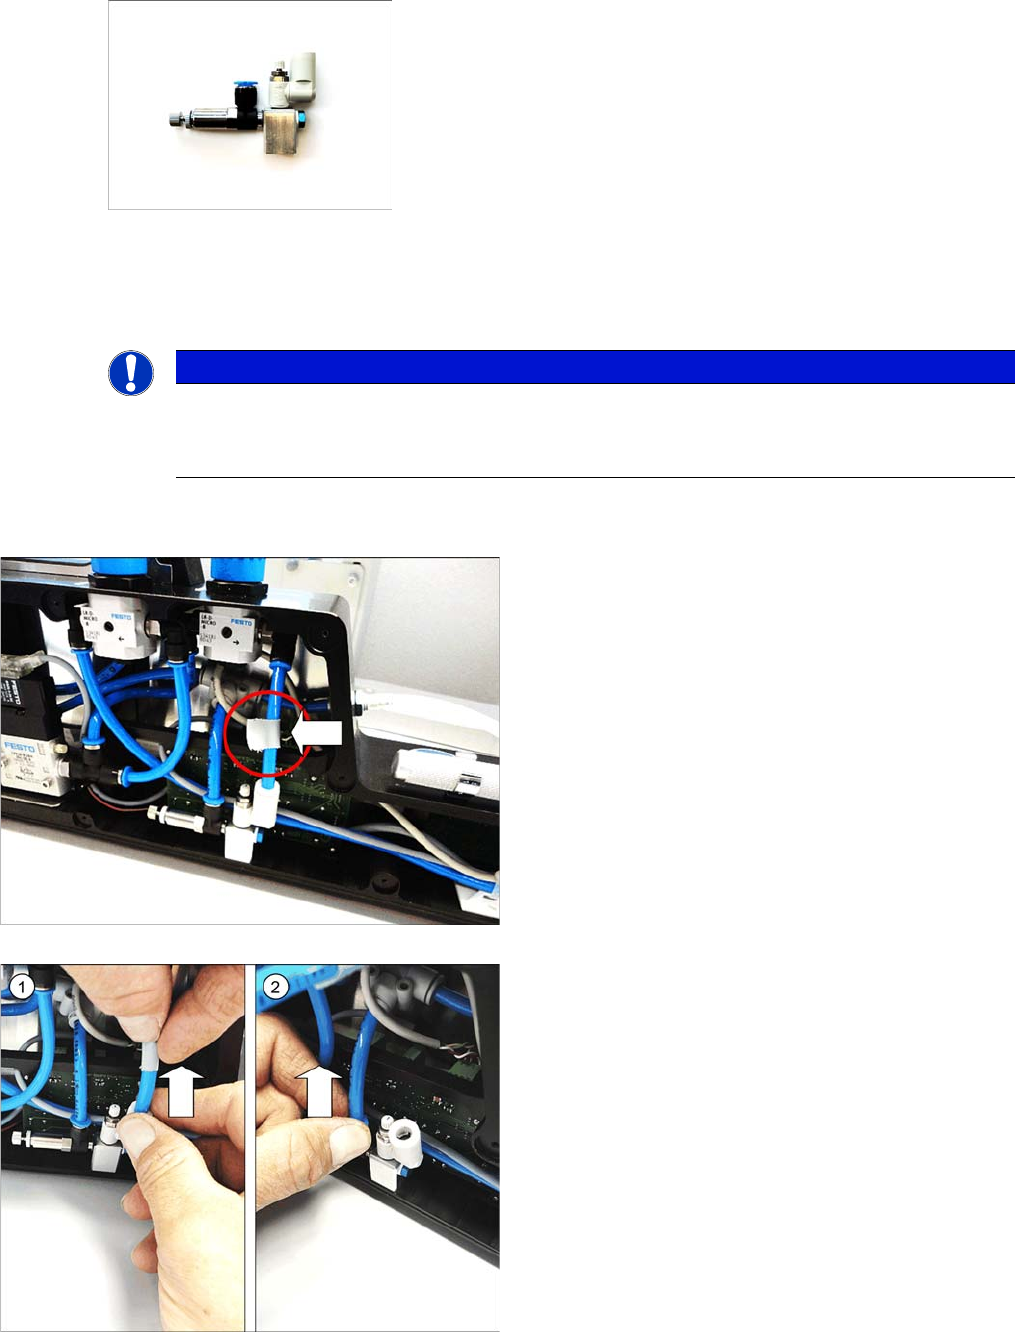
► Mark the hose indicated in the diagram, with adhe
-
sive tape.
► Open the lock and pull the marked hose out of the
connection on the right-hand side. (1)
► Open the lock and pull the hose out of the connection
on the left side. (2)