00195089-0102_AI_Vakuumpumpe_X-Serie_60X_DE+EN.pdf - 第101页
Assembly Instructions SIPLACE Vacuum Pump Ausgabe 07/2006 97 Fig. 2.9.6 Masse : Wire the white cable fr om relay K2_A2 to th e grou nd in terminal block X1ra_0V (see Fig. 2.9.6) . Fig. 2.9.7 Supply voltage 24V (f or plug…
Assembly Instructions SIPLACE Vacuum Pump
Ausgabe 07/2006
96
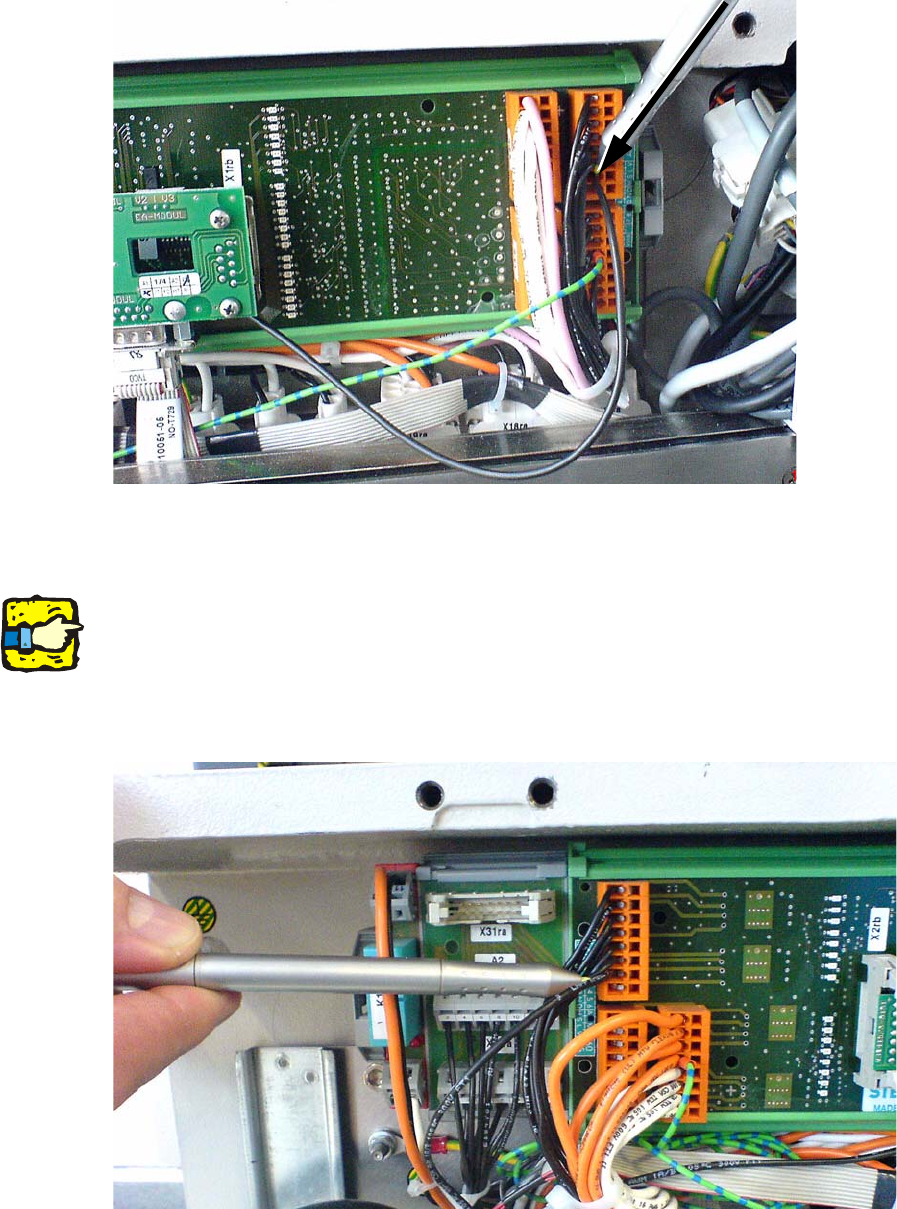
Fig. 2.9.4 Eingang DI6
: Wire the black cable from X16 ra_2 to input DI6 on the “CAN In/Out module 2” (see Fig. 2.9.4 ).
2
Don’t mix up the cables! 2
2
: Wire the black cable from relay K2_A1 to output DO6 on the “CAN In/Out module 2” (see Fig.
2.9.5).
Fig. 2.9.5 Output DO6
Assembly Instructions SIPLACE Vacuum Pump
Ausgabe 07/2006
97
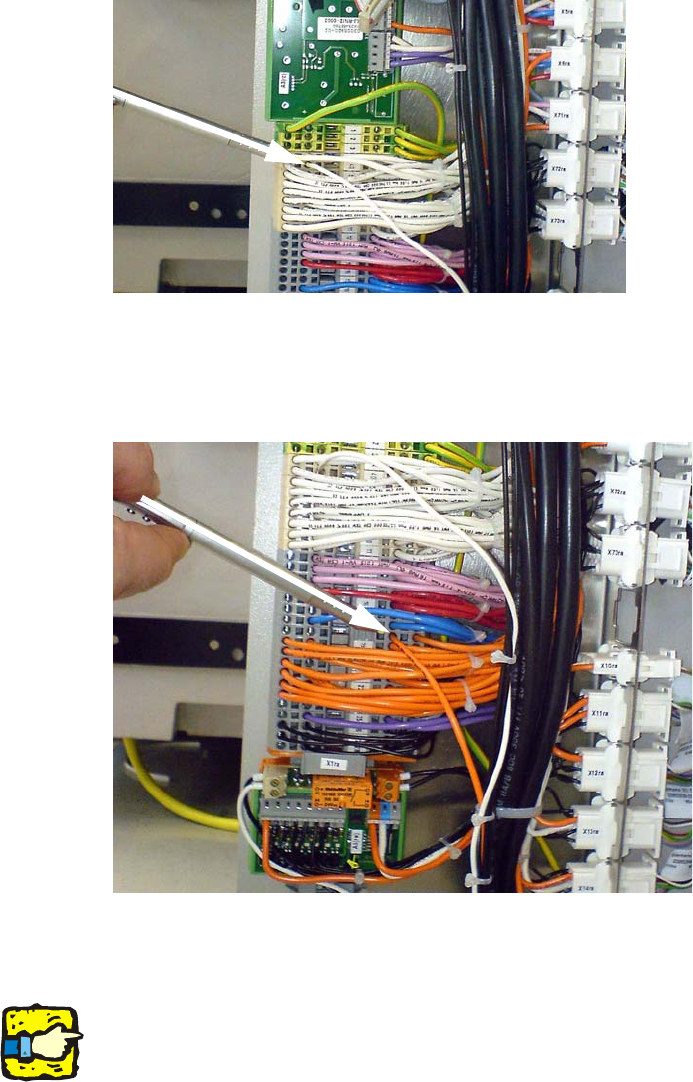
Fig. 2.9.6 Masse
: Wire the white cable from relay K2_A2 to the ground in terminal block X1ra_0V (see Fig. 2.9.6)
.
Fig. 2.9.7 Supply voltage 24V (for plug X16)
: Wire the orange cable from plug X16ra_3 to terminal block X1ra_24V (see Fig. 2.9.5).
2
Both wires on relay K2_13 (X16ra_4) and K2_14 (X16ra_3) are needed to control the vacuum
pump. 2
2
: Connect the control cable “cable power vacuum pump” (03049005-) to X16. Control and/or mo-
nitoring of the vacuum pump is only available starting with SW 603.
Assembly Instructions SIPLACE Vacuum Pump
Ausgabe 07/2006
98
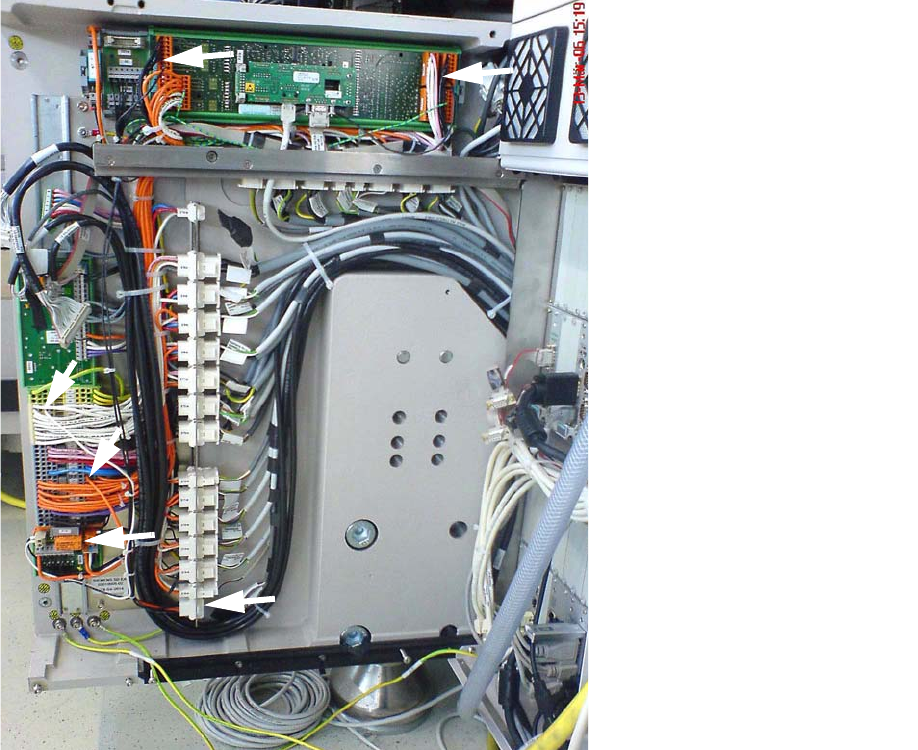
2.9.3 Retrofitting Electrical Equipment
Fig. 2.9.8 Relay with completed cabling
: Fix the cables in place with the cable ties.
: Plug the vacuum pump’s control line into plug X16.
: Secure the line to nearby cables with cable ties to provide pull relief.
: Guide the control cables together into the machine stand and from there through the machine
knapsack to the vacuum pump.
: Mount the steel flooring.