00195425-01.pdf - 第64页
4 Co nfi gurat ion Ins tall ation and Con figu rat ion Guid e SI PLA CE Exp lorer 4.1 S tan dard Moni tor ing Ap plic atio n ( SMA ) Editi on 05 /2 007 EN 64 → Confirm your entries wi th OK . Th e DB back up locat ion di…
Installation and Configuration Guide SIPLACE Explorer 4 Configuration
Edition 05/2007 EN 4.1 Standard Monitoring Application (SMA)
63
→ If the connection functions properly, you will see the following information box:
4
Fig. 4 - 11 Success
→ Click OK. The system will check the database data. If the database has data from SIPLACE
Explorer V2.1, V2.0 or V1.2, you will need to convert the database for SIPLACE V2.2, due
to the changed data structure in the SIPLACE Explorer V2.2 database. In this case, the
Convert Database dialog box will open.
NOTE
Consider the following when converting the database
- You require database administrator privileges.
- Once you have started the conversion, this process can not be stopped.
- The conversion time depends on the size of the database. It may take up to one hour. 4
4
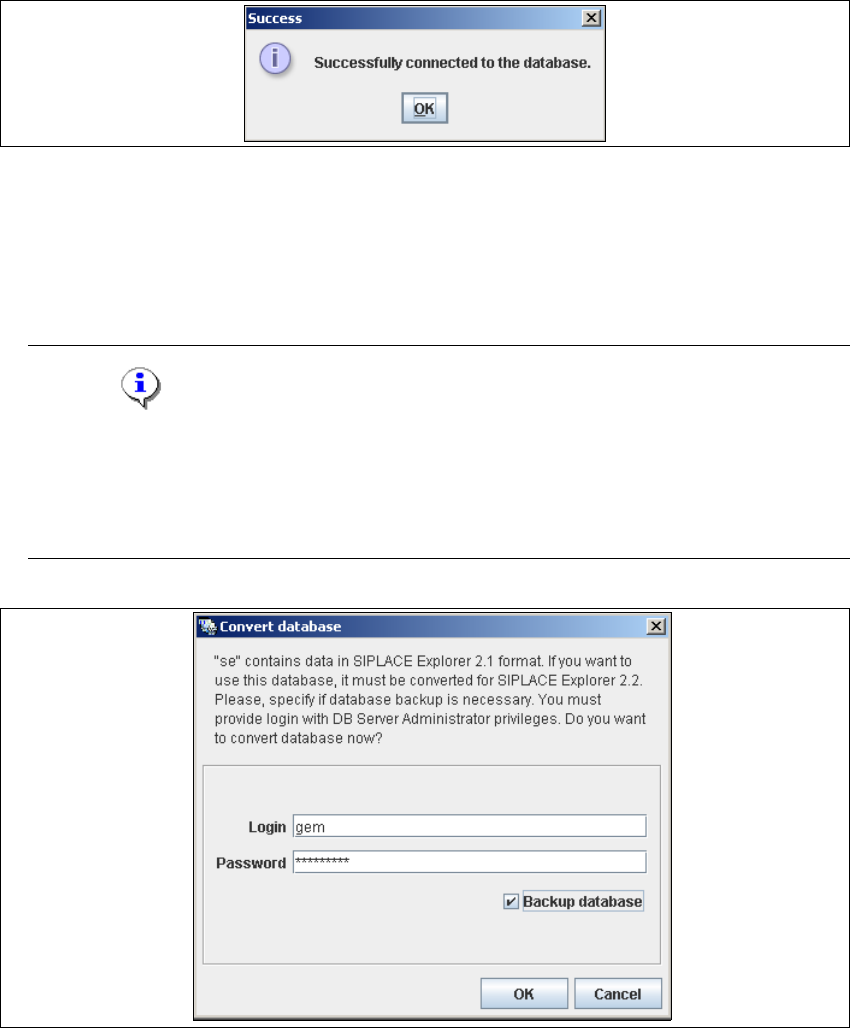
Fig. 4 - 12 Convert database
→ Specify the access data for the database administrator and enable the Backup database
option.
4 Configuration Installation and Configuration Guide SIPLACE Explorer
4.1 Standard Monitoring Application (SMA) Edition 05/2007 EN
64
→ Confirm your entries with OK. The DB backup location dialog box will open
4
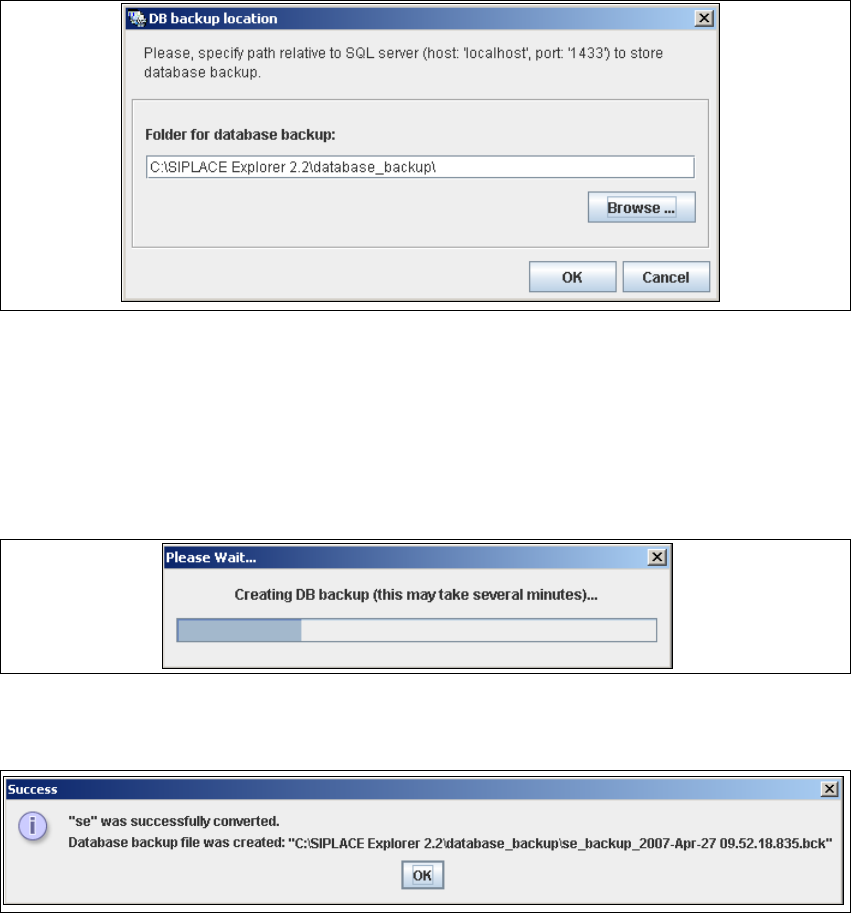
Fig. 4 - 13 DB backup location
→ Before performing the conversion, the system creates a backup file of the database. Specify
the folder for this file in the Folder for database backup field. Click on the Browse ...
button to select an existing folder.
→ Confirm your choice with OK. The database will be converted. This may take up to one
hour. The conversion time depends on the size of the database.
4
Fig. 4 - 14 DB backup
→ After successful conversion of the database, the following information window will open:
4
Fig. 4 - 15 Success
→ Click OK. You can now continue with the line configuration process.
4
→ After you have established the database connection and converted the database for SIPLACE
Explorer V2.2, you need to define the maintenance details for the system database, with the
Maintenance button.
Installation and Configuration Guide SIPLACE Explorer 4 Configuration
Edition 05/2007 EN 4.1 Standard Monitoring Application (SMA)
65
→ The DB Maintenance dialog box will open. This is where you can either create a new
archiving schedule for the database or edit the default maintenance schedule.
The archiving process involves taking data from the database and saving it in a file, so that
the size of the database can be controlled. 4
All input fields will be disabled. To start or edit a DB maintenance schedule, you must have
administrator privileges for the database and the database connection must already be
established. 4
4
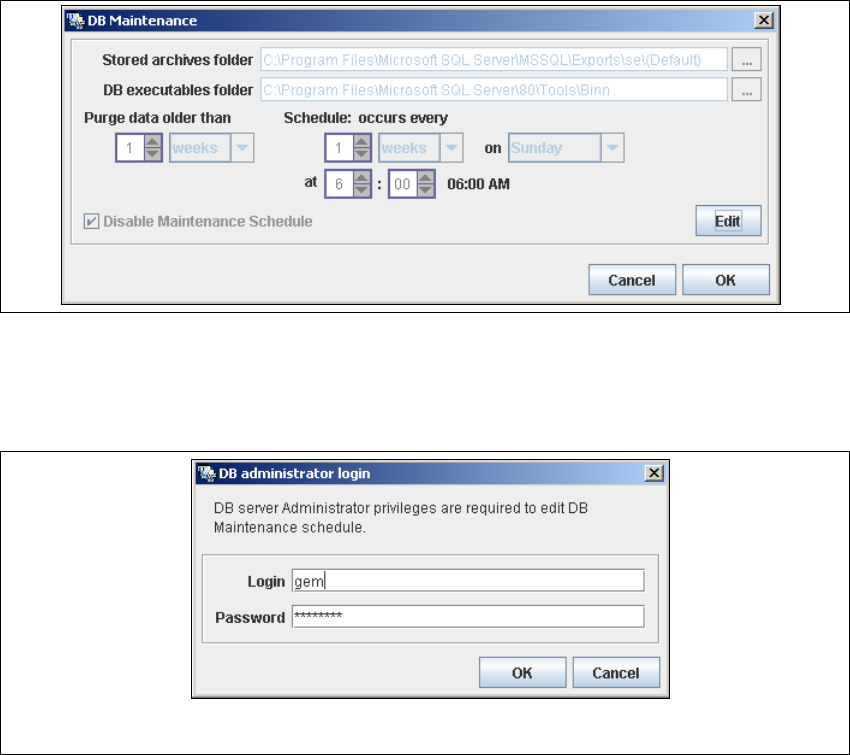
Fig. 4 - 16 DB maintenance
→ Click on the Edit button
→ to open the DB Administrator Login dialog box.
4
Fig. 4 - 17 DB administrator login
→ Enter the access data here and confirm your entries with OK.
→ The input fields in the DB Maintenance dialog box will be enabled. The following details
can be defined:
– The file and path for the archived data
– A schedule specifying the intervals and times when data is to be removed from the line
system database and stored in the archive.