00195425-01.pdf - 第70页
4 Co nfi gurat ion Ins tall ation and Con figu rat ion Guid e SI PLA CE Exp lorer 4.1 S tan dard Moni tor ing Ap plic atio n ( SMA ) Editi on 05 /2 007 EN 70 4.1. 2 Development Environment: Cre ating an SMA wi th the App…
Installation and Configuration Guide SIPLACE Explorer 4 Configuration
Edition 05/2007 EN 4.1 Standard Monitoring Application (SMA)
69
→ Specify the access data for the Tomcat administrator. If you entered admin and an empty
password during Tomcat configuration, this data will be automatically used as a default login.
If this is not the case, use the data you specified during Tomcat configuration.
→ Enter the following information here:
– the folder where the website will be generated to;
– the website URL;
This URL contains a port number, which applies to the web server (Tomcat 5.5) e.g. "8080".
If you change the port number here, you will also need to update the port number of the web
server see “Port Configuration after Changing Tomcat Port Number” on page 50.
– the refresh rate;
For capacity purposes, we recommend a refresh rate of at least one minute (60000 ms).
– website language
– specify whether the login page is to be generated
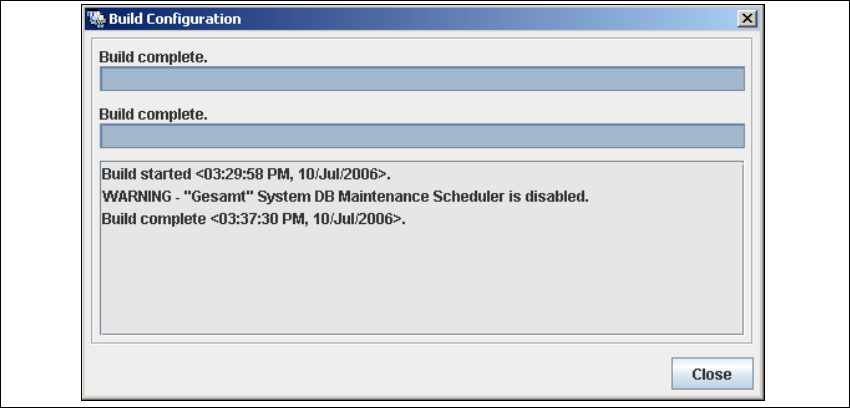
→ Once you have made and checked all entries, click on the Build button. An information box,
showing the website generation, will appear.
4
Fig. 4 - 21 Build configuration
At this point, the application is generated automatically and is loaded into SIPLACE Explorer.4
→ Once the website has been fully generated, click on Close. The SMA has been completed.
Click on the Exit button in the Line Configuration - Website Generation dialog box.
4 Configuration Installation and Configuration Guide SIPLACE Explorer
4.1 Standard Monitoring Application (SMA) Edition 05/2007 EN
70
4.1.2 Development Environment: Creating an SMA with the Application Wizard
In order to create an SMA with the application wizard, you must have SIPLACE Explorer
Development Environment installed on your computer. SMA creation consists of the following
steps: 4
– Application wizard (wizard with 8 steps)
– Establishing a connection to the database (wizard with 3 steps)
4.1.2.1 Starting the Application Wizard
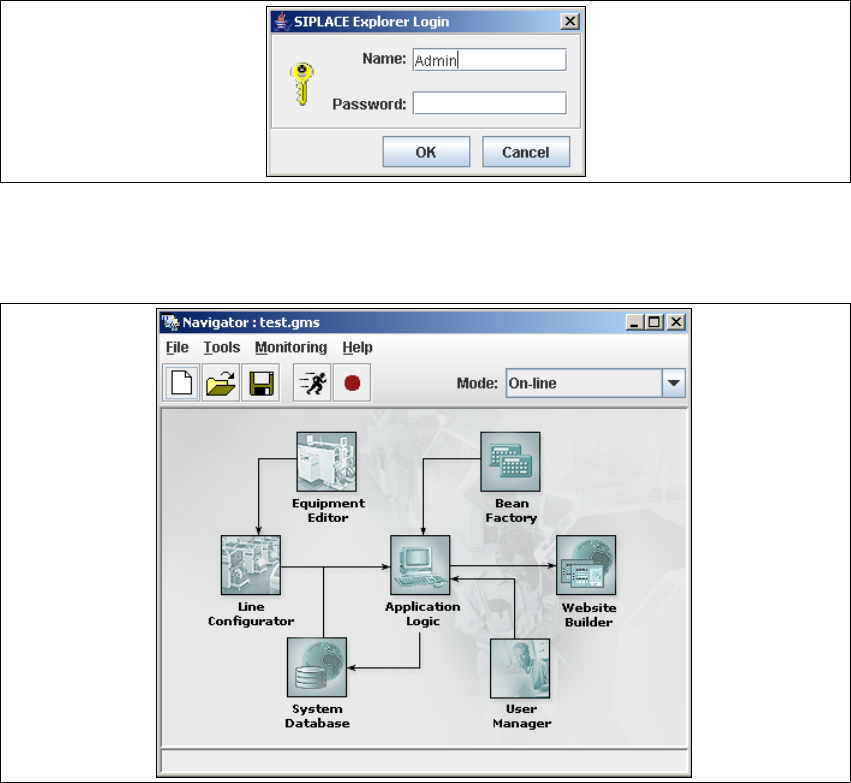
→ Start the SIPLACE Explorer Developer Studio by selecting Programs → SIPLACE Explorer
2.2 → Development Environment → SE Developer Studio from the menu in Windows. The
login dialog will appear:
4
Fig. 4 - 22 Login
→ Register yourself as Admin with an empty password and click on the OK button. The SIPLACE
Explorer navigator will appear.
4
Fig. 4 - 23 SIPLACE Explorer navigator
Installation and Configuration Guide SIPLACE Explorer 4 Configuration
Edition 05/2007 EN 4.1 Standard Monitoring Application (SMA)
71
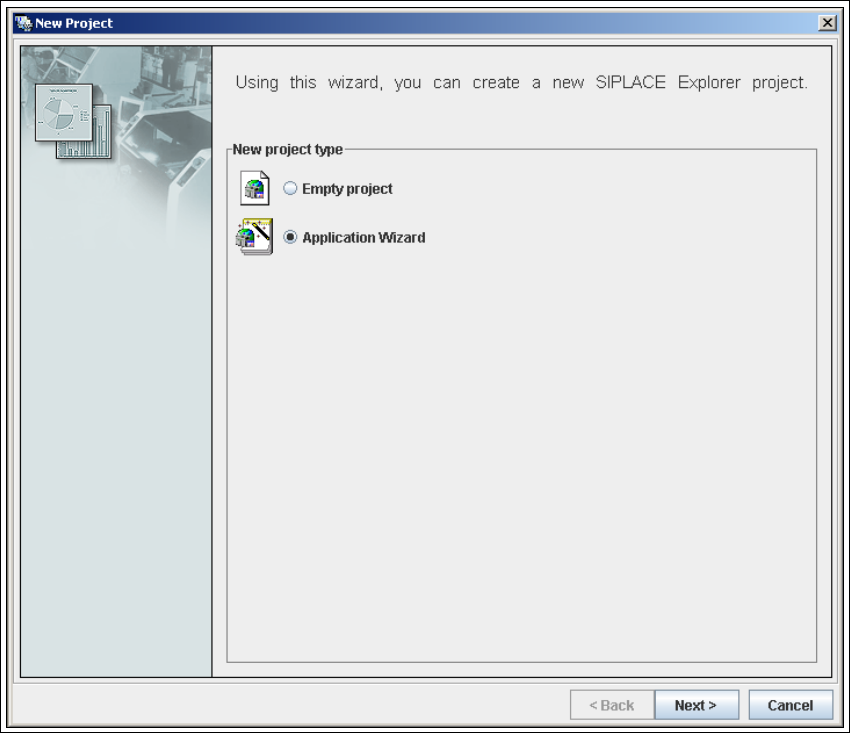
→ In order to open the application wizard
you must select File → New Project from the menu or click on the corresponding button in the
SIPLACE Explorer navigator toolbar.
→ The New Project dialog box will open.
4
Fig. 4 - 24 'New project' dialog box
→ There are two ways to create an SMA:
– Select Empty Project to build your application from scratch or
– Application Wizard to customize and configure a prebuilt application.
→ In this section we will discuss the second option.
→ Once you have selected Application Wizard and clicked Next, you will be presented with an
eight-step wizard that will help you to create SIPLACE Explorer customized for your production
line.