00197490-03_SM_CP20-P-M2_EN保养维护.pdf - 第56页
6 Pressure control valve (PRV) 6.2 Replacing the membrane and other small parts on the PRV 56 Service Manual SIPLACE SpeedStar (C&P20 P / C&P20 M2) 03/2018 Fig.82: Tool ► Use the tool to make sure that the plung…
6 Pressure control valve (PRV)
6.2 Replacing the membrane and other small parts on the PRV
Service Manual SIPLACE SpeedStar (C&P20 P / C&P20 M2) 03/2018 55
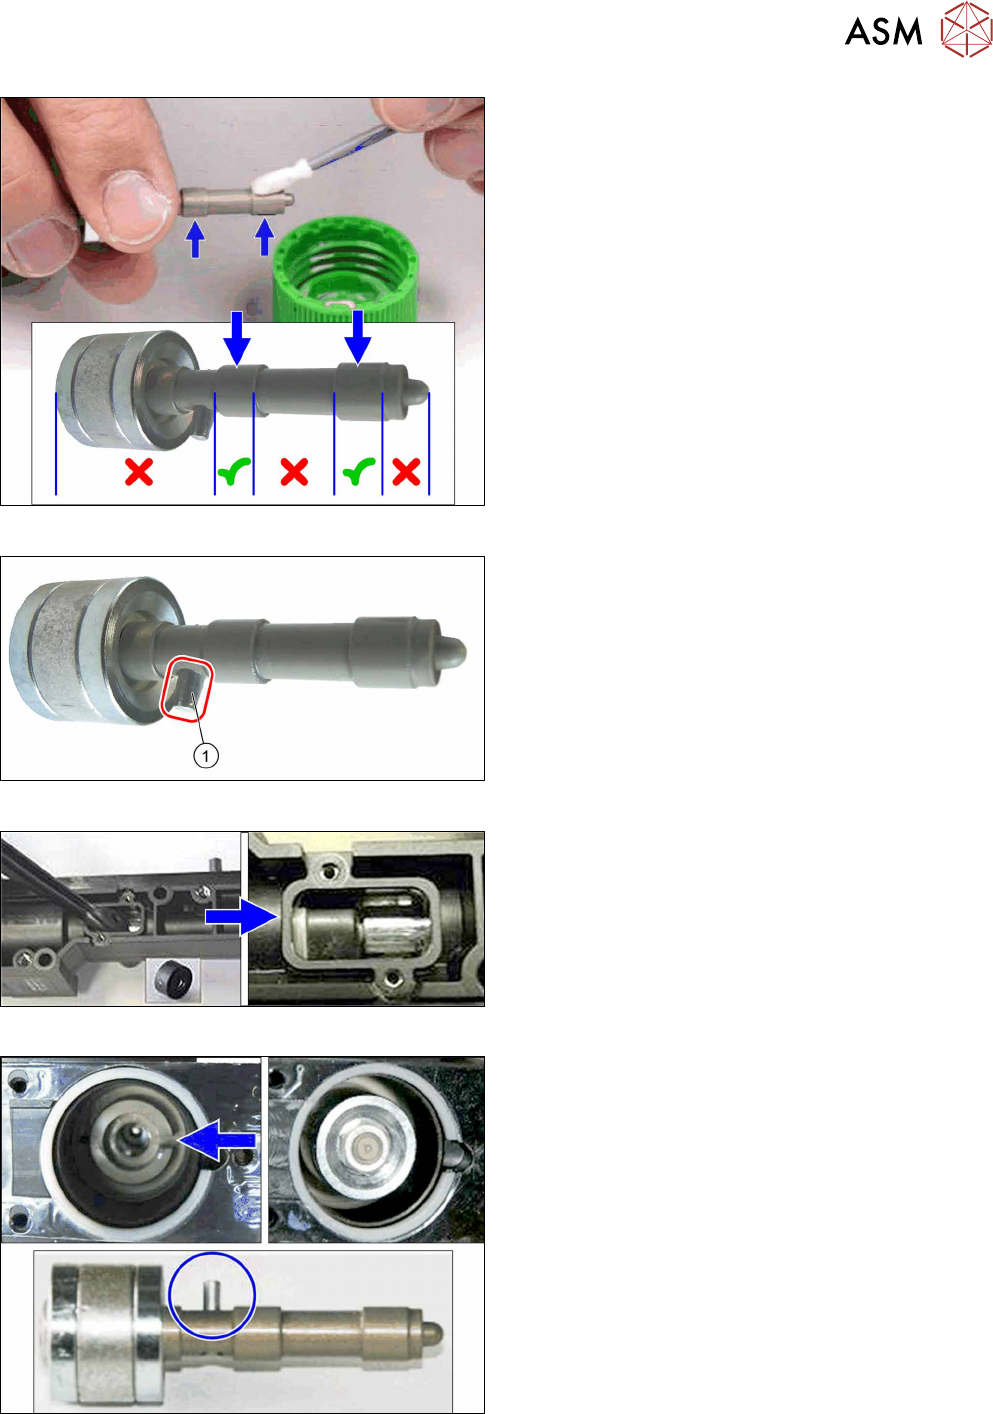
Fig.78: Greasing the plunger 1
► Grease the plunger slightly at the higher positions
with Isoflex Topas 5051.
Remove any excess grease from the gaps.
Fig.79: Greasing the plunger 2
► Grease the rotation lock pin(1) slightly with To-
pas 5051.
Fig.80: Inserting the membrane
► Insert the new membrane.
Make sure that the membrane is fitted properly at
the housing and is not damaged.
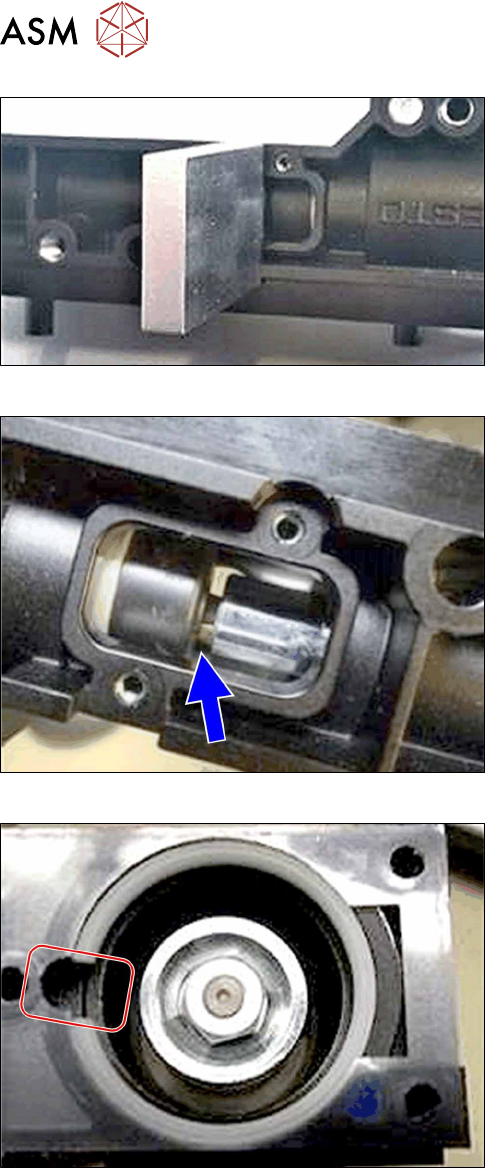
Fig.81: Inserting the plunger
► Push the valve plunger back into the PRV.
The nib of the plunger must engage in the recess
on the valve.
Check by trying to turn the plunger. If it can be
turned, the nib has not yet engaged in the recess.
6 Pressure control valve (PRV)
6.2 Replacing the membrane and other small parts on the PRV
56 Service Manual SIPLACE SpeedStar (C&P20 P / C&P20 M2) 03/2018
Fig.82: Tool
► Use the tool to make sure that the plunger en-
gages with the membrane.
Fig.83: Checking the membrane
► The membrane must lie on the valve plunger so
that the end of the valve plunger can be seen, as
in the diagram.
► Move the plunger back and forth to check for
ease of movement.
.
Fig.84: Inserting the plastic ring
► Make sure that the opening of the ring is level
with the groove.
6 Pressure control valve (PRV)
6.2 Replacing the membrane and other small parts on the PRV
Service Manual SIPLACE SpeedStar (C&P20 P / C&P20 M2) 03/2018 57
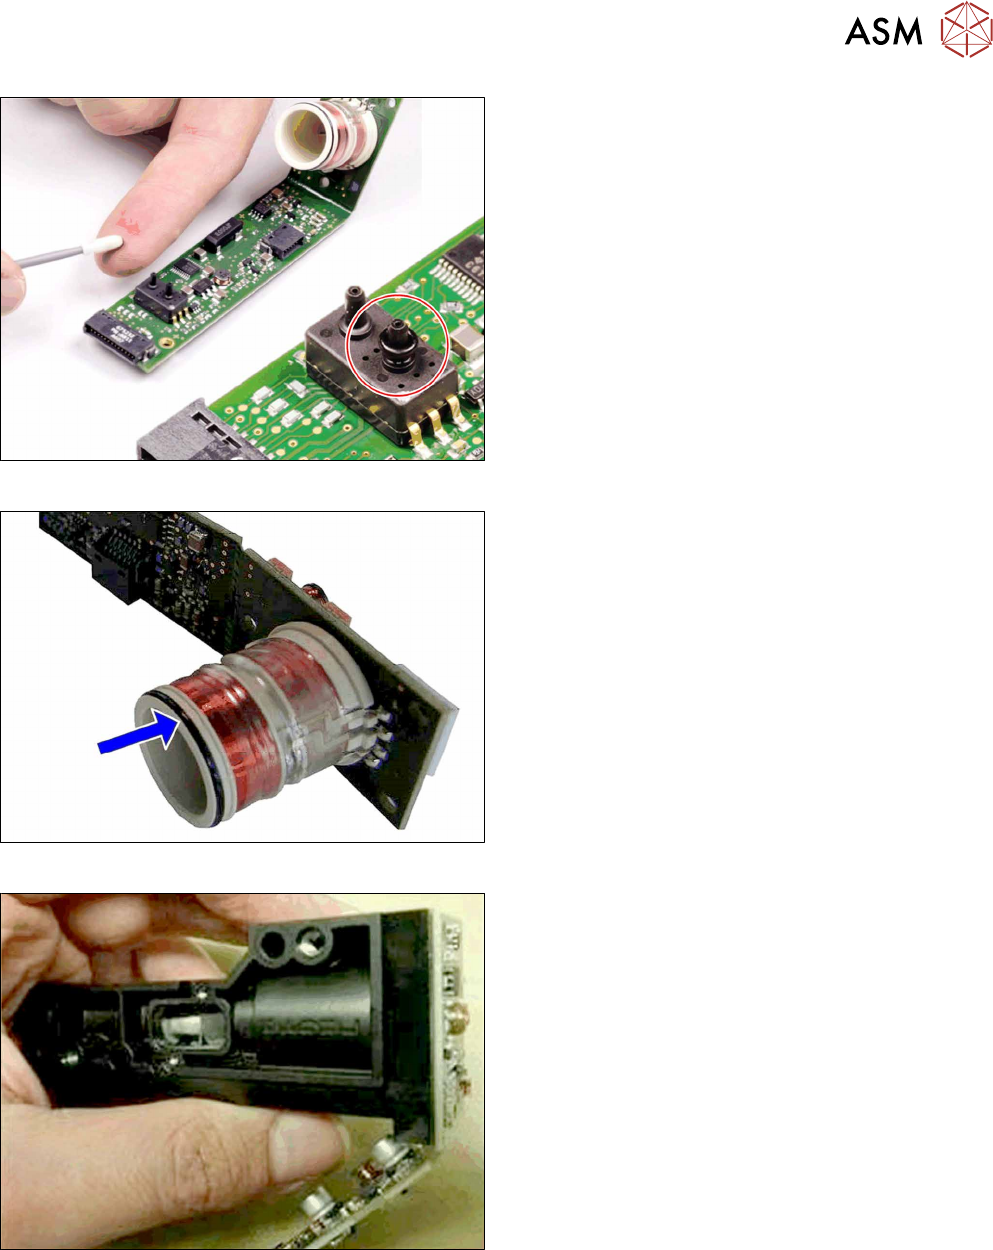
Fig.85: Inserting the O-ring
► Lightly grease the O-ring with a lint-free cotton
swab and "Isoflex Topas 5051" [03078517‑xx].
► Then place the O-ring onto the vacuum sensor.
Fig.86: Greasing the O-ring
► Grease the O-ring slightly with a lint-free cotton
swab and "Isoflex Topas 5051" [03078517‑xx].
Fig.87: Inserting the board
► Push the board and coil into the housing.