00198608-02_SM_CP20P2_Kunde_EN.pdf - 第35页
4 DP drives 4.2 Replacing the DP drive and hose Service Manual SIPLACE SpeedStar (C&P20 P2) 01/2019 35 Fig.38: Board ► Carefully pull the board (1) off the con- nector (2) . Fig.39: Screws fastening the DP drive ► …
4 DP drives
4.2 Replacing the DP drive and hose
34 Service Manual SIPLACE SpeedStar (C&P20 P2) 01/2019
4.2 Replacing the DP drive and hose
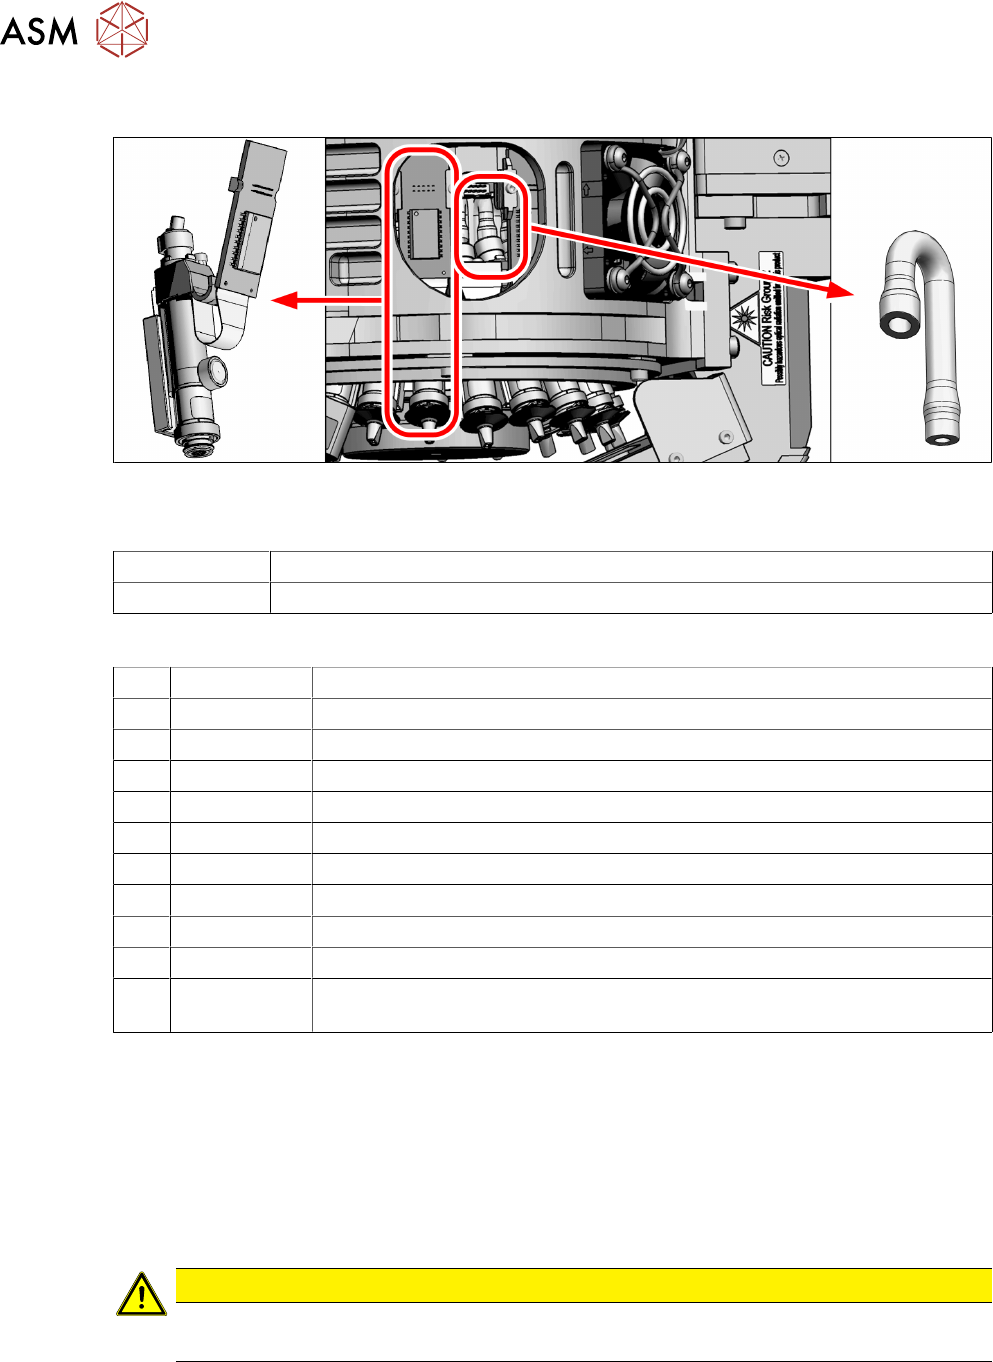
Fig.37: DP drive and hose
Parts
03102532Sxx DP drive SIPLACE C&P20P (including screws and clamping plates)
03103784‑xx Hose, DP vacuum for SIPLACE C&P20P
Equipment and tools
T07 03078400-xx Torque Screwdriver ESD 1.0-5.0 Nm
T44 00386132-xx Torque screwdriver ESD 0.1-0,6 Nm
T47 00386253-xx Torque screwdriver ESD 0.4-1.0 Nm
T53 00096487-xx Tweezers angled 140mm oval tips
T65 03109065-xx DP change tool for the SIPLACE C&P20P
T76 00386135-xx Torque interchangeable blades 1.5 mm, hexagonal
T78 03090019-xx Torque interchangeable blades 2.5 mm, hexagonal
T81 00376493-xx Tweezers, flat/tips 3 mm wide
T98 03171857-xx Torque Allen swap blade 1.5 mm TX10
T99 03171856-xx Torque Allen swap blade 1.5 mm TX20
T --- Tools for removing/fitting and calibrating the placement head, if needed
(see also the service manual for your machine)
Preparation
► Remove the head from the machine. For details about removing and fitting the placement
head, refer to the service manual for your machine.
Fit the head on the head mount [03056231‑xx].
► Make sure that the component sensor protective cap is fitted.
1.1.3 "Safety instructions for the component sensor" [}6]
Removal
CAUTION
Tweezers, blunt 145mm size 3mm [00376493-xx]
Do not use any other tweezers for the hoses. If you do, the hoses could be damaged.
► Pull the nozzle off the segment.
► Dismantle the holding circuit/aperture ring.
► Dismantle the two clamping plate next to the DP drive circuit board.
4.1 "Replacing the clamping plate at the DP drive" [}33]
4 DP drives
4.2 Replacing the DP drive and hose
Service Manual SIPLACE SpeedStar (C&P20 P2) 01/2019 35
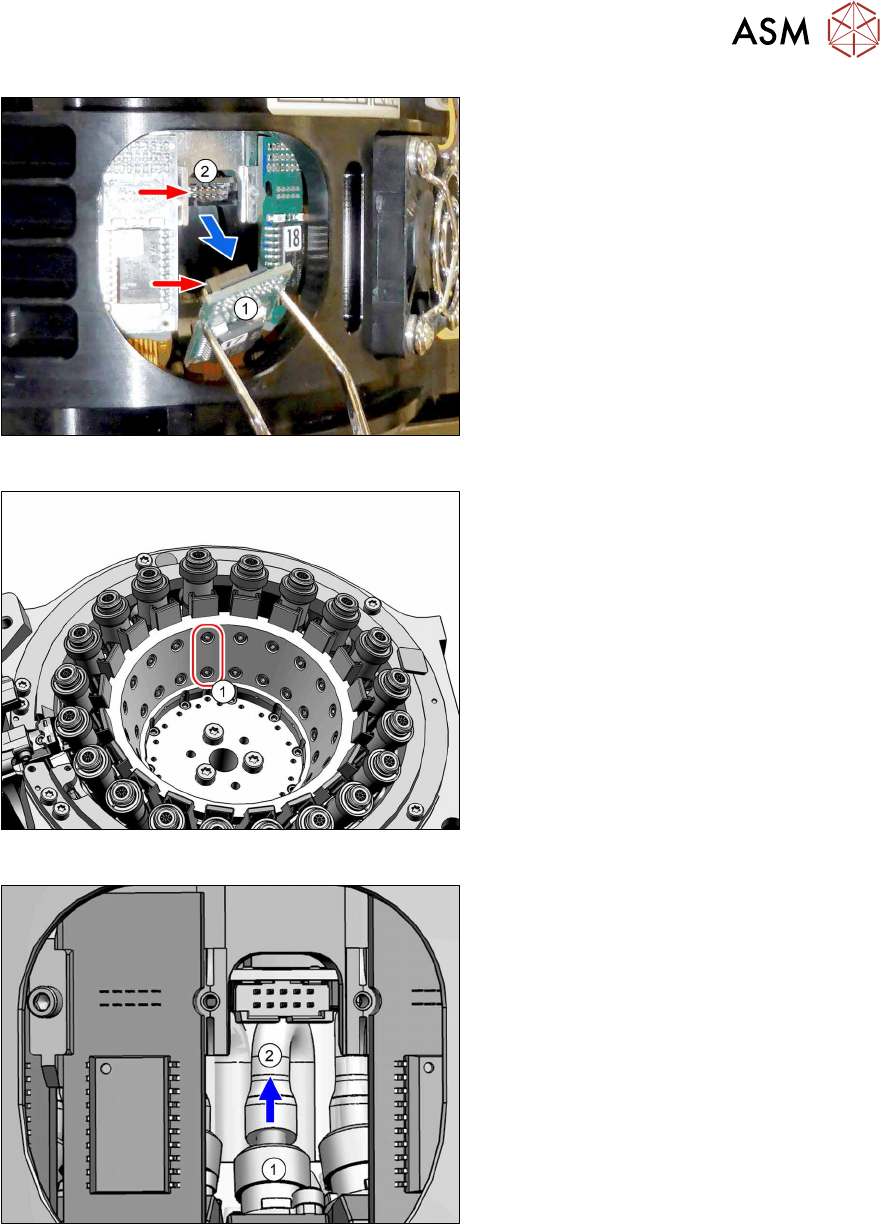
Fig.38: Board
► Carefully pull the board (1) off the con-
nector (2).
Fig.39: Screws fastening the DP drive
► Remove the two screws(1) fastening
the inside of the star carrier.
Fig.40: Hose
► Disconnect the hose (2) from the DP
drive (1).
► Extract the DP drive through the ser-
vice aperture.
► If you are replacing the DP drive, con-
tinue with installation of the DP drive.
4 DP drives
4.2 Replacing the DP drive and hose
36 Service Manual SIPLACE SpeedStar (C&P20 P2) 01/2019
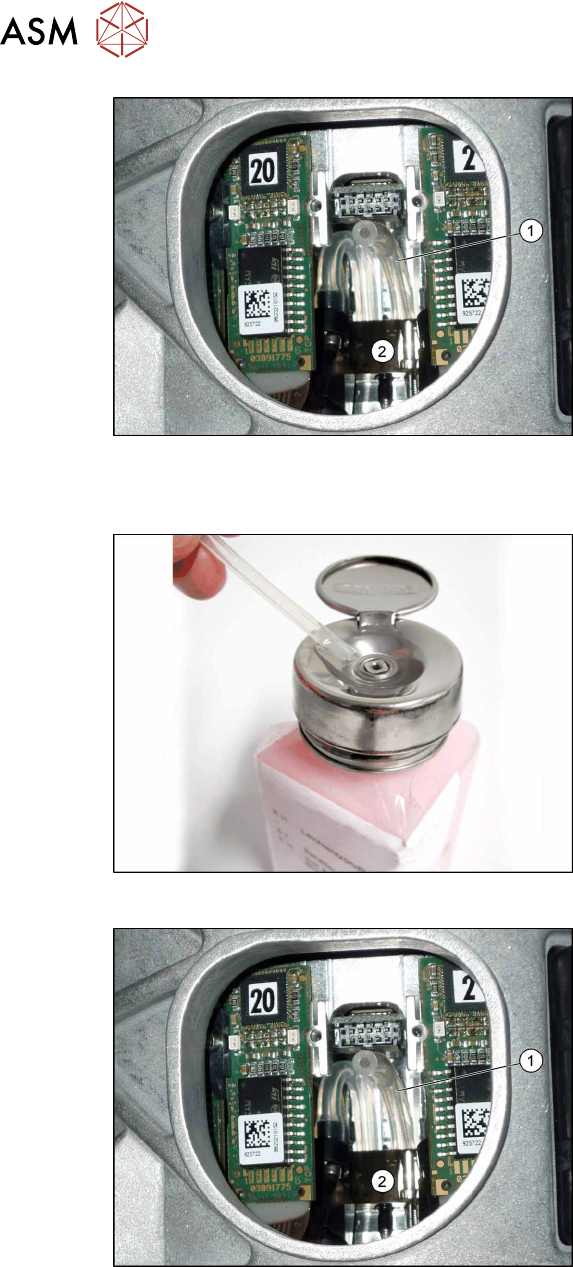
Fig.41: Hose
If you are removing the hose(1), continue
with the following step:
► Carefully pull the hose upwards.
The connection for the back end of the
hose is located on the star carrier, be-
hind the spring unit(2).
Fitting the hose
Fig.42: Coat the hose with ethanol
► Check the hose for damage or folds.
► Check the length of the hose: 40mm
+/- 0.5mm
► Coat the new hose at one end with eth-
anol.
Fig.43: Hose
► Use the tweezers to push the coated
end of the hose(1) onto the connection
behind the spring unit(2).
Observe the natural bending radius of
the hose.
Make sure that you only use the
"tweezers blunt 145 mm size 3
mm" [00376493-xx].
Do not twist the hose when pushing it
on.