00198608-02_SM_CP20P2_Kunde_EN.pdf - 第36页
4 DP drives 4.2 Replacing the DP drive and hose 36 Service Manual SIPLACE SpeedStar (C&P20 P2) 01/2019 Fig.41: Hose If you are removing the hose (1) , continue with the following step: ► Carefully pull the hose upw…
4 DP drives
4.2 Replacing the DP drive and hose
Service Manual SIPLACE SpeedStar (C&P20 P2) 01/2019 35
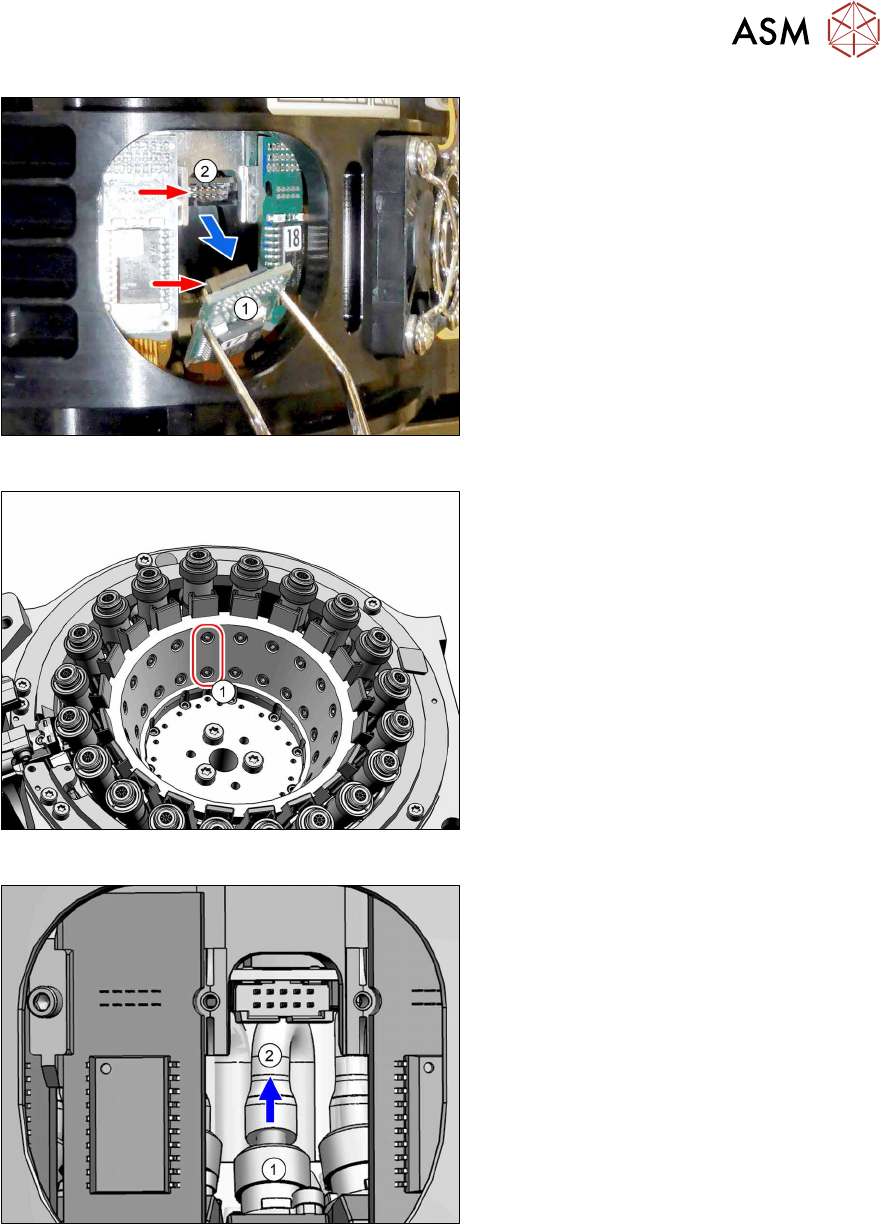
Fig.38: Board
► Carefully pull the board (1) off the con-
nector (2).
Fig.39: Screws fastening the DP drive
► Remove the two screws(1) fastening
the inside of the star carrier.
Fig.40: Hose
► Disconnect the hose (2) from the DP
drive (1).
► Extract the DP drive through the ser-
vice aperture.
► If you are replacing the DP drive, con-
tinue with installation of the DP drive.
4 DP drives
4.2 Replacing the DP drive and hose
36 Service Manual SIPLACE SpeedStar (C&P20 P2) 01/2019
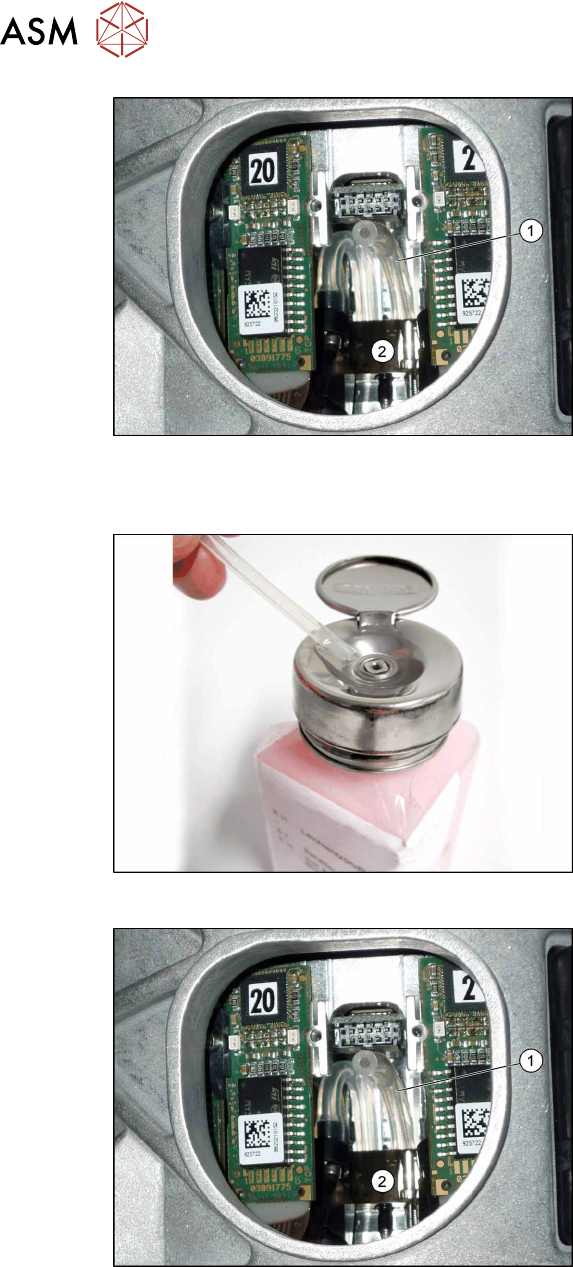
Fig.41: Hose
If you are removing the hose(1), continue
with the following step:
► Carefully pull the hose upwards.
The connection for the back end of the
hose is located on the star carrier, be-
hind the spring unit(2).
Fitting the hose
Fig.42: Coat the hose with ethanol
► Check the hose for damage or folds.
► Check the length of the hose: 40mm
+/- 0.5mm
► Coat the new hose at one end with eth-
anol.
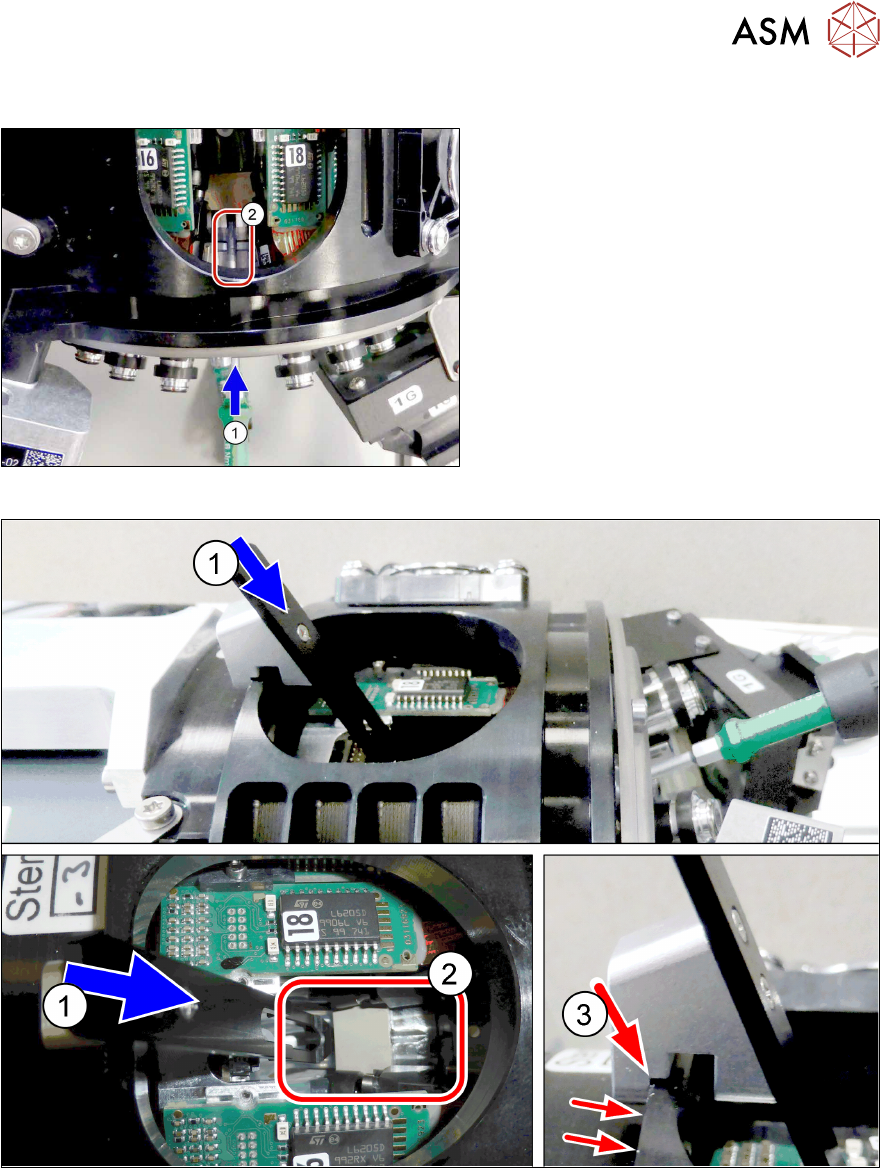
Fig.43: Hose
► Use the tweezers to push the coated
end of the hose(1) onto the connection
behind the spring unit(2).
Observe the natural bending radius of
the hose.
Make sure that you only use the
"tweezers blunt 145 mm size 3
mm" [00376493-xx].
Do not twist the hose when pushing it
on.
4 DP drives
4.2 Replacing the DP drive and hose
Service Manual SIPLACE SpeedStar (C&P20 P2) 01/2019 37
Fitting the DP drive
Fig.44: Spring pin
► Carefully push the spring pint(2) back
with a Torx screwdriver (1).
Fig.45: Inserting the DP change tool
► (1) Insert the DP change tool.
(2) The spring pin is held by the DP change tool. This spring pin is not directly visible.
(3) Pay attention to the correct fit of the DP change tool on the head. The bottom notch on the
DP change tool must be on the edge.