00198608-02_SM_CP20P2_Kunde_EN.pdf - 第39页
5 Pressure control valve (PRV) 5.1 Replacing the support plate on the PRV Service Manual SIPLACE SpeedStar (C&P20 P2) 01/2019 39 5 Pressure control valve (PRV) 5.1 Replacing the support plate on the PRV Parts Fig.47…
4 DP drives
4.2 Replacing the DP drive and hose
38 Service Manual SIPLACE SpeedStar (C&P20 P2) 01/2019
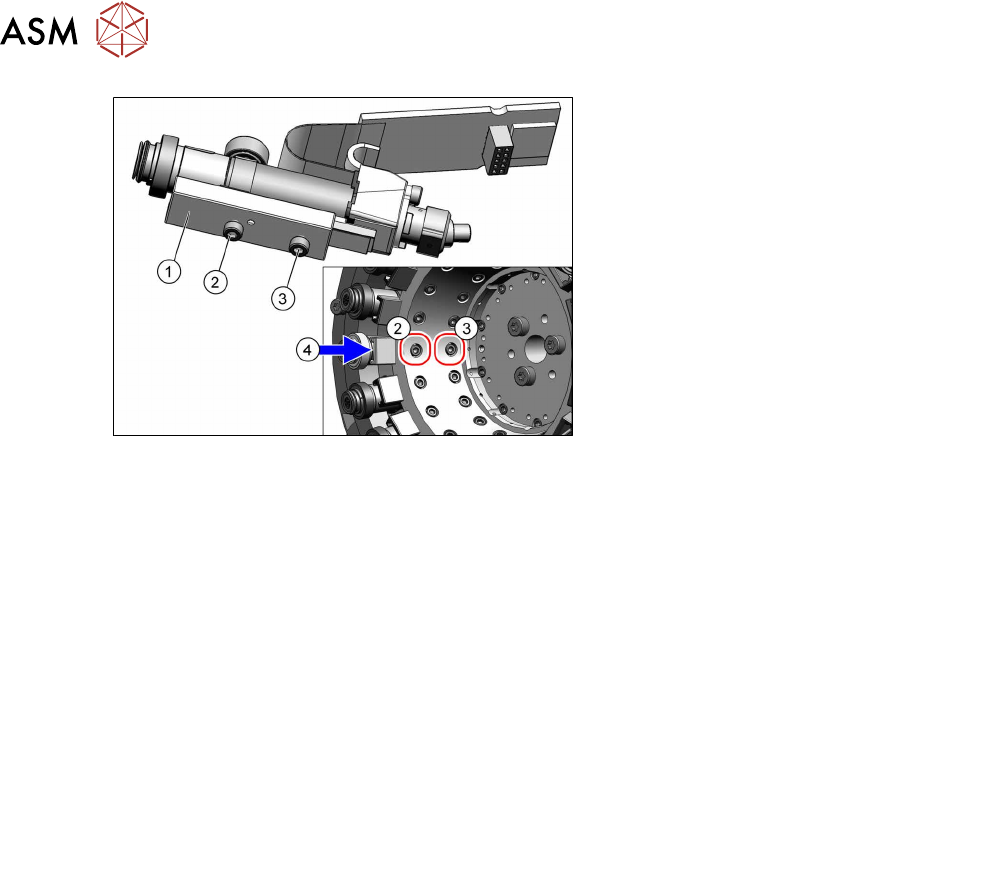
Fig.46: DP drive (example of SIPLACE C&P20P shown)
► Use the service opening to insert the
new DP drive into the head. Position
the linear guide (1) on the star carrier.
► Loosely fix the linear guide with a new
fastening screw (3).
► (4) Press the linear guide towards the
spring pin.
► Tighten the two new fastening
screws(3) and(2) (Allen1.5) with a
torque of 0.2Nm.
► Remove the DP change tool.
► Check that the spring unit is correctly seated. To do this, press the DP drive inwards. This
should easy to do.
► Use the tweezers to fit the hose onto the DP drive.
Make sure that you only use the "blunt tweezers 145mm size 3mm" [00376493‑xx].
Take care that the hose is not bent or damaged.
Do not twist the hose when connecting it.
► Make sure that the DP drive can be compressed upwards.
► Press the board into the connector.
► Follow the removal instructions in reverse order for further installation.
Also observe the installation instructions in the following sections:
4.1 "Replacing the clamping plate at the DP drive" [}33]
6.1 "Replacing the aperture ring/holding circuit/sealing disc" [}45]
► Observe in particular the torques specified!

5 Pressure control valve (PRV)
5.1 Replacing the support plate on the PRV
Service Manual SIPLACE SpeedStar (C&P20 P2) 01/2019 39
5 Pressure control valve (PRV)
5.1 Replacing the support plate on the PRV
Parts
Fig.47: Support plate
03154883-xx Support plate for pneumatic valve C&P20P2
Equipment and tools
T47 00386253-xx Torque screwdriver ESD 0.4-1.0 Nm
T98 03171857-xx Torque Allen swap blade 1.5 mm TX10
T99 03171856-xx Torque Allen swap blade 1.5 mm TX20
T --- Tools for removing/fitting and calibrating the placement head, if needed
(see also the service manual for your machine)
Preparation
► Remove the head from the machine. For details about removing and fitting the placement
head, refer to the service manual for your machine.
Fit the head on the head mount [03056231‑xx].
► Make sure that the component sensor protective cap is fitted.
1.1.3 "Safety instructions for the component sensor" [}6]
5 Pressure control valve (PRV)
5.1 Replacing the support plate on the PRV
40 Service Manual SIPLACE SpeedStar (C&P20 P2) 01/2019
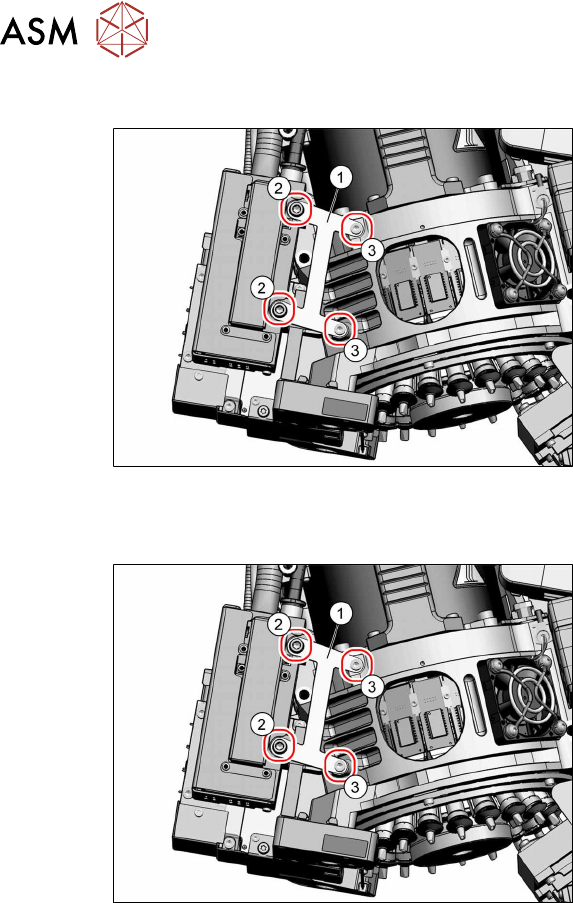
Removal
Fig.48: Dismantling the support plate
► Remove the fastening screws(2)
(TX20) and(3) (TX10) and then
remove the support plate(1).
Installation
Fig.49: Fitting the support plate
► Fasten the support plate(1) with the
screws(3) (TX10, M3x6, torque
0.6Nm) and(2) (TX20, M4x25, torque
0.9Nm).